menu

Showing posts with label catching fire. Show all posts

Thursday, February 6, 2014

Catching Fire Giveaway Winners!

I just wanted to drop in really quickly to congratulate the Catching Fire giveaway winners, Anna and Sarah H! I have contacted you directly through the email you provided in the Rafflecopter widget. 

Please keep in mind that if someone has contacted you asking for sensitive information (such as credit card info, social security numbers, etc), that person is NOT me! I will never ask you for more information than necessary, so that I can send you your prizes.

A big thanks to everyone who signed up, and I'm planning to do more giveaways soon! I was absolutely blown away by the number of people who were interested in the giveaway. Subscribe to my blog via Bloglovin' in order to stay up-to-date with my blog, and to know whenever I have exciting news! 

- d. 

a Rafflecopter giveaway

Sunday, January 19, 2014

Johanna Mason's Interview Look + Giveaway!

So now we've come to the final look of the series! This makeup is from the scene when Johanna cusses out the Capitol citizens. She is so gutsy! 


This look was so much fun to do! I primarily used my Too Faced Chocolate Bar Palette for this look. 


I first started out with an eyeshadow primer. Any primer will do, just something that will really hold onto the pigment. Then, I took the gold color, Creme Brulee, and packed this all over my lid and onto the orbital bone, but not quite all the way to my brows. I wanted to leave an empty space for the highlight color. I did this in a rounded shape. I also applied this color along my lower lashline and smudged it out.

Next, I took Milk Chocolate, which is a cool-toned light brown, and placed this on the orbital bone, into the crease. I also blended this color along the sides of my nose, near the brow, to create dimension. Jena Malone's makeup artists really love to accent her gorgeous bone structure this way! I used a fluffy domed shadow brush for the Milk Chocolate color. 

I then took an angled brush and Triple Fudge, and filled in my brows. I have very sparse brows, so this was a necessary step for me, but if you have great brows like Jena Malone, feel free to skip this step! I took a spoolie and blended out the brow color. I also took this same dark brown color and angled brush and lined my upper lashline, using a pencil brush to add a smoky effect. Then, I took White Chocolate under the brow. 


From here, I moved onto the face, using the same products I have used in every look I do, which you can find in any other makeup look or face of the day post! I also took Milk Chocolate on a fluffy domed brush and contoured my cheeks, as well as my nose. Milk Chocolate is a great contour shade, especially for really precise application. I used "Strawberry Bon Bon" from the Chocolate Palette as my blush. I then applied a light coat of my Maybelline The Mega Plush Volum' Express Mascara. I ran a clean spoolie through my lashes to ensure that it was a very light coat. 


Now moving onto the most important part of this look: the lashes! I bought these lashes from Elegant Lashes, and they are the exact style used in the movie. I simply applied my Duo Eyelash Adhesive in "Clear" to the band, let it sit until it was tacky, then placed them underneath my lower lashes. Don't worry if you can see the band. This look isn't supposed to be natural, despite the fact that she's a tree. ;)


For the lips I actually used a cream shadow, which was the Rimmel Scandaleyes Eye Shadow Paint in "Golden Bronze." I used a lip brush to neatly apply it, and I was done!


Now for the big surprise I keep talking about! 

I seriously have had so much fun doing this series, and I have gotten such positive feedback from it. So I wanted to give back to all of my followers! I have decided to do a GIVEAWAY!!! 


For this giveaway, there will be two winners. Each winner will receive a fun Catching Fire prize pack! 

I will be giving away the CoverGirl Catching Fire Limited Edition Nail Polish in "Seared Bronze," as well as the Nail Stickers in "Tawny Flame." I used both of these products in my last Katniss look (but don't worry, you'll be getting these products brand new and still in the packaging). The winners will also receive a brand new pair of lashes, just like the ones I wore in this post, as well as a replica Mockingjay pin! 

So here are the rules:
  1. This giveaway is international! I will be choosing two winners at random via Rafflecopter.
  2. If you are under 18, please get your parent or guardian's permission before entering this giveaway.
  3. This giveaway will end on February 5th, 2014, at 12 AM, PST.
  4. You MUST leave a comment below explaining why you want to win this prize pack. You will only receive one entry for this. Multiple posts will not grant you multiple entries.
  5. You may tweet about the giveaway once per day. For each tweet per day, you will receive one entry.
  6. You may follow me on Instagram! You will receive one entry.
  7. You may reblog this post on Tumblr! One reblog per day will get you one entry per day. 
Use the Rafflecopter widget below to ensure that your entries count!

a Rafflecopter giveaway

Good luck! And may the odds be ever in your favor...

- d. 

Saturday, January 11, 2014

Katniss Everdeen's Tribute Parade Look

Now we're back to the Catching Fire mini-series! We're almost done, just one more look, and in the next post, I have a surprise!

This is the look Katniss wears in her second tribute parade, before entering the arena for the Quarter Quell.


Jennifer Lawrence's makeup artists definitely didn't hold back on the glitter in this movie. It looks like it's a pretty chunky black and gunmetal glitter on her eyes, and a gorgeous gold liner, almost like feathers.


Despite being fairly simple, this look is very messy, and I made sure to keep cotton swabs and makeup remover on hand at all times. To create a solid base for the black shadow, I took a Milani Liquid Eye Eyeliner Pencil in "01 Black" and created the shape I wanted for my lid. I took it up through the crease, being very particular about where I placed the product. I used my finger to blend the cream color out, then I took a matte black shadow and a flat shader brush and pushed the color into the liner, to prevent fallout. 


After I placed the color, I took a cotton swab and some makeup remover and went along the edges to clean up any fallout, and to create a crisper edge. Next, I took a gunmetal cosmetic glitter from Claire's and, using the same flat shader brush, I pressed this into the black shadow. I held a tissue under my eyes to prevent the glitter from getting everywhere. 


Now comes the hard part. I took NYX Loose Pearl Eyeshadow in "Yellow Gold" and mixed it with a spray of my Mac Fix+ to create a paste. I used this for the feathery strokes along the outside of the eye. I took a precision liner brush and very carefully and quickly drew in the strokes. I also took this wet shadow under the lower lashline, stopping at the inner corner. Before the product completely set, I took the loose shadow, dry, and patted it over the wet shadow to brighten it up. 


I completely forgot to take a picture of this next product, but if you've been keeping up with this mini-series, you'll recognize the product from Johanna's Tribute Parade Look. I wiped off my precision liner brush and took my Maybelline Eye Studio Lasting Drama Gel Liner and carefully lined the accent points on the feathery strokes.


After I accented the feathers, I again took my Milani Liquid Eye Eyeliner Pencil and lined my upper and lower waterline, as well as my lower lash line. Finally, I applied a pair of generic eBay lashes, like I did in my last Katniss look.

I used Rimmel Professional Eyebrow Pencil to fill in and straighten out my brows, much like Jennifer Lawrence's.This brow pencil is great for on-the-go because it comes with a brow brush on the cap! I highlighted the browbone with my MAC Studio Finish Concealer in NW25 (which actually isn't even the right color for me, but it works well for this step). 

From here, I did my face, layering my foundation for a more flawless finish. On the cheeks, I used my trusty Inglot 358 Matte as a light contour, and the mauve-toned blush from my Morphe 10 Color Blush Palette. Since her lips look pretty natural, I simply applied my Jack Black Intense Therapy Lip Balm


For this look, I decided to do something a bit different, and do some Katniss inspired nails! 


For this manicure, I used a gorgeous berry color on my nails, which was Revlon Nail Enamel in "Bewitching." On the accent nail, I used a polish from CoverGirl's Limited Edition Capitol Collection, which is called "Seared Bronze." I got this polish in a pack with the nail stickers in the style "Tawny Flame," which I also used on my nails for this look. I was actually quite impressed with this bronze polish from CoverGirl. The glitter was gorgeous and it was so opaque! It looks especially amazing in natural sunlight.


- d. 

Tuesday, December 24, 2013

Katniss' Presidential Party Makeup

Happy holidays, everyone! Or should I say, happy Hunger Games!

As I said in a previous post, I have been fully obsessed with The Hunger Games series recently, and I've just started reading Mockingjay! I know, I'm super late joining on this, but I'm so excited to find out what happens next.

After watching "Catching Fire," I was so inspired by Katniss and Johanna's makeup looks. I even dyed my hair in a similar style to Johanna's because I am just SO obsessed! The makeup artists did a fantastic job with both Jennifer Lawrence and Jena Malone, and their costumes were absolutely to die for. When I watched "Catching Fire," I decided I had to do a mini-series based on their looks. I thought I would begin with the look Katniss wears at the end of the Victory Tour, at President Snow's party.


Part of the reason I decided to start off with this look is because it's party makeup! It's the holiday season, and I can't believe Christmas is tomorrow. This look could totally be adjusted for any kind of New Year's party. Imagine this look using like smoldering grays and silver glitter! It's dramatic, but don't be afraid to work it. 


First, I started off with my Ben Nye FX Bruise Cream Stack, using the brick red color as a base. I applied this in a thin layer all over my lid, but staying under the crease. Then I took a synthetic blending brush and blended out the edges of the product. I paid close attention to the outer corners, where I blended up and out to create a winged shape. 

Then, using my trusty Coastal Scents 252 Ultimate Palette, I picked up a matte red color on a flat shader brush and packed this color over the lid. Then I used the same synthetic blending brush from before and blended out the edges. To add a bit of dimension, I grabbed a darker red and mixed it with a warm purple shade, and took it through the crease.

Then I took a stiff shader brush and the NYX Glitter on the Go in the color Ruby and patted this carefully all over the lid. Unfortunately, this product has been discontinued, but you can use any red cosmetic glitter you can find. They are easily found just about anywhere, and a lot of brands have absolutely beautiful glitters. Make sure you are using cosmetic glitter though! Craft glitter can be dangerous for use around the eyes, as it can be thicker and sharper. When I applied this glitter, I used a tissue under the eye to help prevent the fall out from getting all over my face. When using glitter, you will get fall out, even if you are using a sticky base. The glitter I am using is a red-based glitter with beautiful golden orange flecks. 

Next, I took my Maybelline Eye Studio Lasting Drama Gel Eyeliner in "Blackest Black" and created a very fine but very dramatic winged liner on my upper and lower lashline. I used a small precision artist's brush, so I could create a very thin line. I did the top liner first, then used that as my guide to creating the lower wing. I then took a cotton bud and cleaned up any mistakes. 

Using a clean synthetic angled brush and Ben Nye's Cream Color in "White," I very carefully began to fill in the space between the two wings. I also used this product in my lower water line, as well as under my brow to highlight. To set it, I wiped off my angled brush and used my translucent setting powder. Then, I used a shimmery white shadow and brought it through my inner corner to brighten up the whole look.


Katniss' face is absolutely glowing in this makeup. Jennifer Lawrence's makeup artists did an amazing job of making her skin look glowing and flawless. To achieve a similar effect, started with a moisturized face. I first applied my Too Faced Primed and Poreless Face Primer to really smooth everything out. Then, using my L'Oreal True Match Foundation in the shade C2 and the Real Techniques Expert Face Brush, I applied my foundation in a buffing motion, to get the fullest coverage from this foundation. Then, I used my Rimmel Wake Me Up Concealer under my eyes, and my Urban Decay 24/7 Concealer Pencil to hide any blemishes or redness that the foundation didn't cover. Remember, the makeup artists would have been trying to make Katniss look absolutely flawless for her party in the Capitol! 

After I finished concealing, I used my mini Benefit Watt's Up Highlighter under my eyes and on the tops of my cheekbones, as well as on the high points of my face, such as the the center of my forehead, the bridge of my nose, my chin, and my cupid's bow. I used my finger to blend this product out, then took a stippling brush and applied a very light layer of my Revlon Photo Ready Translucent Finisher

I then took a small domed face brush and Inglot 358 Matte and contoured my cheeks. I also ran this product through my brows. It doesn't look like Jennifer Lawrence has much in her brows during this scene, but she always has much better brows than I do, so I decided to give my brows just a little extra definition. 

Her cheeks have a very soft pink glow to them, so I used blush side of the e.l.f. Studio Contouring Blush & Bronzing Powder in the color "St. Lucia" and applied this color to the apples of my cheeks, and blending it out. Then, I spritzed some of my Mac Fix+ to get rid of any powdery finish and to add an extra glow. 

Her lips are pretty nude, so all I did was apply some lip balm, and dabbed a tiny bit of a white shimmery shadow on the center of my lips.

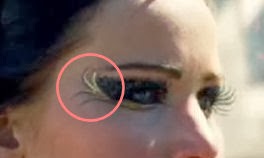
Finally, the lashes! The lashes I used are not of any particular brand. I actually got them for super cheap on eBay! EBay is a great place to purchase lashes, because you can buy huge sets of them for less than $5. The lashes I used were super thick and dramatic, which I thought was perfect to complete this look.


Thanks for reading! I wanted to wish all of you a happy holiday, and I really hope that it is lovely for each and every one of you. Thank you so much for supporting me in these last couple months, and I hope you all have a wonderful new year! 

- d. 

ps. stay tuned for the next look -- Johanna in the elevator!