menu

Saturday, May 31, 2014

Karlie Kloss' MET Gala Look + Birthday Outfit of the Night!

Yesterday just so happened to be my 21st birthday, so me, my boyfriend, and a couple of my friends went out for dinner and drinks. I decided it was the perfect time to do the Karlie Kloss MET Gala look that Sarah (Diary of a Beauty Padawan) has been requesting! I based the look mostly off of these two photos from Instagram:


Her look is definitely 60s-mod inspired with a modern pinup twist. After doing a little bit of hunting, I found that her lip color is Marc Jacobs Lovemarc Lip Gel in "Moody Margot," which honestly would be a horrific color on me since I don't have Karlie's beautiful golden undertones, so I opted for MAC's Shy Girl instead! For the eyes, I used my Too Faced Chocolate Bar Palette, but the Urban Decay Naked2 would be a perfect palette for this look!


For my skin, I have been testing and loving the Bare Minerals bareSkin Pure Brightening Serum Foundation. I used 2 drops on each section of my face (my cheeks, chin, and forehead, with one drop on the nose), to give me a sheer-to-medium coverage. Karlie had absolutely flawless skin at the MET Gala, but since I was planning on going out, I wanted some of my own skin to show through. Then I let the foundation sit, while moving on to my brows. For Karlie's brows, she had a very natural yet defined look. I went in with the "Triple Fudge" shade from the Too Faced Chocolate Bar Palette and filled in my brows the way I normally do. Then, I brushed through with the Anastasia Clear Brow Gel to keep all the hairs in place.


From here, I moved onto the eyes. First I went in with my MAC Studio Finish Concealer all over the lid and up to the brow to even out my lids. I then took "White Chocolate" and used it to set the concealer as well as create the cream colored base that Karlie has in her look. From here, I took a mix of "Triple Fudge" and Inglot 358 Matte on an angled brush and precisely ran it through the crease, flicking upward to create a cut crease that would be easy to blend. I used a clean pencil brush and blended up the line, making sure to keep it crisp along the bottom. After blending it, I continued to build the colors into the crease. I avoided blending into the outer corner of my lid, because her crease color is concentrated specifically in the crease. After the color was built up to an intensity that I was happy with, I went back in with "White Chocolate" on a flat shader brush and cleaned up on the lid, making sure it was crisp, as well as along the brow bone.

From here, I moved onto the liner, which was the Maybelline Eye Studio Lasting Drama Gel Eyeliner in "Blackest Black." I won't go into detail about how I did my liner since I already did a post on that here. I used my MAC Studio Finish Concealer on a very small detail brush to create a crisper finish under the wing. Then, going in with an angled liner brush, I lined my lower lashline with "Triple Fudge," doing a soft wing on the outer corner that mimicked the strong liner on my upper lashline. I then lined my waterline with Rimmel Scandaleyes Waterproof Kohl Kajal in "Nude" to brighten up the eyes. 


For my upper lashes, I skipped mascara altogether, and used the Ardell Natural Lash 110 to create the full and flared out lashes that Karlie has in her look. On my bottom lashes, I used a single coat of Maybelline Volum' Express The Rocket Mascara. Then, after the falsies dried, I curled them to blend them with my natural lashes! The great thing about these lashes from Ardell is that they have an invisible band, which makes them so easy to blend into your liner without having to take a million steps to hide the band. They also look super real and make you look like you have the longest natural lashes!


Back to skin, I took my Maybelline Dream Touch Lumi Concealer and applied this under my eyes, to the tops of my cheekbones, and down my nose, and blended it out with my finger. Then I took my Sonia Kashuk Undetectable Cream Bronzer and contoured under my cheekbones and along my jawline. I topped it with my Inglot 358 Matte to give me an even more defined look. For blush, I used the NYX Rouge Cream Blush in "Natural," which is probably my new favorite cream blush! Of course, I then set all my cream products with my Revlon Photo Ready Translucent Finisher, and very lightly blended "Champagne Truffle" on the tops of my cheekbones to really make them pop. To finish off the entire look, I used MAC's Shy Girl, which is the perfect nude lip color for my skintone. 


For my outfit, I actually used a basic black dance leotard from Bloch, which I have found serves me just as well as a fashion piece as it does a dance outfit! Leotards are pretty much everywhere nowadays, so you don't have to find a specialized one for your wardrobe, but it's just what I had in my closet. My skirt was a piece I picked up in Chicago at a little boutique called Akira, and unfortunately, they no longer sell it on their website. However, I found an almost identical skirt at Forever21, except it is all black as opposed to black and tan. For my shoes, I had some basic leather flats with a subtle pointed toe that I got ages ago from a little shoe store in our local mall, and my chunky chain necklace is from H&M


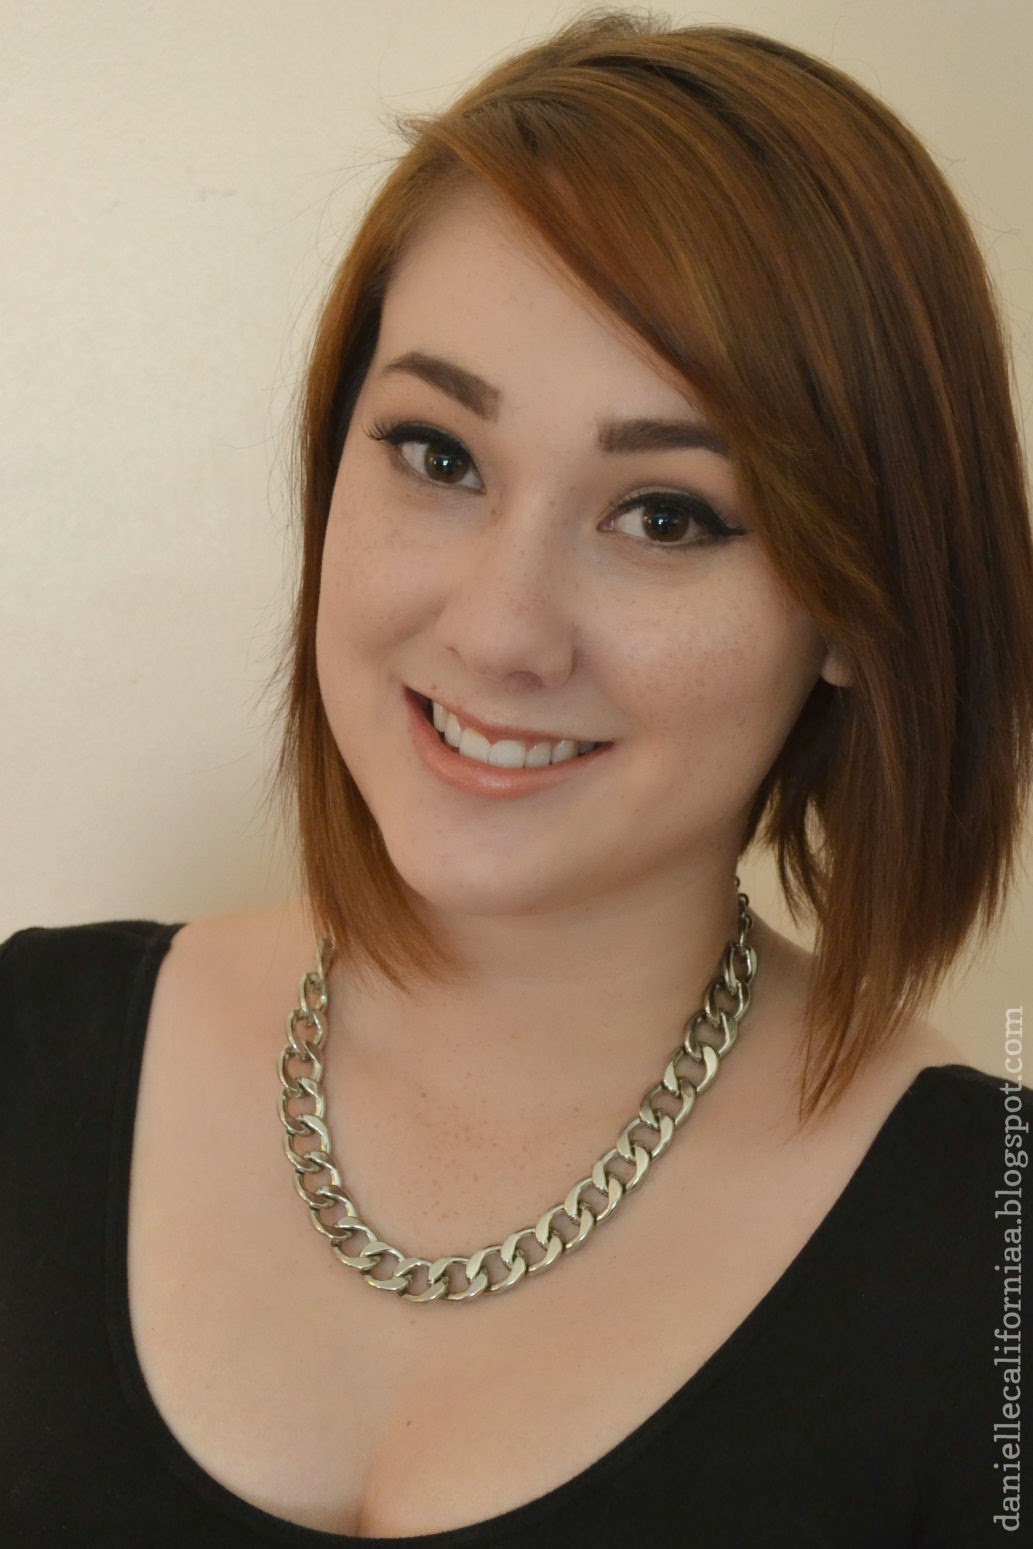
I promise I fixed the edge of that false lash before going anywhere ;) And of course, I couldn't talk about my 21st birthday without showing you a picture from last night at the restaurant with my first legal drink!


- d. 

Friday, May 23, 2014

Beauty 101: Contouring & Highlighting

I've been trying to type this post for...I don't know, say, three weeks now? If you haven't noticed, I haven't been featuring very many photos of my face this month, if at all. Here in San Diego, we have had the most insane weather, and I think it's been affecting the way I take photos (or at least, the way I appear in photos). I just couldn't get it right! I think I've finally got it this time, so let's take a crack at contouring and highlighting basics.

The first thing you're going to need is a good bronzer for your skin. You can also use an eyeshadow. Personally, I love using a taupe shadow for my contour when I don't want the sun-kissed look. However, I've recently been reaching for the Sonia Kashuk Undetectable Cream Bronzer that I mentioned in my April Favorites. What you choose is definitely a personal choice, and a lot of people are very particular about what they use.

For fair skin, like mine, I definitely recommend staying away from anything orange. If you have a deeper skin tone, you can get away with it, but if you are fair, you'll end up looking like an Oompa Loompa! And no matter what you skin tone, if you plan on contouring with a bronzer, I would definitely avoid shimmer. I've seen a few bronzers with shimmer that work, but it's usually very sparse and unnoticeable.

For Fair to Medium skin I recommend:

For Medium to Dark skin I recommend: 
Obviously, because I am a fair skinned girl, I tend to know a bit more about bronzers for fair skin. Whenever I do contouring on anyone with darker skin, I tend to use a brown eyeshadow that is suitable for the individual.

Moving on to the technique! First thing's first, let's find your cheekbone. Generally, it's pretty easy. Just make a fish face!


No contouring post is ever complete without a fish face photo. However, if you don't know how to make a fish face (which is more common than you think so don't be ashamed!), take a makeup brush, a pencil, or anything that's straight and round, and place it on the top of your cheekbone. From there, roll it down until you find the hollow of your cheek. 

When contouring and highlighting your face, most people almost always think of contouring your cheeks first and foremost, which is why I mentioned it first. It's also the part where most people struggle, because they tend to use too much product in the wrong place.

Whatever product you are using, it's going to be the same technique. Starting at your hairline, take your brush and very gently sweep the color into the hollow of your cheek. Focus the color near your ears and blend it into your hairline, as well as in toward your mouth. Don't go any farther than the outer third of your eye! That is the key to keeping it look natural. 

Another quick tip is to avoid blending downward. You can easily get the bearded lady effect by blending downward. Don't bring the color down, just use the brush to gently feather the product out. When in doubt, just pull the product into the hairline. This will keep everything looking natural and beard-free.


Yes, I am aware that this picture makes me look crazy. However, it's an important diagram for contouring and highlighting! The areas where I have marked the brown are the areas that are most commonly contoured, and the areas that are in white are the most common areas for highlighting.

For highlighting, I often like to take a small fluffy eye brush and dust my highlighter on the high points of my face. Be careful when highlighting. If you have oily skin, you may want to skip highlighting altogether. 

Honestly, it's a bit hard to really sit down and write a tutorial on contouring because it is so different for different people. Everyone has a different face shape and your contouring routine should cater to your specific wants and needs. But just keep this in mind: If you want a part of your face to recede (the hollows of the cheeks, the top of your forehead, the sides of your nose, etc.) use a darker color. If you want a part of your face to pop (the tops of your cheekbones, your chin, your brows, etc.), use a lighter color. The best advice I can give is to play with it and find what works best for you!

- d. 


Thursday, May 15, 2014

Quick Graduation Ceremony Tips + Throwback Thursday

In my experience, graduation day can be a totally nerve-wracking experience! My biggest concern on graduation day was "Don't fall don't fall don't fall." And looking back, there were definitely some things that I wish I could go back and re-do. So I decided to make a quick list for you to help make you less worried about your big day!

Beauty-Related Tips

  • If your ceremony is outdoors, make sure to apply plenty of sunscreen! For both my middle school promotion and my high school graduation, I got majorly sunburned. A lot less so at my high school graduation, but either way, I definitely suffered some sun damage from sitting out on the field. For my post about different types of sunscreen, click here.
  • Wear a great long-wearing foundation. Nothing is worse than finding your family and getting ready to take pictures and realizing your foundation is melting off! Definitely invest in a good primer or setting spray, if you haven't already, to help prevent any meltdowns. 
  • Bobby pin your cap to your head, especially if you will be outside or if it doesn't quite fit right. On my graduation day, I didn't pin my cap down, and it was windy, so I constantly was playing with it to keep it from flying off! A great way to make the bobby pins unnoticeable is to spray paint them the same color as your cap. No one will even know they're there!
  • Wear a lip balm that has SPF. I promise you that nothing is worse than sunburned lips. Just do it.
  • If you think you might cry, or the weather may be hot, make sure to wear waterproof eye makeup. Smeared eye makeup never looks good in pictures!

Fashion-Related Tips
  • If your graduation is out on grass, avoid wearing pumps. If you want to wear heels, go for a wedge instead. If you have a pair of pumps that you really love, you can always purchase some heel caps, which can help prevent you from sinking into the grass and ruining your shoes. 
  • Wear shoes that are comfortable to walk in. If you aren't comfortable in your shoes, you may trip!
  • If you're wearing a white gown like I had to, try to avoid wearing a bright outfit underneath. It will show through the gown, and look rather tacky. 
  • Avoid wearing dresses that are longer than your gown. Typically, it just doesn't look good, and unless you're super comfortable in maxi dresses, they can be a cause for a great big tripping disaster.

Etc, etc, etc.

  • Drink water. If your school is anything like my high school was, I wasn't allowed to take anything with me onto that field! Especially because, for me, my graduation was outdoors here in sunny California, I got really dehydrated while sitting out waiting for my name to be called. Just make sure to run to the restroom before it's too late!
  • If you are allowed, wear sunglasses. The year I graduated, my high school instated this really stupid rule that we weren't allowed to wear sunglasses during the ceremony. Honestly, we should have been allowed to, because I felt like I was really straining my eyes through the whole ceremony. Protect your eyes and they will thank you later.
  • Walk tall. This is your day -- you've earned it! Don't be afraid to wear all the things you earned while you were in high school. For me, it was my colorguard and theatre medals, and my Thespian stole and pins. It isn't cocky or conceited to show everyone what you've accomplished. That's what this whole day is for!
  • Make sure to tell your family to arrive early. Unless you are graduating from a very small school, the parking lot will fill up fast.

I thought this would be the perfect time for a fun throwback to my high school graduation!

Me with two of my best friends from high school, right before our graduation rehearsal.
I didn't wear any of my medals that day, but I did rock my Thespian stole! 

Alana was squeezing the heck out of me because she was so proud! We've been friends since way back when.

Huge congratulations for all of you who are graduating, whether it be from high school or college, or anywhere in between. It's your big day, enjoy it, and good luck! 

- d. 

Monday, May 12, 2014

Men's Skincare -- My Boyfriend's Skincare Routine!

Today I'm going to talk about something a little bit different from my usual posts -- well, kind of. I'm still going to be talking about a beauty-related topic, but instead, beauty for men! I tried to get +Andrew to type this post up himself, as another guest blogger, but he's busy studying for a big test right now and asked me to do it for him (probably because he's too lazy to type it up himself).

With men's skincare, there's a few things you have to keep in mind. For one, your skin is NOT invincible. Your skin, being the largest organ in your body, requires lots of care. Something I have noticed is that a lot of men don't go the extra mile to take care of their skin. In fact, before Andrew and I started dating, he was using ordinary body wash on his face, not knowing that there were better options out there! Another thing is to keep it simple. That was the key when Andrew and I first started looking into skincare options for him. He wanted something that was quick and easy to remember.


As with my own skincare post, let's start with a few things about Andrew's skin: 
Andrew's skin is sensitive, oily-combination, and acne-prone. He tends to get most oily through the horizontal center of his face -- his cheeks and his nose. He also has trouble with ingrown hairs causing acne around his mouth and jawline. 

Andrew's primary problem with his skin is when he shaves. I've seen that to be a concern with a lot of men, actually. Ingrown hairs are often caused by a blockage of the hair follicle with dirt and sebum. In people with curly or course hair, the hair will sometimes curl into the skin and grow back in toward the skin, causing irritation.


For shaving, Andrew uses the Neutrogena Men Skin Clearing Shave Cream with 1% salicylic acid. Salicylic acid is a type of beta hydroxy acid, which can chemically exfoliate the skin. Exfoliation is a well-known way to help reduce ingrown hairs due to shaving, and this shave cream not only provides a nice protective barrier while he shaves, but it helps to exfoliate, all in one step!


For Andrew's face wash, he uses the Mario Badescu Enzyme Cleansing Gel, which is a non-foaming cleanser that uses grapefruit and papaya extracts to break down buildup in the pores. Since this cleanser is gentle and sulfate-free, it will not strip the skin of the natural oils it needs, which means that Andrew's naturally oily skin won't begin overproducing oils to compensate.


As a toner, Andrew switches from day to day. On days that he shaves, he uses the Origins Spot Remover Pads with 1.5% salicylic acid, to really help prevent those pesky ingrown hairs. On the days that he doesn't shave, he uses the Michael Todd Blue-Green Algae Toner. In his words, "It feels like it's actually doing something against the bacteria on my face, but it doesn't feel like it's sucking the life out of my face," which is exactly what a toner should do! This toner is great for irritable skin like his because it is alcohol-free and set in a base of aloe vera juice, which is fantastic for soothing the skin!


For moisturizer, Andrew uses the Cetaphil Daily Facial Moisturizer with SPF 15. Andrew is the kind of person who hates the greasy feeling of sunscreen, and he always seems to loathe when I tell him to put it on when we go out some place. This moisturizer is a great option for people like him (although it definitely shouldn't replace your every day sunscreen!), since it doesn't cause him to feel greasy or oily.


Last but not least, Andrew uses the Origins Ginzing Eye Cream to help with his undereye circles. For him, his dark undereye area is caused by genetics, and it causes him to look constantly worn out. The salmon color and gentle brightening particles in this eye cream helps to lightly diffuse the blueish tones under his eyes, and the caffeine really helps to wake his eyes up. A few weeks ago, he even told me that someone noticed he looked more tired than usual, and he realized it was because he forgot to use his eye cream that morning! This photo is of a sample size he recently got at Origins. Back when I was working at Sephora, I got him a small sample pot and it has seriously lasted months!

- d.

Friday, May 9, 2014

Like a fine wine...

This is going to be a pretty quick post, since I'm mostly just updating you all on something I talked about previously.

A while back, in my March Favorites, I included an un-favorite, which was the ever-popular Maybelline Volum' Express The Rocket Mascara. When I first bought this mascara, I really, really wanted to love it. However, I found that it was so wet and sticky and hard to work with that I just didn't really want to fuss with it. Of course, I told myself that since I bought it, I would use it, even though I expected to be miserable every time I used it.

I am surprisingly happy to say that I was very wrong about this mascara.

When I had first given my mini-review on The Rocket, I had been using it for a couple weeks. A lot of times, with mascaras, you can tell how you feel about it after that first day of wear. That is not the case with this mascara. The Rocket actually gets better with age! 


I've heard some mascaras are like that. They get better as they get a bit drier. Personally, I've never experienced anything like that, especially because I've never been particularly adventurous with mascara. I like my lashes to look a certain way: black, with moderate length and lots of volume. I love the look of thick lashes, even if they aren't particularly long.

When you first open The Rocket, it is very wet. For me, I had a lot of trouble with it smearing every where, and taking way too long to dry. When I tried to build it up, it just got clumpy and made my lashes look spidery. Then, throughout the day, I would have friends telling me that my mascara had smudged, there were little black dots under my eyes, it was flaking off, etc. Something I had never had trouble with in any mascaras. However, I continued using this mascara despite the trouble I was having with it, and I slowly began to notice that it stopped doing all the things I hated about it. It stopped getting every where when I applied it. It stopped clumping and flaking and smudging. It was starting to perform the way I hoped it would to start with!


This isn't to say I will repurchase this mascara, simply because I don't want to have to wait two months for the product to work the way I like it to. However, I will say that I am happy to have a product change my mind, and I think that, thanks to this experience, I will go back into my makeup collection and give old products a second chance!

- d.

Tuesday, May 6, 2014

Sunscreen Smackdown

My boyfriend likes to say that I've declared a one-woman war against the sun. In a way, I think he's probably right. I don't go outside unless I've applied some kind of sunscreen. Now that summer is upon us, I'm even more adamant about protecting my skin!

Aging and skin cancer due to sun exposure is caused by UV radiation (or UV rays, as it's more commonly known), which deteriorates the elastin in your skin. Elastin is just as it sounds -- it's the substance that keeps your skin feeling elastic and young!

For the longest time, I believed that all sunscreens worked the same. In my recent skin care routine post, I talked about the Neutrogena Ultra Sheer Dry Touch Sunscreen, which has a beautiful texture and never makes my skin feel oily. However, after publishing that post, I heard something about "physical sunscreens" and "chemical sunscreens." It wasn't the first time I had heard these terms, but I never really cared to look into it until I heard about it again not too long ago.

That's when I found out about some not-so-great ingredients in my Neutrogena sunscreen.


Most of this information was found on ewg.org.
  • Avobenzone has been associated with high rates of skin allergies, but is generally safe. The best chemical filter for UVA.
  • Homosalate is suspected to be an environmental toxin, as well as toxic to the organs. One or more studies show evidence of endocrine disruption. The endocrine system affects the hormone production in the body. Used to help the product penetrate into the skin.
  • Octisalate has been shown to have a very high rate of skin allergies. Like homosalate, it is used to help the product penetrate. It also is used to stabilize avobenzone. 
  • Octocrylene has been associated with high rates of skin allergies. It has been linked to cell death and cardiovascular disease. Used for skin absorption, this ingredient can accumulate in your body. 
  • Oxybenzone has a high hazard rating of 8 on ewg.org. It has a high rate of skin allergies, and has been associated with endocrine disruption. It contaminates the bodies of 97% of Americans, can alter sperm production, and has been found in breast milk due to absorption. 
As someone with sensitive skin, I have never noticed a problem with skin allergies while using this product, despite the ingredients that would suggest that I should. However, the ingredient I am most concerned with here is oxybenzone, which has been linked to cell degeneration and skin cancer

What do chemical sunscreens do? The best way to describe this to you is by using a mesh car sunshade as an example. When using a mesh sunshade, you can still see outside, but it helps to absorb the light as it passes through the mesh, so that it is not blinding you or shining directly on your face. That is how chemical sunscreen works. It absorbs the UV rays as opposed to reflecting them. 

So now the question is, what is a better option? 

I want to say that the answer is "physical suncreens." However, the problem with physical sunscreens is that they can often feel greasy and leave an ashy white cast on your skin. The classic example is the lifeguard with the white nose. The white product that lifeguards used is zinc oxide, a fantastic physical sunblock

Of course, no one wants to walk around coated in white, greasy sunblock. So recently, I started using the Aveeno Active Naturals Natural Protection Lotion.


This sunblock has been my saving grace. It is not greasy, and is a physical sunblock, which means it actually blocks UV rays, as opposed to absorbing them. While there is still a slight white cast, it isn't crazy noticeable. Now let's talk about the active ingredients.

  • Titanium Dioxide has a low concern in terms of skin penetration. The only real carcinogenic properties shown in this ingredient is when it is used as an aerosol and inhaled. 
  • Zinc Oxide is probably the best for UVA protection, as it deflects the harmful rays. It is harmful if inhaled, but is limited in terms of skin penetration.
Since this product is water resistant as opposed to waterproof, you will have to reapply a bit more often than with a chemical sunscreen. I figure that is because it does not absorb into the skin. It is hypoallergenic, fragrance free, and best of all, it doesn't feel greasy on the skin!

Note that physical sunscreens have been known to block the pores and cause mild acne. Personally, I think that's a small price to pay for the overall health of my skin, especially because I thoroughly cleanse my skin every night.

What do physical sunscreens do? Physical sunscreens are often better known as sunblocks, and do just as they say. They block the sun! Using the same example of the car sunshade, imagine a large, reflective sunshade that you would place on your front windshield to prevent the sun from making the inside of your car too hot. That is what a physical sunscreen does. It reflects the sun's rays and keeps the UV rays from absorbing into your skin altogether.

Make your skincare a priority this summer: limit your time in the sun, especially at the peak of the day. For those of you who are experiencing winter while the rest of us are experiencing summer (I'm looking at you, Sarah), sunscreen is still a necessity! Especially if it is snowing -- snow sunburns are some of the worst ones out there.

Be safe in the sun this season!

- d.

p.s. Yes, I realize I have nail polish all over my thumb in these photos. I didn't realize it was there until after I took these photos! Oops! But in case you're wondering, I'm wearing Sally Hansen Xtreme Wear Nail Color in "Coral Reef," which I talked about in my Top 5 Under $5 Spring Nail Polish post.

Saturday, May 3, 2014

Razor Burn RemeDIY -- Potatoes?

Alright I know what you're thinking. What do potatoes have to do with razor burns? Well, let me first tell you a little back story on my current problem:

A few days ago, one of my favorite YouTubers, Tati (AKA GlamLifeGuru), posted a video discussing coconut oil. I already love using coconut oil in my hair and on dry elbows and feet, but in the video, she talked about how coconut oil makes for a great shaving gel. Usually, Tati has great advice for stuff like this -- in fact, she's the reason I bought coconut oil for my hair in the first place. But using coconut oil on my legs for shaving was an absolute DISASTER. At first, my legs felt alright. They felt moisturized because of the coconut oil, and I felt pretty good about it. I went to bed, got up the next morning, and experienced some of the worst razor burn I've ever had.

Immediately, I started researching razor burn remedies. As I was looking through the different home remedies, I was hoping to find something that I already had at home. I knew that a milk and honey mixture would be a good idea, but I wanted to see if there was anything else that would be more effective. So as I was reading, I kept noticing people mention the same old things: aloe vera, milk, honey, oatmeal baths, and...potatoes? I'm a very curious person, so the second I saw "potatoes" on the list of remedies, I had to try it.

Turns out, potatoes have vitamin E and calcium which helps to soothe and restore damaged skin. Milk is a well-known remedy for burns, because the lipids in the milk coat the burn and promote healing. And then of course, we have honey, which is a fantastic humectant (meaning it draws moisture out of the skin and to the surface) and antiseptic.

I'm happy to say that this treatment really helped calm my razor burn. While I still have little bumps on my legs, my skin is no longer irritable, itchy, and hot, like it was prior to this treatment.

And luckily, making this remedy is pretty easy and only takes a couple minutes!


For this treatment, you'll need:

  • 1 potato
  • 1 tbsp of honey
  • 1 tbsp of milk (whole milk is best, but you can use any kind of milk as long as it's cow's milk with some percentage of fat)
I'm only 5'3", so if you are significantly taller than me, you may need to adjust this recipe for you. 

The first thing you need to do is peel the potato. Don't bother cooking it or boiling it -- you want it in its raw state! After peeling the potato, just cut it into cubes. From this point, I took a small food processor (but you could always use a blender or a hand mixer), and blended up the potato cubes. After the cubes start to break down, add in your milk and honey. Continue blending until you get a chunky paste, similar to oatmeal. It will look something like this:


While you clean up the kitchen, stick the mixture in the freezer for a couple of minutes. This will ensure that it's nice and cold when you apply it to the affected area. 

I definitely suggest applying this in the bathtub, because it will get messy! You'll instantly feel a cooling sensation when you apply the mixture. I waited about ten minutes and then rinsed it off with lukewarm water. Pat it dry to avoid irritating your skin even more, and apply a lotion or body butter. It's best if it is unscented, again, to avoid irritating your skin even more.

I hope this helps anyone who may be suffering from a razor burn. Always be careful when shaving -- it's tricky business! 

What are your favorite home remedies?

- d. 

Thursday, May 1, 2014

April Favorites!

And yet another month has passed! April has certainly been an interesting month, especially with the crazy weather we've been experiencing here in San Diego. Last week, it was raining, and this week, the temperature outside is up in the 90s! This month hasn't been super abundant in favorites, especially since I've gone bare-faced most of the month, but I do have a few I would love to share with you!


Sonia Kashuk Undetectable Cream Bronzer -- Warm Tan. This cream bronzer is without a doubt my new favorite bronzer. It's a great drugstore dupe for the Chanel Soleil de Tan bronzer. It has a beautiful cream-to-powder formula and leaves you with a healthy, dewy finish. It's really buildable and you can easily get a sunkissed look or a heavily contoured look! Unfortunately, it's only sold in the U.S. for now, but if you can get your hands on it, it's a total must-have if you love bronzers.


Maybelline Dream Lumi Touch Highlighting Concealer -- Ivory. I never thought I would fall in love with a concealer like this! I absolutely love using this concealer along with my Sonia Kashuk Cream Bronzer because it makes me look so warm and radiant. It's a gel-based highlighting concealer, much like my Rimmel Wake Me Up concealer that I love, and it has the most subtle shimmer that really brightens up your face!


Garnier Cleansing Micellar Water. I talked about this cleansing water back in my skin care routine post, and at the time, I had really liked it, but I didn't feel like I had used it enough to really consider it a total favorite. This month, I've used it quite a lot! April has definitely been a lazy month in terms of makeup, so on days that I'm not wearing anything other than sunscreen, I sometimes will use this at night just to feel refreshed before going to bed.


Neutrogena Rapid Tone Repair Night Moisturizer. Like many women, I struggle with stretch marks. They're just a fact of life! However, I do tend to get a little bit insecure about them, especially when they're fairly new and red. A few months ago, I was looking into ways to help fade stretch marks, and one answer I found was to use retinol cream. I didn't want to go to a dermatologist to get a prescription, so I decided to pick this moisturizer up from Target -- and let me tell you, I have seen a difference! There is one mark in particular that I have noticed fade drastically in the four months I've been using this cream. Instead of being a dark red like it was when it first appeared, it is now a lighter fleshy color!


Rubbermaid No Slip Interlocking Drawer Organizers. Earlier this month, I felt a serious bolt of spring fever go through me. It was about 2 in the morning and I suddenly had this crazy urge to clean. So a few days later, I gave my car a thorough cleaning (and let me tell you, it needed it), and started hunting for a way to organize my makeup. I already had a Sterilite Drawer Cart, which helped me keep all my makeup in one place, but these interlocking drawer organizers with rubber grips keep everything from sliding around, and just makes all of my products that much more accessible! This photo is just one drawer and it shows an example of how you can arrange these organizers! You can arrange them in a ton of different ways to really utilize your space.

Now a favorite that is completely irrelevant to my blog...


BioShock Infinite + Burial at Sea. Okay so my nerd is showing. This is a completely irrelevant favorite but it's pretty much been a constant all month. Earlier this month, I finished "BioShock Infinite" (I know, I'm completely late jumping on this bandwagon), and then Andrew and I jumped into the DLCs, "Burial at Sea" episodes one and two. We just finished episode two a few days ago, and if you're a fan of horror or psychological thrillers, play this game -- you will love it!

That's it for my April favorites! Have you had any stand out favorites this month? Any video game favorites like me? ;)

- d.