menu

Sunday, July 27, 2014

July Favorites

I have really been itching for July to end. Of course, every month I'm like, "Oh wow, this month went by so fast!" But I feel like July has really dragged on. I probably feel that way because I'm moving across the country in about three weeks! Anyways, I kicked off  July with some amazing purchases at PHAMExpo, and I've had an awesome month for beauty products because of it.


Beauty Blender Solid Cleanser. This stuff is freaking amazing. I am notorious for being really lazy about cleaning my brushes. That's why I kind of hoard brushes, so I don't have to clean them so often! However, between deep cleans, I use the Solid Cleanser to keep everything sanitary, so that when I do finally deep clean my brushes, I don't have as many to clean! It also dries super quickly, so you don't have to wait a few days for your brushes to dry.


Anastasia Beverly Hills Contour Kit. This contour palette has changed the way I contour my face! The center taupe color is the perfect contour shade for me, and I love using the banana color to highlight under my eyes, while using the shimmering pink color to highlight the tops of my cheekbones. When I had my wisdom teeth removed earlier this month, this contour kit really helped to make my chipmunk cheeks look a lot more normal! As you can see in the photo, this palette is already being very well loved.


Matrix Biolage Fortetherapie Strengthening Conditioner. I have had an amazing hair month, and I completely attribute it to this conditioner. I started using this conditioner early in the month and my hair as been completely transformed! It is so much stronger and healthier than it was before. I use it every other wash in conjunction with my Aussie 3 Minute Miracle Color because it is a bit pricey, but it is seriously worth every penny to have my color-damaged hair feel this soft and healthy!


Aussie Sprunch Mousse + Leave-in Conditioner. Supposedly this mousse is meant for curly hair, but I like using it to give me a little bit more control over my hair. Like I said, I've had an awesome hair month, and this is another product I've tried that I really believe has helped my hair! The leave-in conditioner that is built into this mousse is not heavy at all, and the mousse really helps to hold texture, which my hair has very little of. When I get out of the shower, I will run this through my hair and twist sections of my hair, and it just gives me a really effortless look! And when I curl my hair, this mousse gives me such a defined, piecey look!


Benefit Gimme Brow in Medium/Deep. I always talk about how much I hate my brows, but this product has seriously changed the way I look at them. I still fill my brows lightly, but this tinted brow gel has a fiber formula that makes my brows look like they grow that way naturally! It gives just enough volume to my brows to make them seem natural without looking at all overdone, and the tiny little wand is perfect for keeping your application precise!

I always try to keep my favorites narrowed down so that you don't have a huge wall-of-text to read, but I found so many incredible products this month! Let me know your favorite products in the comments below!

- D.

Thursday, July 24, 2014

The Interrogation Beauty Tag

I've been wanting to do some looks for you lately, but it has been so hot and humid in San Diego that I can barely put on a small amount of makeup to even go out! So instead, you guys get a fun beauty tag. My good friend Sarah from Diary of a Beauty Padawan did this tag about a week ago and I've decided to do it as well! So grab a nice refreshing glass of lemonade and let's get started.

1. What is the one product you'd grab if your house was on fire?

  • Moisturizer. Definitely moisturizer. My absolute favorite is the First Aid Beauty Ulta Repair Face Moisturizer. I have dry-combo skin, so without this stuff, my skin turns into a total desert, and what's the point of putting on makeup if your skin is dried out?
2. Which beauty blogger would you want to do your makeup?
  • I have to say Leesha from xSparkage. She is a beauty blogger/vlogger and is the reason I started blogging in the first place! I absolutely love both her YouTube channel and her blog, and her makeup looks are always amazing!
3. Which celeb do people think you look like?
  • I've always been told that I look a lot like Audrey Hepburn, which to me is a total compliment! It must run in my family or something, because my little niece gets it all the time as well. I've also been told Jena Malone when she has her dark hair (like in Catching Fire), which again, is a total compliment. I think it's a bit more evident when I have bangs, so here are some older photos for comparison!


4. What beauty product do you save for a date night?
  • I can't really think of anything in particular that I save for date nights. Maybe perfume? I don't usually wear much in the way of perfume, and I kind of just wear whatever makeup I feel like wearing regardless of occasion. 
5. Which of your guy friends takes longer than you to get ready?
  • Honestly, it would be my boyfriend. He takes an eternity in the shower, so if we consider the entire from shower to out-the-door getting ready process, he probably takes about as long as me if not longer. The only thing he really has on me is that he doesn't have to blow dry his hair. 
6. If you could create your own miracle beauty product, what would it be?
  • A foolproof, full coverage foundation that never cakes. I know those exist, but sometimes even the best foundations will get cakey if not applied correctly! Or a one-step tattoo cover up. As someone who lives in the world of theatre, few things are harder than covering up tattoos! Or, the perfect lipstick formula that never needs touch ups, doesn't feather, and doesn't stain (see also: question #11). 
7. What's your best beauty tip?
  • Take care of your skin. Hydrate it. Drink lots of water. Splurge on skincare. I am a firm believer that beauty starts from the inside, so eat healthy so that your inner health will radiate outward. Your makeup will apply so much more easily if you take care of yourself first.
8. What beauty products do you love to splurge on?
  • Um, how about everything? I don't even know. If I think it's worth it, I'll splurge on it. End of story.
9. Which beauty bloggers would you bring on a shopping spree?
  • It's funny that she mentioned me as well, but I would definitely take Sarah. I think we would have so much fun shopping together, and we're both pretty bad about the whole "It's okay, just get it!" thing ;)
10. What is your signature scent?
  • I don't really tend to wear perfume. I really love deep, musky scents though, so I guess that is what I would have to say.
11. I'm on an endless quest for the perfect...
  • Red lipstick. I want the perfect blue-toned, blood red lipstick that doesn't feather, fade, or stain. I want a red lipstick that I never have to touch up and stays vibrant all day. I know, I'm asking for a lot, but I have yet to find it!
12. How many beauty products does it take to get your ready? 
  • Depends on the day, but if I include skincare and haircare, I totaled up 15 products that I use on a normal day.
13. What lipstick/lip gloss do you have in purse right now?
  • I think the only lip product I actually have in my purse (considering I just cleaned it out) is the Fresh Sugar Rose Lip Treatment, which isn't actually my favorite of the Fresh collection, but it's the only one I have at the moment.
14. Who is your celebrity beauty icon?
  • Alexa Chung, Dena Kaplan, and of course, Audrey Hepburn.
15. Name the beauty brand you'd most love to be a spokesperson for.
  • Wow, this one is actually really hard. Considering my collection, the answer would be Too Faced, since I have a lot of products from them. However, I absolutely love the vintagey vibe that brands like Soap & Glory and The Balm have! 
16. What's your current nail polish?
  • Currently my nails are bare! But the color I recently removed was actually a limited edition version of the Sally Hansen Salon Effects Nail Strips. I can't quite remember what they were called, but they looked like fish scales!
17. Favorite mascara right now? 
18. The last thing you bought at Boots?
  • We don't have Boots here in the US, unless you count the little Boots section at Target, in which I'd have to say the last item I bought was the Boots Botanics Hydrating Eye Cream.
19. I try to never be seen without wearing...
  • Some kind of eyebrows. I hate my brows. It's no secret. I always try to at least even them out with a little bit of powder before I head out the door!
20. What's one beauty product you'd always recommend? 
  • Ooooh, this is a hard one because there's a lot of stuff I absolutely love. But I would have to say I always go back to the original L'Oreal True Match Foundation. I picked this foundation because, with more than 30 shades, you can pretty much find something for everyone!
If you are a blogger and you read this post, then I tag you! Leave a link to your blog in the comments below and I'll be sure to check it out! 

- D. 

Sunday, July 20, 2014

Battle of the Blenders

This post has taken a little longer than expected getting out for two reasons:
  1. I had my wisdom teeth removed this past Monday and the painkillers they gave me pretty much made me hibernate; and
  2. I've been incredibly lazy and didn't feel like typing up my thoughts despite knowing exactly what I wanted to say.
And now, I'm probably just procrastinating packing for my big college move, but hey, what better way to procrastinate than by actually doing something productive, right?

Before I get started, I do want to make note that I now have a Facebook page! Please check it out, and it would mean so much to me if you could like it. Check it out here, or click on the little Facebook icon on the right sidebar. 

Anyways, onto today's topic. The Beauty Blender has been a pretty big thing for a couple of years now, and now it seems like every brand is making a point to come out with a dupe of their own. I haven't had my Beauty Blender for very long, but it has already changed the way I apply my foundation. However, the original Beauty Blender usually runs for about $20. I was lucky enough to get a fantastic deal at PHAMExpo, but I know not everyone has the opportunity to go to a beauty show and get one. 

Not too long ago, Real Techniques came out with their own Beauty Blender dupe: the Miracle Complexion Sponge. I had been eyeing this sponge for a while since I already love the Real Techniques brushes (especially the Expert Face Brush), and after falling in love with the original Beauty Blender, I decided to give this dupe a shot! At only $6, I figured, what do I have to lose?

Purchasing: This one is easy. The Beauty Blender runs for $19.95 and can be bought online, or you can find a store near you that carries them by clicking here. The Miracle Complexion Sponge is $6, and can be bought online or in many different drugstores, or at Ulta. You can also find local retailers that carry it by clicking here.

First Look: At first glance, to me, the Beauty Blender simply appears more expensive. I don't think it really appears to be worth $20, but it does look more high-end than the Miracle Complexion Sponge. I think this may be because the Miracle Complexion Sponge appears to be more porous than the Beauty Blender, making me kind of think of a cheap makeup sponge wedge that you can buy in packs of 100 at Walmart.


I placed both sponges next to a mini Bath & Body Works candle as a sizing reference.


Shape: The Beauty Blender has the classic egg-shaped design that almost doubles in size when wet. The Miracle Complexion Sponge also gets somewhat larger when wet, and has a similar design to the Beauty Blender, with an added flat side that is meant to be used around the contours of the eyes and nose. I think I prefer the shape of the Miracle Complexion Sponge because it is bigger, and I love the flat side for general application of foundation. The Beauty Blender's size tends to make everything a little bit tedious, and the rounded shape limits the application. 


Texture: The difference in the porosity of the two sponges is very apparent just by looking at them. When you look at the original Beauty Blender, it looks very firm, and you are almost surprised at how bouncy and spongy it actually is. With the Miracle Complexion Sponge, it's very obvious that it is, in fact, a sponge, and it is much less dense than the Beauty Blender. It doesn't bounce off the skin quite like the Beauty Blender does. That being said, both the Beauty Blender and the Miracle Complexion Sponge are very soft, yet dense, and feel comfortable on the skin.


Application: Of course, application is the most important topic! With both sponges, you will want to dampen them for a few reasons. If you don't, you will have a very small tool to work with, and it'll take significantly longer to apply your makeup, and it'll probably feel pretty tedious. If you wet either sponge, they will almost double in size. Also, if you don't wet these sponges, they will absorb pretty much any liquidy product you try to use, which will only waste product and make your application sloppy. Point of this little ramble is to wet your sponges. All you have to do is run it under the tap and squeeze out the excess water.

When the Beauty Blender is dampened, it gets much larger, but retains its firmness. I felt that it also got a bit softer when wet. The Beauty Blender isn't as porous as the Miracle Complexion Sponge, so it retains much less water while still getting bigger. With the Miracle Complexion Sponge, I found that even after squeezing and squeezing, it still remained pretty wet, and it only expands a little bit. Strangely enough, I actually found that I got more coverage out of my foundation using the Miracle Complexion Sponge than I did the Beauty Blender. I'm not entirely sure how that makes sense, given the way both sponges responded to water, but that's what happened consistently as I was trying both of these sponges out.

My biggest problem is that the way the Miracle Complexion Sponge retained water actually seemed to dry out my skin. My skin responds pretty dramatically to water (due to the pH balance, yada yada), so the excess water in the Miracle Complexion Sponge seemed to end up on my face, which made my skin feel a little bit stripped. I didn't have this problem with the Beauty Blender.

Cleaning: Both sponges are incredibly easy to clean. I love using the Beauty Blender Solid Cleanser because it's just so easy, however, you can use a gentle facial cleanser or a gentle shampoo to clean both the Beauty Blender and the Miracle Complexion Sponge. If your sponge starts to smell a bit, or you're worried about bacteria, simply throw it into the microwave in a bowl with about an inch of water in it, let it cool, wash it as normal, and you're good to go!

Final Smackdown: All in all, both sponges are fantastic. I feel like my analysis of these sponges seems very...cold? But I really do love both of these sponges and I think they both have their pros and cons. Of course, the Beauty Blender is more expensive. However, I feel like it gives you better control in terms of coverage, and it holds just the right amount of water. The Miracle Complexion Sponge is better for someone who prefers a higher coverage and likes a super quick, flawless application, who isn't bothered by the water thing. I also think that the Beauty Blender is best for concealing and blending out other products that you may have gone a bit overboard on, while the Miracle Complexion Sponge is better for a general foundation application. I think that if I could take the material of the Beauty Blender and mix it with the design of the Miracle Complexion Sponge, I would have my perfect foundation tool.

If I had to pick one, I'd probably lean toward the original Beauty Blender, simply because of the water problem. However, I do not in any way think the Miracle Complexion Sponge is a bad product! I will definitely use both sponges depending on my needs. For $6, you definitely can't go wrong with the Miracle Complexion Sponge. However, if you don't mind spending the $20, the original Beauty Blender is a cult classic!

Which sponge do you prefer? Let me know in the comments below!

- D.

p.s. There is still time to enter my Lorac Pro Palette 2 giveaway! Use the widget below to enter.


a Rafflecopter giveaway

Monday, July 14, 2014

REVIEW: Lorac Pro Palette 2 + GIVEAWAY!!!

I feel like I've been spending a lot lately. Because I'm addicted to shopping and makeup. It's a serious problem. I swore off of spending after my big splurge at PHAMExpo, but when I saw the Lorac Pro Palette 2 in stock at Ulta, I couldn't resist. My gut was just screaming at me to get it!


For $42, you get 16 shadows - 8 matte and 8 shimmer - as well as a mini Behind the Scenes Eye Primer. I'm not a huge fan of this primer, but for those who are new to makeup, it is nice that this palette comes with a primer in case you don't have one yet! 

Let's go straight on to the packaging.


This palette comes in a sleek matte charcoal gray packaging. It's very minimal, making it absolutely ideal for travel! It is a cardboard packaging with a magnetic closure, and nearly identical to the original Lorac Pro Palette, aside from, of course, the color of the packaging itself. 

The shadows themselves are laid out very cleanly, and you can easily tell which shade is which. The upper row consists of creamy matte shades, and the bottom row consists of shimmery shades. 

I'm not a huge fan of the mirror on this palette. Because of the floppy cardboard design, it's pretty much useless. It doesn't stand on its own so you will have to hold the mirror up to your face, but if you're in a sticky situation and this is the only mirror you have, it'll do the job!


Buff: A creamy matte light nude shade, perfect for blending, or highlighting. On lighter skin tones like mine, it would be a great blending color. On more medium skin tones, it would be a nice matte highlight. This shade will probably be too chalky-looking for dark skin tones.

Snow: A white, shimmery color. It is definitely a true white, and would be great for an inner corner highlight. It is incredibly smooth and pigmented, with little fall out. Normally I have trouble getting white shadows to appear on my skin, as they usually turn translucent, but I didn't have trouble with this one at all.

Light Brown: A matte brown shade that would be perfect to define the crease on more natural days. It's definitely a necessity for every makeup collection. It is very smooth and long-wearing.

Beige: A go-to shimmery champagne color. This shade is so buttery and beautiful. It would be an amazing all-over lid color as well as a great inner corner highlight. 

Cool Gray: I would consider this more of a taupe than a gray, but it is very matte with little fall out. Another great color for defining the crease. It blends easily without blending away completely and is very pigmented.

Rose: Probably my favorite shade in this palette (go figure), this is a shimmery rose gold shade that is just so buttery and beautiful.You barely have to touch the shadow to get amazing color payoff. 

Nectar: A matte peachy cream color that would be a nice transition shade. Not my favorite in the palette, as it is a bit chalky compared to the other mattes, but it is still a great shade for blending.

Mocha: This shade is kind of similar to "Rose," but quite a bit deeper and a bit more coppery. Again, an absolute dream to use and super creamy to the touch. 


Plum: A beautiful matte purple, but a bit chalky. It does tend to blend away if you aren't careful, so you will have to layer it up in order to truly get its full opacity.

Chrome: Such a beautiful color. This is kind of similar to "Cool Gray," only shimmery. It's a bit of a neutral brown with a silver sheen, and it's so absolutely stunning!

Navy: One of the most coveted shades in this palette from the second I saw it! This color is very, very pigmented and very, very matte. Because of those two pros, you do get the con of some fallout. Be sure to tap off the excess and use a nice primer and you'll be fine. It blends out to a pretty deep teal color. 

Silver: Exactly how it sounds, this color is just a traditional metallic silver shade. It works best with a primer underneath, and blends nicely without blending away completely. I can only imagine how amazing this shade would look if used wet!

Charcoal: Super soft and buttery and pigmented. Charcoal is pretty much the same color as the palette's packaging. It does tend to have a little bit of fallout, but nothing that can't be avoided by tapping off the excess before applying it.

Jade: Another coveted shade. This is such a pretty shimmery olivey green with just a hint of gold shimmer! This would be amazing for an earthy green smokey eye.

Black: Not the blackest of blacks I've used, but it does the job. This shade would probably work well wet, or to help smoke out any ordinary look. It is a bit chalky so be careful! This is the only repeat shade from the Lorac Pro Palettes.

Cocoa: Probably the most pigmented shade in the entire palette. This color is a shimmery cool brown and it blends like a dream while still staying vibrant! 


Say your prayers, Chocolate Bar Palette. This may be my new go-to palette. This is an amazing addition to the Lorac Pro family, and, from what I've seen, it's better than the original! I love the range of colors in this palette. It's neutral without being boring or traditional (step aside, Naked Palettes). 

Final Thoughts? Yes. Yes yes yes. For $42, you can't go wrong. Each color in this palette is creamy and intense. The "duds" are hardly duds at all, and even the chalkier shades are still creamy and pigmented. You could create a huge range of looks with this palette, and in the end, you're paying less than $3 for each of these shadows! 

- D.

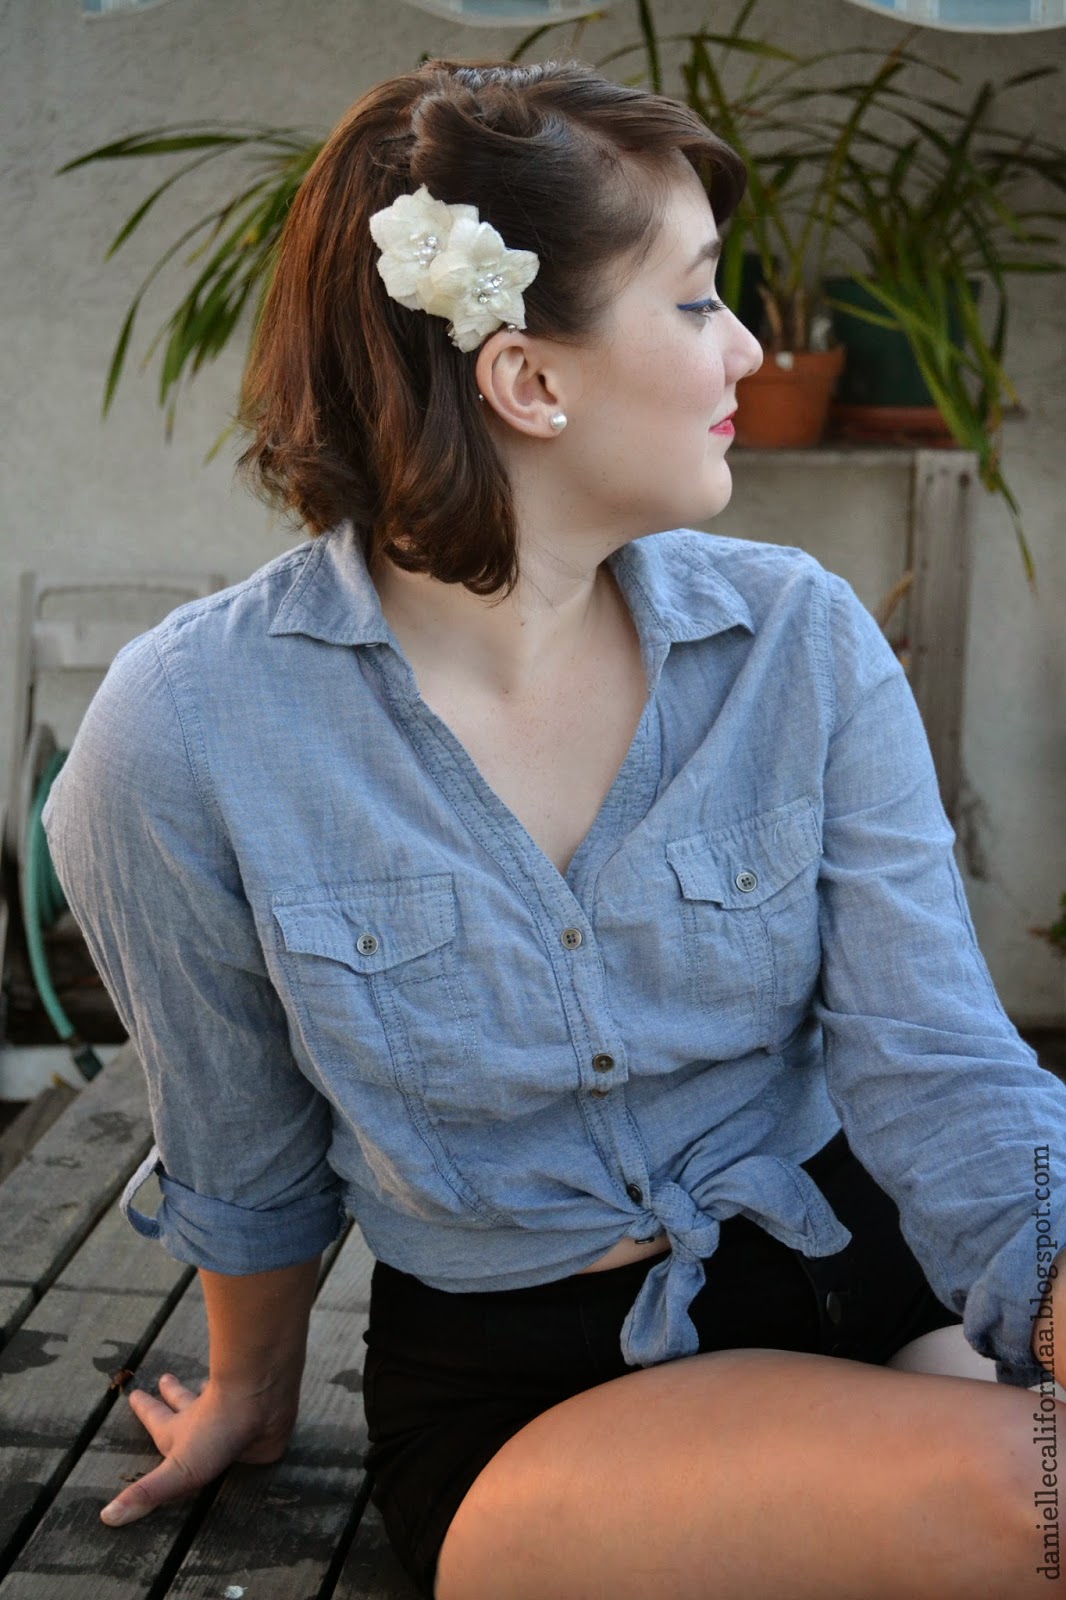
p.s. It's giveaway time! I was a bit unsure on whether or not I wanted to do a giveaway of this palette. However, yesterday when I was playing with it, I realized I just HAD to! I am so in love with this palette, and last night I did a fun galactic-inspired look with it that just shows how versatile this palette really is. It definitely isn't an ordinary neutrals palette! Of course, here's a bad webcam photo of the look I did last night. I plan to do a tutorial of it soon!

 
I promise I was wearing clothes, I was just very hot and humid in my room! ;)

If you win this giveaway, you will receive the Lorac Pro Palette 2 as well as the Behind the Scenes Eye Primer that comes with it!

So here are the rules:
  1. This giveaway is international! I will be choosing one winner at random via Rafflecopter.
  2. If you are under 18, please get your parent or guardian's permission before entering this giveaway.
  3. This giveaway will end on July 30th, 2014, at 12 AM, PST.
  4. If you win and have not contacted me back within one week of the end of the giveaway, you will forfeit your prize and it will be given to the next runner up.
Use the Rafflecopter widget below to get your entries!

a Rafflecopter giveaway

Saturday, July 12, 2014

REVIEW: Benefit They're Real Push Up Gel Liner Pen

I am obsessed with gel liners, and I love any product that comes in the ease of a pen. So when Benefit sent out their press email announcing the "They're Real!" Push Up Liner, I had to have it! I remember hearing about the Maybelline version of this a while back, but it wasn't released in the US, so I got even more excited knowing that finally a brand would sell a gel liner pen in the US.

Let's start with packaging.


The box is very similar to Benefit's best selling "They're Real!" Mascara, with claims that read:

  • "91% said it was long wearing"
  • "81% said it was waterproof"
  • "86% said it hugged the lashline"
  • "84% said eyes looked visibly larger"
The product comes in a  pen with a screw-on cap, which means that the cap won't accidentally pop off and make a mess. This makes this liner perfect for your on-the-go makeup bag! To dispense the product, you twist the bottom until product comes out. The first time I used this pen, it took probably 10 clicks to get the product out. After that, it takes 3-5 clicks to get product out.


On the box, you can find a description of their AccuFlex tip. It says "Custom soft, angled tip gets the matte black, smudge-proof liner close to your lash line." That's debatable. While I do like the softness of the tip, I struggled to get close to my lash line. When I dispensed the product, it would ball up on the end, and getting just the right amount of product was a bit of a challenge. 


I also really struggled to get a precise line with the applicator. When you first apply the liner after clicking a few times, it really just kind of clumps onto your lash line, and I often felt that I was just smearing it around with the silicone tip. It wasn't until there was almost no product on the tip that I could finally get a precise line, but then it wasn't exactly opaque.


In terms of longevity, it's pretty average, in my opinion. It is water resistant, but definitely not water proof. When rubbed with a wet finger, it did smudge, but it didn't completely come off. When using my Garnier Cleansing Micellar Water, it began to come off with little effort, which makes it seem quite silly that they are also selling an $18 remover gel to go with the "They're Real!" line. I've taken naps while wearing this liner (I know, bad Danielle), and it smudged like nobody's business, significantly worse than a lot of drugstore liners that I have slept in before.

Another thing I've noticed with this formula is that is flakes. A lot. After wearing this liner for maybe 3 hours, I would have friends come up to me to clean black chunks off my cheeks. While it does stay black and generally opaque all day, it tends to get a bit patchy due to the flakiness of the product.

Final Thoughts? I'm really disappointed that I dislike this product so much. I wanted to love it, I really did. But for $24, I can't really recommend this product. There are drugstore liners that do a much better job for a third of the price. I really wanted to be able to rave about this liner, but, once again, the "They're Real!" line has let me down. I feel like this liner is incredibly gimmicky, and honestly, it's going straight back to Sephora.

However, I will mention something. I received the "They're Real!" Remover as a sample when I purchased this liner, and I actually really like it. While I don't think I can justify paying $18 for a makeup remover, it does a beautiful job of removing waterproof makeup! Since it's summer and I've been super busy, I've switched to a waterproof mascara, and it makes my lashes look like I was never wearing mascara at all. 

What a bummer, huh? Do you have any products you just really wanted to love, but couldn't?

- D. 

Wednesday, July 9, 2014

June Favorites

I can't believe the summer is going by so quickly! As I type, I am looking at my college move in day, which is only 41 days away, and I am just absolutely astonished by how quickly this year has gone by. I feel like I was in Chicago not that long ago, but that was back in February! Anyways, I have just a couple of favorites to talk about this month, so let's go ahead and get started!


Kate Spade Beacon Street Jeanne. I am so obsessed. They no longer sell this version of this bag, however they do have the Holly Street version in "Geranium" available and on sale! Earlier in June, I received a 25% off sale items on the Kate Spade website, and of course, being a curious little cat, I had to check it out. And of course, satisfaction definitely brought me back! This beautiful bag is a charcoal gray color, so it goes with everything, and it's super roomy without taking up a lot of space. It has a patent leather body with 14k gold hardware. Originally, this bag was $398, but I got it on sale for $159, plus the 25% off, which knocked it down to $119! I've always been obsessed with Kate Spade bags, and I think I got a serious deal on this classic bag that I know will last ages. It was worth every penny!


Aussie 3 Minute Miracle Color. I've loved Aussie's 3 Minute Miracle since last year when I bleached my hair, and they recently released their color-friendly line! This deep conditioner is perfect for colored hair, and usually when I color my hair, it begins to fade after just a couple of washes. With this conditioner, my hair color is still vibrant! I loved the original formula, but I love the color formula even more.


Lush Dark Angels Cleanser. This stuff smells weird. Let's just get that out there. It's also pretty rough so I definitely could never recommend this for daily use, despite being a "gentle" cleanser. However, on my psoriasis, this stuff is amazing. I'm not a huge fan of using this on my face because I do have slightly sensitive skin, but I use this on my psoriasis maybe once a week, and I have seen such an improvement! My skin is soft and smooth as opposed to flaky and painful. It is still red as it usually is, but I have noticed that after using this cleanser, the little psoriasis scales that I get usually clear up for a few days. I use this on my entire face once every couple of weeks, just for a really exfoliating deep clean, but for psoriasis, this unique cleanser really helps make my life a whole lot easier.


Wet n Wild H2O Proof Liquid Liner. I know this liner has a lot of mixed reviews, but personally, I absolutely love it. This was the first liquid liner I ever bought, and I still love using it! It's essential for summer, especially if you plan to go to any summer parties where you aren't sure if you will be swimming or not, because this stuff does NOT budge. Period. The only way to get this off is with an oil-based cleanser, and sometimes, that isn't enough. But if you're like me, and you want your liner to look perfect when there is a possibility that you might be in the ocean or the pool (or if it's just insanely humid!), this liquid liner can't be beat in terms of staying power, and is super affordable at around $3!


Band-Aid Brand Advanced Healing Blister Cushions. Okay, so this probably sounds a little bit funny to be talking about in my favorites for this month. However, these things have saved my feet. This month I recently bought a new pair of flip flops, and despite how much I love them, they have been a beast to break in. I feel like I'm super prone to blisters, but these blister cushions are perfect! They stay on really well, and help to cushion the blister against your shoes to make the pain more bearable. I don't think I could ever go back to using regular bandaids again!

And that's it for this month's favorites! I've definitely done my share of spending this month...but I've sworn off of any big purchases, I promise! ;) What have you been enjoying this month?

- D.

Thursday, July 3, 2014

Pin-up Inspired 4th of July Makeup, Hair, and Outfit

Hey everyone! The other day I was playing with my hair, and I found out that my hair is long enough to do victory rolls again, and I was super excited. For the longest time, my private Twitter photo was a picture of me with victory rolls, and so many people have asked me how I did it. So here's how, along with a full makeup that would be perfect for the 4th of July, and a pin-up inspired outfit.


Starting with the hair, victory rolls are actually a lot easier than you may think. All you really need are lots of bobby pins, some hairspray, and a comb!

First, I take the section of hair that I want to style into the victory roll. For me, I usually just take a rat tail comb and go from right about the ear and toward my part, and make the roll out of that section. Most of the time, especially if you have bangs, you can't go wrong doing that! Then, I hairspray the entire section to give it some hold, especially because my hair is pretty slippery most of the time, and separate the section into two horizontal sections (think of "horizontal" as "from one ear to the other"). I clip the front section out in order to keep it from getting mixed up with anything else, and then backcomb (or tease) the back section in order to give the bobby pins and the front section a proper base to hold onto.

I'm not very good at explaining exactly how to do this, so here's a diagram that will hopefully help.


After you've teased that section, all you have to do is take the front section and slide it over the section behind it. I usually like to wrap the hair around my finger and then loosen my grip to create the perfect rolls, 
but honestly, the key to this look is practice and bobby pins. I only really place bobby pins in the roll itself, and sometimes in the back if they need a little extra security. 

Another thing that might make this easier is to take a 1" curling iron and curling the hair upward and away from the face. That will give the roll a direction and a mold to go into, as opposed to just falling right back down. After I've secured all the bobby pins, I always spray in my hairspray and then smooth over it all with a comb. If the back of your roll looks a little messy, you can always add some kind of hair piece for some added flair, and no one will ever know that it is messy!


The makeup for this look is very simple but always classic! I won't be explaining how I did the winged liner, because I already did a tutorial for that here


Starting with the face, I used my trusty L'Oreal True Match Foundation with my Beauty Blender to give my skin a flawless finish. My skin has been acting up a bit lately, so I took my Rimmel Wake Me Up Concealer over any of my blemishes as well as on my lids, and my Maybelline Dream Lumi Touch Concealer to highlight under my eyes. I then took my Anastasia DipBrow Pomade and filled in my brows, making sure to keep them super defined to really get that pin-up look. Then of course, I used my Anastasia Clear Brow Gel to set the brows into place.


For my eyes, I first took my Makeup Geek shadow in "Beaches and Cream" and put this all over the lid and up to the brow bone. I find that this shade is perfect as a starting point to make sure everything blends nicely. Then, I took "Unexpected" and ran this in the crease, making sure to keep it defined yet blended. I really wish I had this shade for when I did my Karlie Kloss look, because it would have been perfect in the crease! Then, I took "Shimma Shimma" and used that on the browbone, making sure to blend it out so it wouldn't be harsh, as well as in the inner corner. 

After finishing the eyeshadow, I took the Milani Liquid Eye Twist Up Pencil in "Blue" and created a pretty substantial winged liner. It wasn't over the top, but I made sure it was thick enough to be noticeable. While this set, I ran my Rimmel Scandaleyes Kohl Kajal in "Nude" in my waterline to really open up my eyes. After that, I curled my lashes and used my Maybelline Volum' Express Mega Plush Mascara, focusing especially on the outer corner to really help give that cat eye effect. I also did a very light coat of this on my bottom lashes, just to help define them a bit more. 


After setting my face with my Revlon Photo Ready Translucent Powder, I took the middle contour shade from the Anastasia Contour Kit and contoured my face. I did a whole post about how I contour here, and let me tell you, this palette makes contouring so easy! After that, I used my Morphe Blush Palette and the upper mauve shade to give my cheeks a very subtle color.

Finally, on the lips, I just took my OCC Lip Tar in "NSFW" on a lip brush and carefully filled in my lips with this perfect pin-up red.


Of course, you can't have a fun summery pin-up look without cute high-waisted shorts! These shorts are very basic high-waisted black shorts that stretch to fit my every curve and I love them! They no longer sell these exact shorts, but they do have a very similar pair at Forever21. For my shirt, I bought this chambray shirt a few years back and I still absolutely love it! I tied it up around my waist and rolled up the sleeves. Chambray is super popular right now, so you can get it pretty much anywhere, but I know I got this specific one from Target. Of course, I had to throw on my classic red Keds, which when great with my red lips! For my jewelry, I just wore simple pearl stud earrings. I got my white flower hairpieces from Charming Charlie a few years ago, and they also have little pearl accents!

And that's it for this super long post! I hope that you all have a wonderful 4th of July (even if you aren't from the US)!

- D.