menu

Thursday, November 28, 2013

How To: Bold Winged Liner and My Top 5 Tips!

Today, as I was doing my makeup for work, I decided to go with a matte, neutral eye, and a bold winged liner. As I was applying my eyeliner, I thought about how many people have asked me just how I get it so perfect! So I decided that today I'd write a post explaining how I do my winged liner, and my top 5 tips on perfecting your winged liner. 


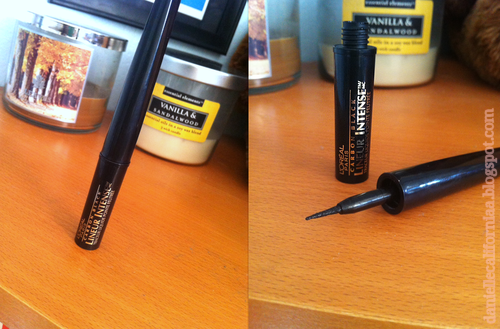
First things first, for today's look I used my Maybelline Eye Studio Lasting Drama Gel Eyeliner in "Blackest Black," which is a great gel liner. I've had a lot of gel liners that have dried out on me long before I was done with the pot, but this liner lasts for so much longer than any other ones that I have tried! It glides on so smoothly and is perfect for this bold look.

The next important thing to take into consideration is, "What kind of brush should I use?" Well, that's up to you. For me, it depends on the day and what I feel like using. Today, I decided to use a push liner brush, so I could get really close to the lash line. But you could use a push liner brush, and angled liner brush, a precision liner brush, or even an artist's brush if you want!

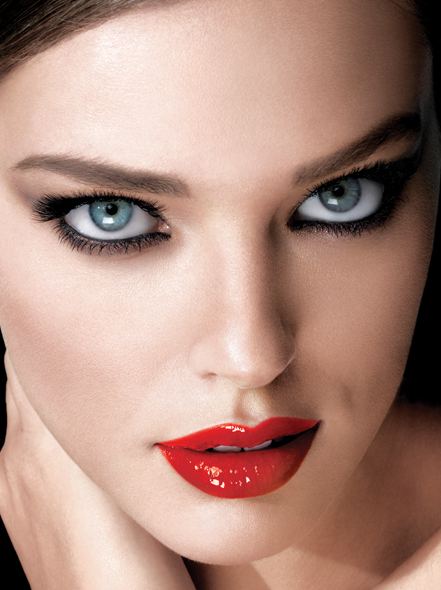
One of the keys to successfully creating a winged liner is to remember your basic shapes. Winged liner is JUST a glorified triangle! That sounds so much less scary, doesn't it? 


In the top photo, I show the three points where you should "connect the dots," and in the bottom photo, I show what your triangle should look like. Of course, for every eye shape this is going to be slightly different. I personally keep my angle in line with my lower lash line, but you can adjust this however you feel works best for your shape. Decide what angle you want for your liner, and, using short strokes, connect the dots. Once you have your triangle, fill it in! At this step, I don't have liner on the rest of my lash line yet. After I filled in my little triangle, I used my push liner brush to gently wiggle in between my lashes and create a thin line. From here, gently build up the line with short strokes until it is as thick as you like!

Don't be afraid to make a mistake. The great thing about makeup is that it can be removed easily with some makeup remover and a cotton bud. Keep this in mind while drawing your liner, and don't worry if you color outside the lines. It can easily be erased! Once I have the liner to my liking, I always run either concealer or a nude liner under the wing. Lately, I have been loving my Rimmel London Scandaleyes Waterproof Kohl Kajal in "Nude" for this step. It's so easy to just draw a line under the wing, and it creates a crisp line. Just don't forget to blend the nude color!

So what are my top five tips for creating the perfect winged liner?
  1. Gel liners are typically easier to work with than liquid liners. If you are a beginner at winged liner, I would recommend using a gel liner and an angled brush.
  2. Don't forget your basic shapes! Remember: winged liner is just a triangle.
  3. Use a nude liner or a concealer and a small brush to clean up the line and to keep it nice and crisp.
  4. Short strokes are a must. Your face is not a flat surface, and you will never be able to draw a straight line in one quick go.
  5.  If you make a mistake, DON'T PANIC! Mistakes are easy to fix with makeup remover and a cotton bud. Don't be afraid to go back and clean up lines. This will keep your makeup looking clean and polished.
Just remember, winged liner takes practice and precision. Over time, it will get easier, so be patient. Don't be too hard on yourself if you don't get it the first time. Practice makes perfect, and soon enough you'll be perfectly achieving this incredible fall/winter trend!

- d.  

Friday, November 22, 2013

Face and Outfit of the Day -- Job Interview Edition

So today, I had my second interview at Sephora (woo hoo!)

I thought that, because Sephora is such a fun place for makeup, I would show you the makeup I wore for the interview, as well as the outfit (which is significantly less exciting, but it may help some of you who are looking for some good professional attire!)

I'll start with my outfit.


We'll go from head to toe! My headband is from Icing. I bought it a few holiday seasons ago so I'm sure they don't have it anymore, but it's just a simple bow headband. It is pretty similar to this headband, though, which is also from Icing. Around my neck is my beloved bow necklace that I actually haven't worn in quite some time. I got it from eBay, a few years ago, and can still be found here! It is a gorgeous gunmetal color, and the photos online definitely do not do it justice. My shirt is a basic black t-shirt from H&M, which is tucked into a slitted pencil skirt from Target. This is another one of those items that I bought quite some time ago and is no longer available at Target, but black pencils skirts are a staple and can be found just about anywhere! My shoes are also from Target, and definitely aren't as cute in the picture as they are on my feet! Plus, they are SO comfy, and wear really well. I tend to walk with my toes up (from a few good years of marching I assume), so a lot of shoes wear out around my toes really quickly. My belt is the same belt I wore in my last OOTD, which actually belongs to my best friend, so I am not sure where it's from.


My nails were inspired by +leighannsays, and I used my L'Oreal Color Riche Nail Color in "Eiffel For You" with my N.Y.C. Longwearing Nail Enamel in "Plaza Plumberry" for the triangle accent. It's the first time I've ever done a manicure like this, so it's anything but perfect, but I think it turned out pretty well for a first time try! 


The look I wore today was definitely a fall-inspired look, with some oranges and wine colors. Unfortunately, my camera was going crazy today and didn't seem to want me to be able to get a very good photo of it. Also, please excuse my crazy hair. I am in desperate need of a good hair mask. 

First, I used my Too Faced Primed and Poreless face primer, and over that, my L'Oreal True Match Foundation in the shade C2. Then I went straight into the brows, with Inglot 358 Matte and my Ardell Brow Sculpting Gel (not pictured). Then, I ran my Rimmel London Scandaleyes Waterproof Kohl Kajal in "Nude" to help shape and define my brows just a bit more. Then, I applied my Urban Decay Primer Potion (not pictured) to help my shadows stay put. Then I went in with my Coastal Scents 252 Ultimate Palette


This palette comes with three tiers of shadows: one with cools tones, one with neutral tones, and one with warm tones. I used the warm tier, and applied a shimmery peach color on the inner third of my lid. I then took a matte plum color and rocked it in my socket as well as the outer corner, being careful to blend it out really well. I then used a bright matte orange to add an extra pop of color on the center of my lids, as well as a matte brown to deepen the plum in my outer corner. I also ran the shimmery peach color along the inner corner. 

After applying my eyeshadows, I went back in with my Maybelline Eye Studio Lasting Drama Gel Eyeliner in "Blackest Black" and created a defined winged liner. It's a bit difficult to see in the picture, unfortunately. I then took my nude Rimmel pencil and ran it in the lower waterline, as well as under the wing to give it some extra definition. 

After all this was applied, I went in with my new holy grail concealer, the Rimmel London Wake Me Up Concealer in Very Fair. I applied this to the undereye area, as well as down the bridge of my nose to add a bit of highlight. This concealer is amazing for my dry-combination skin. I then went in and powdered with my Revlon Photo Ready Translucent Finisher, and contoured with the same Inglot powder I used on my brows. On my cheeks, I used my favorite blush (of all time), Wet 'n Wild Color Icon Blusher in "Mellow Wine," and on my lips, my Wet 'n Wild Megalast Lip Color in "Sugar Plum Fairy." Finally, I used my Maybelline The Mega Plush Volum' Express Mascara. And of course, I spritzed some Mac Fix+ to add a lovely finish to the skin!

- d. 

p.s. in case you were wondering, I got the job!

Monday, November 18, 2013

L'Oreal Color Riche Nail Color Update

About ten days ago, I posted about the two new Color Riche Nail Colors that I bought. They make a claim that the polish lasts 10 days, and I decided to put it to the test.

Okay, so I didn't really put it to the test, because my nail OCD unfortunately didn't allow me to. However, since that post, I have tried both shades that I purchased, "Eiffel For You" and "Charmed, I'm Sure." I can certainly say that "Eiffel For You" has impressed me. It is a gorgeous taupe creme color that is perfect for fall. It goes on so smoothly, and I wore it for 5 days before it started to barely chip. The chipping in the polish was barely noticeable and rather minor, but I had a job interview on what would have been the 6th day, so I removed the polish and in it's place applied two coats of "Charmed, I'm Sure," which is the rose gold polish I purchased.


In the photo, it doesn't quite appear as a rose gold, and that's because it's definitely a bit of a nude rose gold. It is much pinker in person than in photos, but it is absolutely gorgeous. I have said countless times that I look awful in rose gold, and I always wished I could jump on board with this trend, and now I finally can! 

Unfortunately, it isn't quite as opaque as "Eiffel For You." It does apply a bit unevenly, and I almost feel that two coats isn't enough for full coverage. It also definitely highlights the awful ridges in my nails, something that creme polishes typically don't do. However, this polish also lasted 5 days before it began to slightly chip. This time, I felt I was ready for a good manicure anyway, and took it off. But right after I was done with my nail regimen, I reapplied "Charmed, I'm Sure" all over again. It's definitely a gorgeous color and I'm so excited to finally be able to jump on board with this trend!

I think the #1 thing for me is that it lasts about a week before starting to chip. The reason I don't wear polish often is that I don't like having to deal with it after a couple of days when it has already begun to chip. L'Oreal's Color Riche Nail Color line is definitely a low maintenance nail color that comes in a huge variety of colors, and I definitely would recommend trying it out!

- d. 

Thursday, November 14, 2013

REVIEW: Maybelline Color Sensational Color Elixir

Time for a quick review!

I recently saw this advertisement for the Maybelline Color Sensational Color Elixir, while watching Once Upon a Time with +Andrew, and when we saw the commercial, we could not stop laughing. Cosmetic commercials will always be hilarious to me. Regardless, I was intrigued. They described it as a "creamy lip lacquer." Personally, I love lip lacquers. I love the longevity of them, in comparison to lipsticks or glosses, and I love the pigmentation in them. So this commercial instantly made me curious to try them!

image

This is the model from the Maybelline website in the color "Signature Scarlet." The website reads, "Fall under the spell of the elixir effect...Hyper-saturated color, ultra cushiony feel...The new hypnotic lip sensation." 
A few days after seeing the commercial, I ran out to my local Walmart and purchased two of them -- one in "Signature Scarlet" and one in "Mauve Mystique."


There are 20 shades in the collection, ranging from nudes, to purples, to bright reds, and even a couple of orange and coral shades. I purchased "Signature Scarlet" because I'm always on the lookout for a good red, and the color in the picture was amazing. 

Today, I wore it out for the first time!


I must say, the opacity of this is phenomenal. I was absolutely shocked. It was so smooth, vibrant, and non-sticky. Sticky lipglosses are the #1 reason I don't typically wear lipgloss. I have noticed that this product doesn't swatch very well, but for some reason, it glides so beautifully on the lips. This red is a glossy, cool-toned red, and the mauve color is defined by "my lips but better." The colors do stain, so they are somewhat longwearing. In terms of full-on vibrancy, though, they last about 2 hours (if you aren't eating or drinking) before they being to fade. This is coming from someone who has an anxious habit of lip biting. 

Something I really loved about this product, though, is that when I took it off, my lips actually felt smoother. The commercial claims that it has an "addictive cushiony feel of a balm." I totally agree with that. After putting it on for the first time, I just kept rubbing my lips together and wanted to put on more and more product because it felt so nice and smooth when applied. 

Now for the negatives. This is a messy product. If you plan to wear this, bring a mirror with you to check for feathering and smears, because it will do both of those things. I am curious to see if using a lip pencil will help the feathering, but you do need to keep an eye on it if you are wearing it. 

All-in-all, I'd say this is a great product. It feels so nice when applied, and creates a beautiful, pigment-rich lip look. 

- d.

Saturday, November 9, 2013

Makeup and Outfit of the Day!

So today was a bit of a special day for my guard. It was the first time that the marching band has ever been allowed to perform for a football game. Weird, right? Most schools have their bands play halftime shows normally, but at the school I teach at, they have never performed. Anyways, it was also senior night, and two of my girls are seniors. One of them asked me and Kiyoshi to be her escort for senior night. Basically, we came out on the field and met her and walked with her. It’s just kind of a high school tradition kind of things to honor the marching band, colorguard, cheer, and football seniors. 
I figured since I was getting dressed somewhat nicely for this, I would do an outfit of the day! Plus, I would show my makeup for the day as well.


So on the left side was my outfit for before the sun set, and the outfit on the right was for the actual football game, since I knew it would be cold.

My sweater and skirt are both from Target. The sweater was a recent purchase and it is SO soft. If you can get your hands on a couple, snag them! It comes in a ton of different colors and is totally worth the purchase. My watch is from Charming Charlie, and was featured in my October Favorites. My super cuteroll-down boots are the Dr. Marten’s “Stratford” boots. They have this adorable floral pattern on the inside, and can be rolled down for a girlier look, or laced all the way up to create a combat boot style! These boots are great for me, because my last pair of combat boots lasted about a month or two with all the wear I put into them. I expect these Nappa leather boots to last and last and last. As for my jacket, it is faux leather from Aeropostale. But it isn’t that plastic-feeling leather. It is SO soft and comfortable and one of my autumn staples. I bought it last fall, so they don’t have it anymore, but they did come out with a red version and a quilted version. My scarf is from Walmart, and I believe I bought it for about $6, which was a total steal, especially because I’ve been wearing this scarf everywhere! It has sequins weaved into the fabric, which gives any outfit just a little extra punch. Oh yeah, and my studded black belt belongs to my best friend, Christine, so I have no idea where that came from! I think it’s from Target, though.


Now for the face! On my skin, I mixed my moisturizer with my L’Oreal True Match Foundation in the shade C2. Yeah, I’m pale. I mixed it with my moisturizer because I have dry-combination skin, and with these chilly autumn nights on the football field, I need the extra hydration. Then I went on to my eyebrows, which I filled in with Inglot 358 Matte, and sealed that withArdell Brow Sculpting Gel. I also used this shade in my crease, and then Inglot 397 Pearl on my lid and in my inner corner. I did not use a base, because for me, these shadows do not crease at all. To each her own! For my liner, I usedL’Oreal Carbon Black Lineur Intense, which was also featured in my October Favorites. Then I ran Urban Decay’s 24/7 Glide-On Eye Shadow Pencil in Delinquent along my lower lashline, using an angled brush to create a double wing under the liquid liner. For my undereye concealer, I used Maybelline’s Instant Age Rewind Dark Circle Eraser in the shade Fair 110, and blended it out with my ring finger. I used my Revlon PhotoReady Translucent Finisher to set my foundation and concealer. Then I mixed the two colors in the e.l.f. Studio Contouring Blush & Bronzing Powder in St. Lucia (total dupe for Nars Orgasm/Laguna duo, by the way), to add some color to my cheeks. And finally, I used MAC Fix+ to add a lovely, dewy finish to my look! Special shoutout to my Revlon ColorBurst Lip Butter in the color Creme Brulee for adding just a little something extra to my lips! 


I’m sure some of you are wondering why I didn’t use mascara. Today, I chose not to wear mascara because I knew it was going to be a long night and that it would begin to irritate me. I wear glasses. Sometimes I don’t wear mascara simply because I can feel it against my glasses and it drives me absolutely insane.


Hope everyone had a great Friday! 

-d. 

Friday, November 8, 2013

For the sake of beauty blogging...

+Andrew  is going to be mad at me because I caved at the drugstore today.
I bought two nail polishes, both from L’Oreal Paris’s Color Riche line. These polishes claim to have 10-day wear. Personally, I can’t imagine anything lasting that long on my nails that isn’t acrylic or gel. But, time to find out!

Anyways, the two colors I bought were “Eiffel For You” and “Charmed, I’m Sure.” Currently, “Eiffel For You” is on my nails.


As you can see, it’s very much a true taupe color. It’s also one of those “I have something like it, but it’s not exactly like it so I’m going to buy it anyways” colors. My boyfriend would say “It’s just like that other nude one you have” (aka Sephora by O.P.I.’s “Don’t Feed the Hand Models”). The thing is, that one is a nude. This is a taupe. Aaand this is me justifying my purchase.


The other color I bought, “Charmed, I’m Sure,” is a color I really hesitated about getting. It’s a rose gold. I’ve said a million times that I look horrible in rose gold. Or really just any gold in general. But I’m hoping that because this color is a bit more on the pink side, it will look good on me. And if it doesn’t, I can always give it to a friend. 


One of these days I’ll figure out how to make my fingers photogenic. 

-d.

Friday, November 1, 2013

First post and October Favorites!

Hello! Sooo, as many of you may already know, I've been really into the whole beauty industry for quite some time now, and since I was 16, I have been the go-to hair and makeup artist for many of my friends, and friends' friends. When I was 18, I started in beauty school, where I primarily learned hair styling. About 6 months later, I realized it wasn't what I wanted to do with my career, and I left beauty school (insert "beauty school dropout" lyrics here). However, that has not stopped me from being passionate about the beauty industry! That's why I have decided to start posting my favorite beauty, fashion, and lifestyle favorites from month to month, just like a lot of my favorite YouTube beauty gurus. 

Let's start with a rediscovered favorite. 


L'Oreal Carbon Black Lineur Intense. This is my all-time favorite liquid liner. While I typically tend to go for cream or gel liners, Lineur Intense is perfect for just about any eyeliner look. I forgot about this liner for a while, but when I recently saw it in Target, the fire was rekindled. The sponge tip allows it to apply with ease and precision, and is different than the typical felt tip or brush applicators sometimes seen with liquid liners. It is flexible like a brush, which allows for ease of application, but thin and precise like a felt tip, which allows you to build up your liner from super fine to thick and bold. And if you're looking for a black liner, let me tell you. This one is...well, carbon black. In terms of wear time, it lasts and lasts and lasts. I have oily lids, and once this stuff is dry, it won't budge until I'm ready to take it off. But when wet, it is easy to manipulate, and if you mess up, no worries! Just take a wet cotton bud and it cleans up easily.


Wet n Wild Mega Last Lip Color -- Sugar Plum Fairy. This is a truly versatile lipstick. Not only is it the most gorgeous berry color, perfect for the fall, but it can easily double as a cream cheek color! This lipstick has been my favorite cheek color for October. Crazy, you say? Try it yourself! It has a semi-matte finish, with a creamy consistency, so it will not dry out your skin or make it look oily. Just rub the color between your fingers and pat it on your cheeks. Use a buffing brush or sponge to blend it, if your fingers aren't doing the job. This stuff does have a tendency to stain, so it will last! 


Maybelline The Mega Plush Volum' Express Mascara. I've never been a fan of the flaky, clumpy lash look, and I'm not blessed with super long, healthy lashes. This mascara is great for me. It definitely adds volume and length, without making your lashes look clumpy, AND it stays soft while holding a curl! To me, it's almost a "no-mascara" mascara. It feels nice on the lashes and is buildable. It is a very wet mascara when you first apply it, so if that's not your thing, skip it. I hear this mascara is typically a hit or miss, but for me, it's a hit.


Soap & Glory Hand Food Hydrating Hand Cream. Some of you may already know, I am a colorguard coach. As a colorguard coach, I am very hard on my hands. And now, going into these cooler months, my hands will really begin to feel the wear and tear. However, this hand cream has been my savior! I've seen it talked about a million times and I am in love. It smells divine. The smell alone would make me want to use it. But not only does it smell good, it is so creamy and rich! And it isn't the kind of creamy and rich that lingers on your skin so you can't do anything with your hands. It soaks in quickly and leaves your skin feeling soft and smooth. I have the travel size that I keep in my bag. 


Essie Nail Lacquer -- Vested Interest. Anyone who has followed me for a long time will know I'm not a fan of Essie nail polishes. I am so picky about polishes. I like them to be thick, but not goopy. Essie has a tendency to be too thin to achieve the opacity I like without pushing into 3-4 coats. However, Vested Interest is a gorgeous, teal gray creme that is opaque in 2 coats. Honestly, I don't know why I love this polish so much. I tend to stay away from blue-ish polishes, but this one has been on my nails nonstop since I purchased it. It has great staying power. As I said before, I work with my hands a lot, and this polish typically stays on for 5 days before beginning to chip. Maybe my bad Essie luck has changed? 


Bath & Body Works 3-Wick Candle -- Leaves. This is an autumn staple for me. Leaves is such an amazing scent. I even have the Scentportable for my car, and get compliments every single time someone new sits in my passenger seat (despite how messy my car actually is)! It is described as a "rich blend of golden nectar, red apple, and spiced berries." In the last month, I have burned it practically every night, and when B&BW had their 2 for $22 candle sale, of course I had to buy another one, as well as their Cinnamon & Clove Buds candle. I love pairing this with my Candle-lite Essential Elements Vanilla & Sandalwood candle (that's a mouthful), which I found at Rite Aid. Absolutely amazing, and it's burning as I type.


Charming Charlie Right On Rhinestone Watch -- Gunmetal. There isn't much I can say about this watch. Just a standard boyfriend watch with rhinestones in a gorgeous gunmetal color! I've been wearing this pretty much every single day since purchasing it. The cool thing about it was that I received a sizing kit with my purchase (basically a blunt thumb tack with instructions), so it fits just right for me now!

- d.