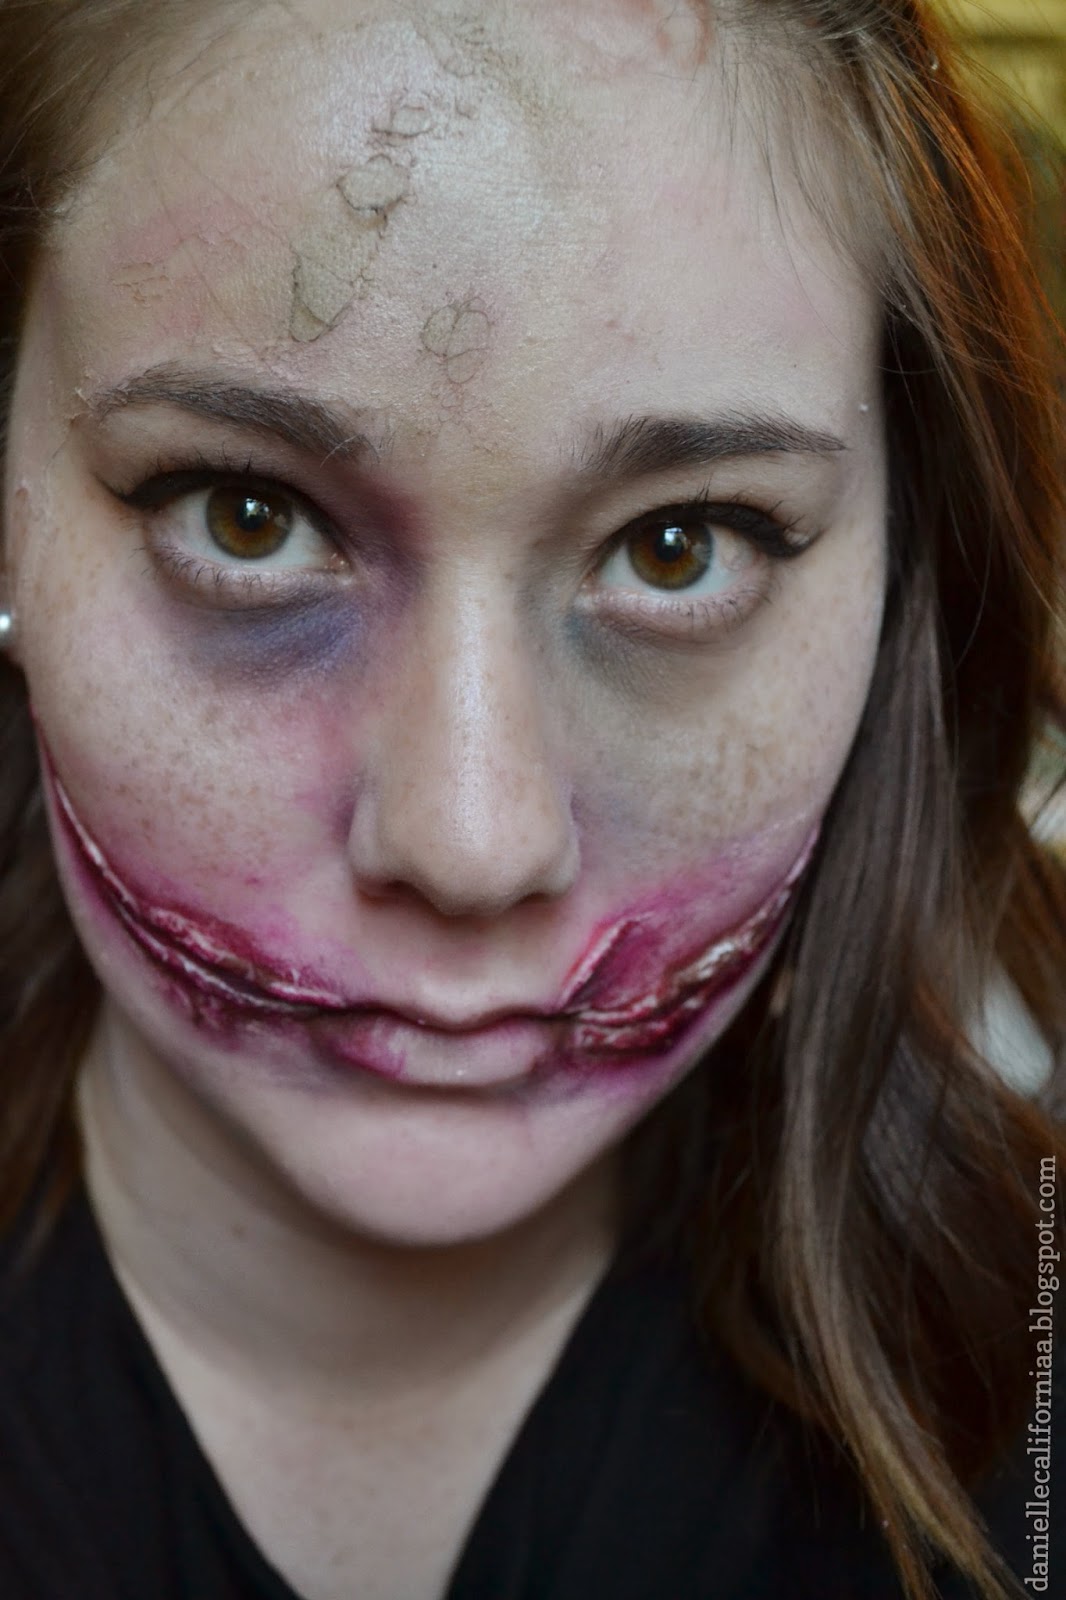
I chose to do this look on a budget, meaning I could only use products I already had, and I had no fake blood! Of course, if you want to do this look, I highly recommend purchasing a cheap bottle of fake blood from your local Halloween store. This tutorial is also perfect if you want to do a Joker costume!
Now for our "prosthetic." Of course, if you are allergic to latex, you will want to use a latex-free lash glue, but I just went for the Duo Eyelash Adhesive in "Clear-White," which dries clear. For a latex-free alternative, you could also go for the NYX Latex Free Eye Lash Glue, which also dries clear! You will also need some single-ply toilet paper, but if you only have two-ply, you can simply peel the two sheets apart. From here, I used a cotton swab and started patting the lash glue over the white liner we used earlier. Then, taking small pieces of the toilet paper, I began layering the toilet paper to create a torn skin effect. To help the edges of the toilet paper blend better, I layered the lash glue on over the edges of the paper, and feathered it out with the cotton swab.
Once I got a few good layers down, tapering out at the edges of the outline, I began to take small pieces of toilet paper and rolled them, placing them along the edges to create an indent for the cut. I did this along the upper and lower edges, to make it look more like the skin has been ripped apart (cute, right?). At this point, it won't look like much of anything, really.
Here is where I began to add color. Before I did anything, though, I powdered over the areas that I had applied the toilet paper with a translucent powder. Then, I mixed together my CoverGirl Outlast 3-in-1 Foundation and my Aveeno Natural Protection Sunscreen, to create a pale base. The reason I mixed in the sunscreen is because of the zinc oxide in the sunscreen. If you use a sunscreen that has zinc as an ingredient, it will give you a white cast, which is perfect for this look!
Now, back to the mouth, I used the skinny end of a cheap cosmetic sponge, and first layered on my OCC Lip Tar in "NSFW." I got pretty messy with this, but try to avoid getting it in places you don't want it, because it is a real pain to get off. I pounced this into the "cuts," as well as around it, to create an irritated look around the edges. Then, I used the OCC Lip Tar in "Black Dahlia," which only seemed appropriate, and did the same thing, this time focusing more on the inner parts of the cuts. Again, don't worry if it gets a bit messy. Around the edges, I added little bits of Lime Crime's Velvetine Lip Color in "Salem" to add a bit of a dried-blood effect. I also mixed together "Salem" with "Black Dahlia" and blended this into the inner corners of my lips, while still keeping the inner portions of my lips pale.
Now that the main portion of the look has been set up, you can begin adding some finishing touches that really bring everything together. I took the black shadow from my Coastal Scents 252 Ultimate Palette (which has obviously been well-loved) on a small angled brush, and applied this to the inner edges of the ridges that we created with the toilet paper. This creates a truer bloody color, and adds more depth to the cuts. Then, I took a mix of the blue, purple, and brown, on a fluffy blending brush, and began adding some bruising around my face. I added it around my nose and eyes, specifically, as well as around the edges of the cuts and on my chin.
Then, I took a mix of the olive green, yellow, and just a touch of the brown, and took this again, under my eyes, in the hollows of my cheeks, and over the forehead. This creates more of a gaunt, sickly appearance. To add the effect of the peeling skin, I took my lash glue and smeared it across my forehead. Once it was dry, I began to scratch and peel at it a bit. Then, I added more of the green, yellow, and brown mixture to create almost a rotting skin appearance.
I hope this look has inspired you to do something a little more out of the box this Halloween! I personally am considering doing this look for a party I was invited to, and it's great because you don't have to go out and purchase a ton of special effects makeup! What are you planning on doing for Halloween?
- D.


No comments:
Post a Comment