menu

Showing posts with label bold metals. Show all posts

Wednesday, January 28, 2015

Negaverse Rampage

Obviously, I've been very into the vampy makeup looks lately. While I was back home in San Diego, I FINALLY found Wet n Wild's Mega Last Lipstick in the shade "Vamp It Up," which is a pretty spot on dupe for MAC's "Cyber," and I am completely obsessed! For this look, I decided to give the new Real Techniques Bold Metals brushes a good test and use them exclusively for this look, to see what these brushes can do, and so I could give a solid review on them, which I posted not too long ago! I literally used these brushes and no others! The review is in two parts, and you can view Part 1 here, and Part 2 here. Not only will I be going over which products I used for each step, but I will also be discussing the brushes!

Also, a big shout out to my friends Chloe and Ashley for helping me come up with a name for this tutorial! I really liked both of their ideas and ended up doing a fusion of both. Chloe mentioned that it reminded her a lot of the Negaverse from Sailor Moon (throwback anyone?) and I love that she mentioned that because I never would have noticed that it's totally a look Queen Beryl would wear.


For today's look, I decided to do brows first and foremost, so, using the 202 Angled Liner brush, I filled in my brows with "Triple Fudge" (a dark, cool brown shade) from the Too Faced Chocolate Bar Palette.  Then, to prime the lid and clean up under the brow a bit, I used my MAC Studio Finish Concealer, and used my fingers to apply this all over the lid and up to the brow. I used the 101 Triangle Foundation brush to help clean up underneath my brow.

For the eyes, I used the tape method to help ensure a crisp, clean line on the outer edges. To help everything blend well, I used "White Chocolate" (a light cream shade) from the Chocolate Bar Palette to set the concealer into place. Then, using the 200 Oval Shadow brush, I swept the color "Champagne Truffle" (a shimmery, pale pink champagne color) from the Chocolate Bar Palette all over my lids, stopping at the crease. I used the 201 Pointed Crease brush and a mix of the "Salted Caramel" (a warm, sandy camel) shade from the Chocolate Bar Palette and the "Nectar" (similar to "Salted Caramel," but slightly more peach) shade from the Lorac Pro 2 to start a soft sculpt in the crease. I also brought this color up onto the brow bone a bit, blending upward. Then, I took the same Pointed Crease brush, wiped it off on a paper towel, and began blending "Candied Violet" (glittery purple) from the Chocolate Bar Palette into the crease, going slightly above the crease and into the peachy mix I placed before. After I placed this color, I decided it wasn't quite purple enough for what I wanted, so I went back into the crease and used "Plum" (basic purple) from the Lorac Pro 2 on top of the "Candied Violet" shade. I continued building this color up until I was happy with the saturation of color. Then I went back in with the 200 Oval Shadow brush and added more of "Champagne Truffle" onto the lid, since the purple shades made it a little more muted than I desired. On the inner corner, I used "Snow" (pearlescent white) from the Lorac Pro 2, and as a brow highlight, I used "Beige," (pearlescent champagne) also from the Lorac Pro 2. On the outer two-thirds of the lower lash line, I used "Candied Violet," then on the inner third, I again used "Snow."


I took the Milani Liquid Eye Liner Pencil in "Black" and lined both my upper and lower waterlines. For my bright pop of a beautiful indigo liner, I used NYX's Studio Liquid Liner in "Extreme Purple." I'm not the biggest fan of this formula or the brush, but the color is beautiful so I'm willing to make it work. Instead of using the brush that the liner comes with, I applied the product to the back of my hand and used the 202 Angled Liner brush to create my winged liner. I then prepped my lashes with a coat of the Mally Volumizing Mascara and used the Andrea 53 Lashes. Because these lashes were kind of on their last legs, I used the Mally mascara to help blend my natural lashes and the falsies together, and then used the indigo liner to help hide the lash band. In retrospect, I probably should've used a black liquid liner to hide the lash band, but lesson learned!


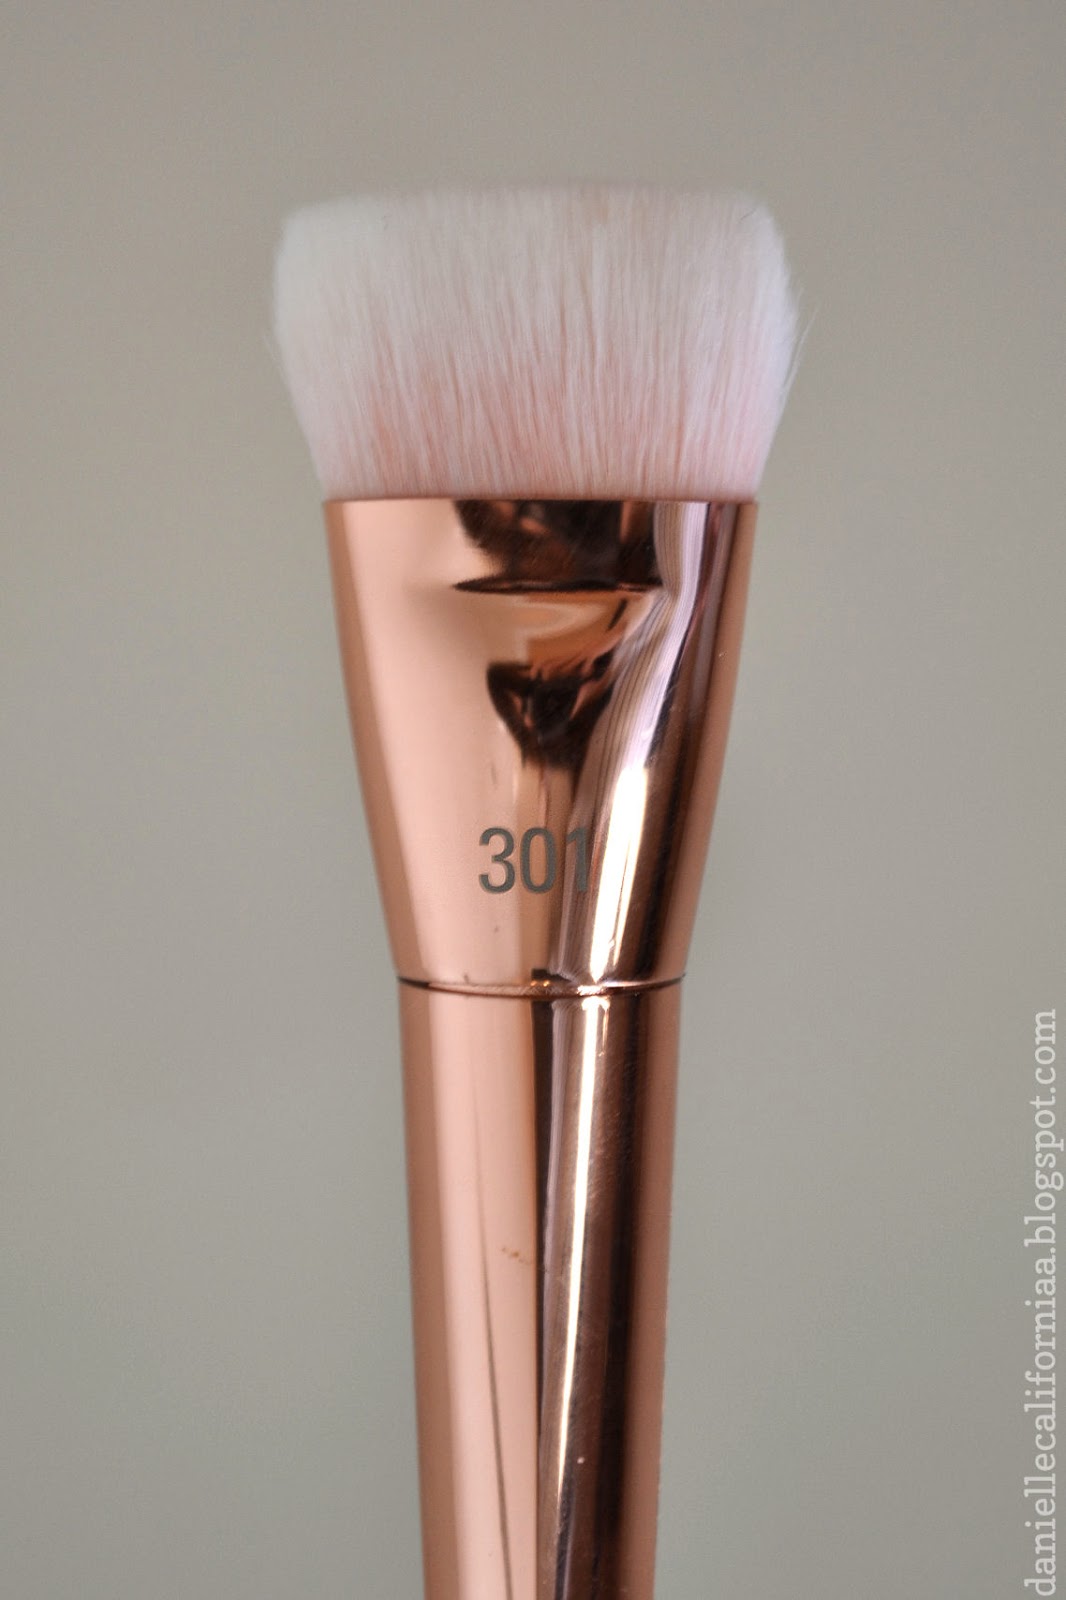
For my face, I went for a perfected, sculpted look. I first used Benefit's The Porefessional to prime. Then, I used the 101 Triangle Foundation to apply my favorite CoverGirl Outlast 3-in-1 Foundation. Then, I used the Maybelline Fit Me Concealer on my under eye area, and again used the 101 Triangle Foundation brush to blend it out. I used the 100 Arched Powder brush to apply my translucent powder, then, using the 300 Tapered Blush brush, I applied the "Banana" powder from the Anastasia Contour Kit on my under eye area. This brush is perfect for this step! I used this same brush to apply the "Sand" highlight shade to the tops of my cheekbones, which helped create a really glowy effect. Next, I used the 301 Flat Contour brush and the shade "Fawn" to sculpt and contour my cheekbones. This brush is seriously the most perfect contour brush, and I don't think I can go back to using anything else! Finally, with the 100 Arched Powder, I applied the Maybelline Fit Me Blush in "Light Rose" for a subtle flush.


Now for the star of the show -- the lips! I used Wet n Wild's Mega Last Lipstick in the shade "Vamp It Up," and applied it straight from the tube and onto my lips, Because this product is a little bit hard to apply due to its matte finish, I used the 202 Angled Liner brush (after wiping it off, of course) to help smooth it out a bit. Then, using the Angled Liner brush again to apply a small amount of this gorgeous Lip Paint from Face of Australia, which sadly seems to be discontinued! However, you can achieve a similar look by just applying a clear gloss on top of the "Vamp It Up" lipstick.


I really enjoyed doing this look for you guys! I really ought to go in with no expectations and to just play more often -- I tend to get my favorite results that way. If nothing else, I hope this look inspires you to step out of your comfort zone and wear a bold lip color or strong cat eye!

- D. 

Thursday, January 22, 2015

First Impressions: Real Techniques Bold Metals Collection -- Part 2 + Collection Wrap Up

I finally got my hands on all of the Real Techniques Bold Metals brushes! This is Part 2 in my two-part series on these brushes, so if you haven't read Part 1 yet, click here. If you have already read Part 1, then keep on reading.


I'm going to dive right in and get straight to the brushes. If you would like more of an introduction to what these brushes are, how they look, and the features, feel free to read Part 1!

The brushes I was missing in Part 1 were the 100 Arched Powder, 101 Triangle Foundation, 301 Flat Contour, and 200 Oval Shadow. As you can see above, these are the brushes I will be reviewing today!


I wasn't certain about getting the 100 Arched Powder at first because I already had a powder brush that I enjoyed using. However, it was old and shedding, so I decided to spend the $26 and get this one! I definitely don't regret it. It's incredibly soft and luxurious feeling. It is a somewhat flat brush, almost like a larger, fluffier version of the 300 Tapered Blush. It's pretty standard in terms of what it does, but it feels like a treat putting this brush to my face. My only complaint is that, because of the white bristles, you can't tell how much product you have on your brush when using translucent powder.


The 301 Triangle Foundation REALLY surprised me. In fact, I almost didn't get it, because I normally hate flat foundation brushes, and this basically just seemed to me like a glorified version of the standard flat foundation brush. For the most part, I find that flat foundation brushes leave my skin streaky and cakey-looking. However, after using it I'm pretty impressed, especially after cringing at spending $24 on it. While the bristles are a little long, making the brush a bit flimsy, this brush can blend foundation out beautifully. I like to use the flat side to first "paint" on my foundation, and then use the pyramid-point side to blend it in! Because of the way the brush is shaped, I found that this is definitely the easiest and most foolproof way to use the brush. While it's still not my absolutely favorite for applying a more natural-looking foundation (I'd still reach for the Expert Face Brush over this one), I'd definitely use this on clients when trying to achieve a super flawless look!


If there is one brush I'd say is a must-have in this collection, it's the 301 Flat Contour. It's $26 and worth every penny. Everything about this brush is just so right. First of all, the super short bristles ensure that your contour powder is going EXACTLY where you want it, without the bristles being flimsy and getting powder everywhere. And because the bristles are so incredibly dense, it blends product out like an absolute dream. I wish I knew how to express how much I adore this brush. Seriously. If you can get your hands on it, don't hesitate! It's a similar concept to the NARS Ita Kabuki Brush, but half the price! 


The 200 Oval Shadow is a bit of a struggle for anyone with smaller eyes. It's about twice the size as a MAC 239, and it's kind of easy to get product everywhere when using this brush. It's a little bit flimsy, making it a little bit difficult to apply product with. However, this would be a great "clean up" brush. What I mean by that is, sometimes, when I've gone a little overboard with the shadows and brought them too high up on my brow bone, I like to take either my face powder or an eyeshadow similar to my skin tone and use a brush like this to bring the colors back down to where they should be. Overall, it's an okay brush, but not a must-have by any means, especially at the $16 price point. 

Like the other brushes in this collection, these do not shed at all after being washed! In terms of drying time, it was pretty standard. I washed them in the evening, and in the morning when I was ready to do my makeup, they were all dry.

Final Thoughts: Nothing stands out to me like the 301 Flat Contour. I just can't. It's no wonder this brush was sold out for weeks after the collection was released. Overall, these four brushes are beautiful to look at, are easy to clean, and get the job done!


Collection Wrap Up: Overall, the Real Techniques Bold Metals Collection is absolutely beautiful. These are the kinds of brushes you want on display on your vanity! The quality of the bristles on every single brush is exquisite, as well as the general build of all of them. Now that I've used all of the brushes, let's go back and do a recap and final review!

The 201 Pointed Crease brush is large and dense, and costs $16. I wish it came to more of a precise tip, because it can be difficult to use on smaller eyes, but it blends out product flawlessly. The 300 Tapered Blush brush is quite small, and kind of like a fluffier version of a standard flat foundation brush. It costs $24. I've played with it quite a bit since purchasing it, and I've realized that it is actually the perfect brush for setting my under eye concealer and for highlighting the face! I much prefer using it for more precise applications than blush. The 202 Angled Liner is very small, dense, and pointed, and costs $16. It's a little bit sharp, so if you have sensitive eyes, be wary. However, if can give you a super sharp and precise line! It is also fantastic for filling in the brows. Because it is so small and precise, it successfully applies even powder products in a way that looks like small brow hairs! The 100 Arched Powder is a standard powder brush that costs $26. It's not really anything special, but it is super soft and doesn't shed at all, which makes the final steps of my foundation routine just that much more enjoyable. The 101 Triangle Foundation brush is not quite what you'd expect, and definitely an upgraded version of a standard flat foundation brush, at $24. It creates a full-coverage canvas, which is perfect for anyone who wants to achieve a flawless look. The 301 Flat Contour is the creme de la creme, and worth the $26, hands down. An absolute must-have. It both places and blends contour powders like an absolute dream! Finally, the 200 Oval Shadow brush, is a little bit difficult to use for smaller eyes, but it places products well and feels soft on the lids. It costs $16.

Of course, you can definitely do an entire look using this entire collection. It is definitely a full set of brushes, and can easily help create a professional look and feel to your makeup look! This is a preview of a look I'll be posting soon, with which I exclusively used the Bold Metals brushes to apply the product.


I hope you found this First Impressions post helpful, and I really enjoyed getting to use these brushes! Is there anything out right now that you would like me to review? Let me know in the comments below!

- D. 

Wednesday, January 7, 2015

First Impressions: Real Techniques Bold Metals Collection -- Part 1

Of course the whole world has been going absolutely NUTS over the new Real Techniques Bold Metals Collection that just came out. These absolutely gorgeous metallic brushes were released late December, and since I've been home in San Diego (where there are like 8 or 9 Ultas), I've been on the hunt for all of them. As of right now, I only purchased 3 of the 7, since they are nearly impossible to get a hold of in stores! So instead of waiting to do a huge collective review, I decided to do a first impressions in two parts.


To start, let's talk about the collection itself. There are 3 categories of brushes: Base, Eyes, and Finish. The Base brushes are gold, the Eye brushes are Silver, and the Finish brushes are rose gold. The handles are a tapered square shape, making them easy to take out of a brush belt, and guaranteeing that they won't roll off your table or vanity when you set them down. The brush handles are also weighted for ease of application and control, while the brass ferrules ensure the durability of the brushes. Finally, the bristles themselves are synthetic hairs, but mimic real hair, since each individual hair is tapered on the end. The bristles have been both tied and glued, in order to maximize the lifespan of each brush.

The first three brushes I purchased were the 201 Pointed Crease, the 300 Tapered Blush, and the 202 Angled Liner. 

The packing itself is solid and beautiful. When I first took the brushes out of the packaging though, I noticed that it had a really annoying sticky adhesive holding them into the packaging, which was a bit difficult to get off. I was worried that if I used alcohol, the metallic paint would come off, but I took a risk and it wasn't a problem at all. The adhesive easily comes off with alcohol, and the brushes looked pristine!


Each of the brushes also has RT stamped into the ferrules, along with the number of the brush on the opposite side.


Let's start with the 201 Pointed Crease brush. This brush costs $16, and, obviously, is meant for the crease. It's almost like a large pencil brush in density. It picks up and places product really well, and comes to a nice point at the very tip, which is great for precise application. Because it is so dense, it buffs out product beautifully with very little effort. 


The 300 Tapered Blush is one of the rose gold brushes, which seemed to definitely be the most popular of the bunch. It is paired with the 301 Flat Contour brush, which is pretty much impossible to get right now. It's sold out of every Ulta in San Diego, as well as online at both Ulta and Boots. Go figure. This particular brush is $24. 

Anyway, onto the brush I'm actually reviewing! The 300 Tapered Blush brush is a relatively small, rounded paddle-style brush. It isn't your typical fluffy blush brush because it is flat on both sides, with a bit of a tapered top. It's quite dense, however I find it a bit bizarre applying blush with this brush. It almost reminds me a bit of a fluffier version of a standard flat foundation brush. I also tried applying a contour color with this, and actually quite liked the effect it gave! It is also quite dense, so if you are using a very intense product, use caution. I think I will have to work with the brush a little more in order to really get a feeling for it, since I'm definitely used to using a more traditional blush brush.


Finally the 202 Angled Liner brush. Of the three brushes I purchased, this is probably my absolute favorite, and well worth the $16 price point! It is super small and precise, making gel liner a total breeze. I haven't been so happy using gel liner in quite a long time as I was using this brush! It is super dense and the bristles are short, making application super easy and precise. This is definitely the perfect brush for anyone who is a gel liner junkie like me, or new to using gel liner!

After using all of these brushes, I decided to put them to the test and give them a good solid wash! I expected the blush brush especially to shed, since I've had trouble with my Expert Face Brush shedding during washes, but nope. Not a single bristle fell out of any of these three brushes, which was impressive! The only thing noticed was that the Angled Liner brush did get a bit stained with my gel liner.

Final Thoughts: So far, so good! I really enjoy all three of these brushes, and I'm really excited to get the last four of the collection. I will definitely have to do a follow up and let you all know how these brushes are holding up, but after my first use/wash, these brushes have definitely impressed me so far!

Are you planning on getting any of the new Bold Metals brushes? Which ones do you want?

- D.