menu

Showing posts with label face. Show all posts

Thursday, January 22, 2015

First Impressions: Real Techniques Bold Metals Collection -- Part 2 + Collection Wrap Up

I finally got my hands on all of the Real Techniques Bold Metals brushes! This is Part 2 in my two-part series on these brushes, so if you haven't read Part 1 yet, click here. If you have already read Part 1, then keep on reading.


I'm going to dive right in and get straight to the brushes. If you would like more of an introduction to what these brushes are, how they look, and the features, feel free to read Part 1!

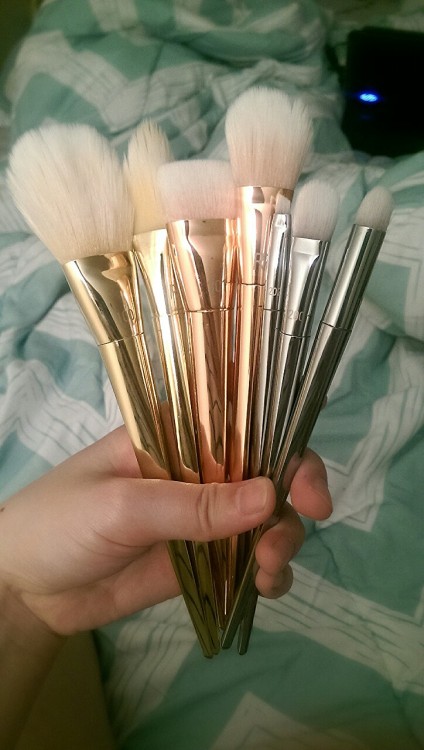
The brushes I was missing in Part 1 were the 100 Arched Powder, 101 Triangle Foundation, 301 Flat Contour, and 200 Oval Shadow. As you can see above, these are the brushes I will be reviewing today!


I wasn't certain about getting the 100 Arched Powder at first because I already had a powder brush that I enjoyed using. However, it was old and shedding, so I decided to spend the $26 and get this one! I definitely don't regret it. It's incredibly soft and luxurious feeling. It is a somewhat flat brush, almost like a larger, fluffier version of the 300 Tapered Blush. It's pretty standard in terms of what it does, but it feels like a treat putting this brush to my face. My only complaint is that, because of the white bristles, you can't tell how much product you have on your brush when using translucent powder.


The 301 Triangle Foundation REALLY surprised me. In fact, I almost didn't get it, because I normally hate flat foundation brushes, and this basically just seemed to me like a glorified version of the standard flat foundation brush. For the most part, I find that flat foundation brushes leave my skin streaky and cakey-looking. However, after using it I'm pretty impressed, especially after cringing at spending $24 on it. While the bristles are a little long, making the brush a bit flimsy, this brush can blend foundation out beautifully. I like to use the flat side to first "paint" on my foundation, and then use the pyramid-point side to blend it in! Because of the way the brush is shaped, I found that this is definitely the easiest and most foolproof way to use the brush. While it's still not my absolutely favorite for applying a more natural-looking foundation (I'd still reach for the Expert Face Brush over this one), I'd definitely use this on clients when trying to achieve a super flawless look!


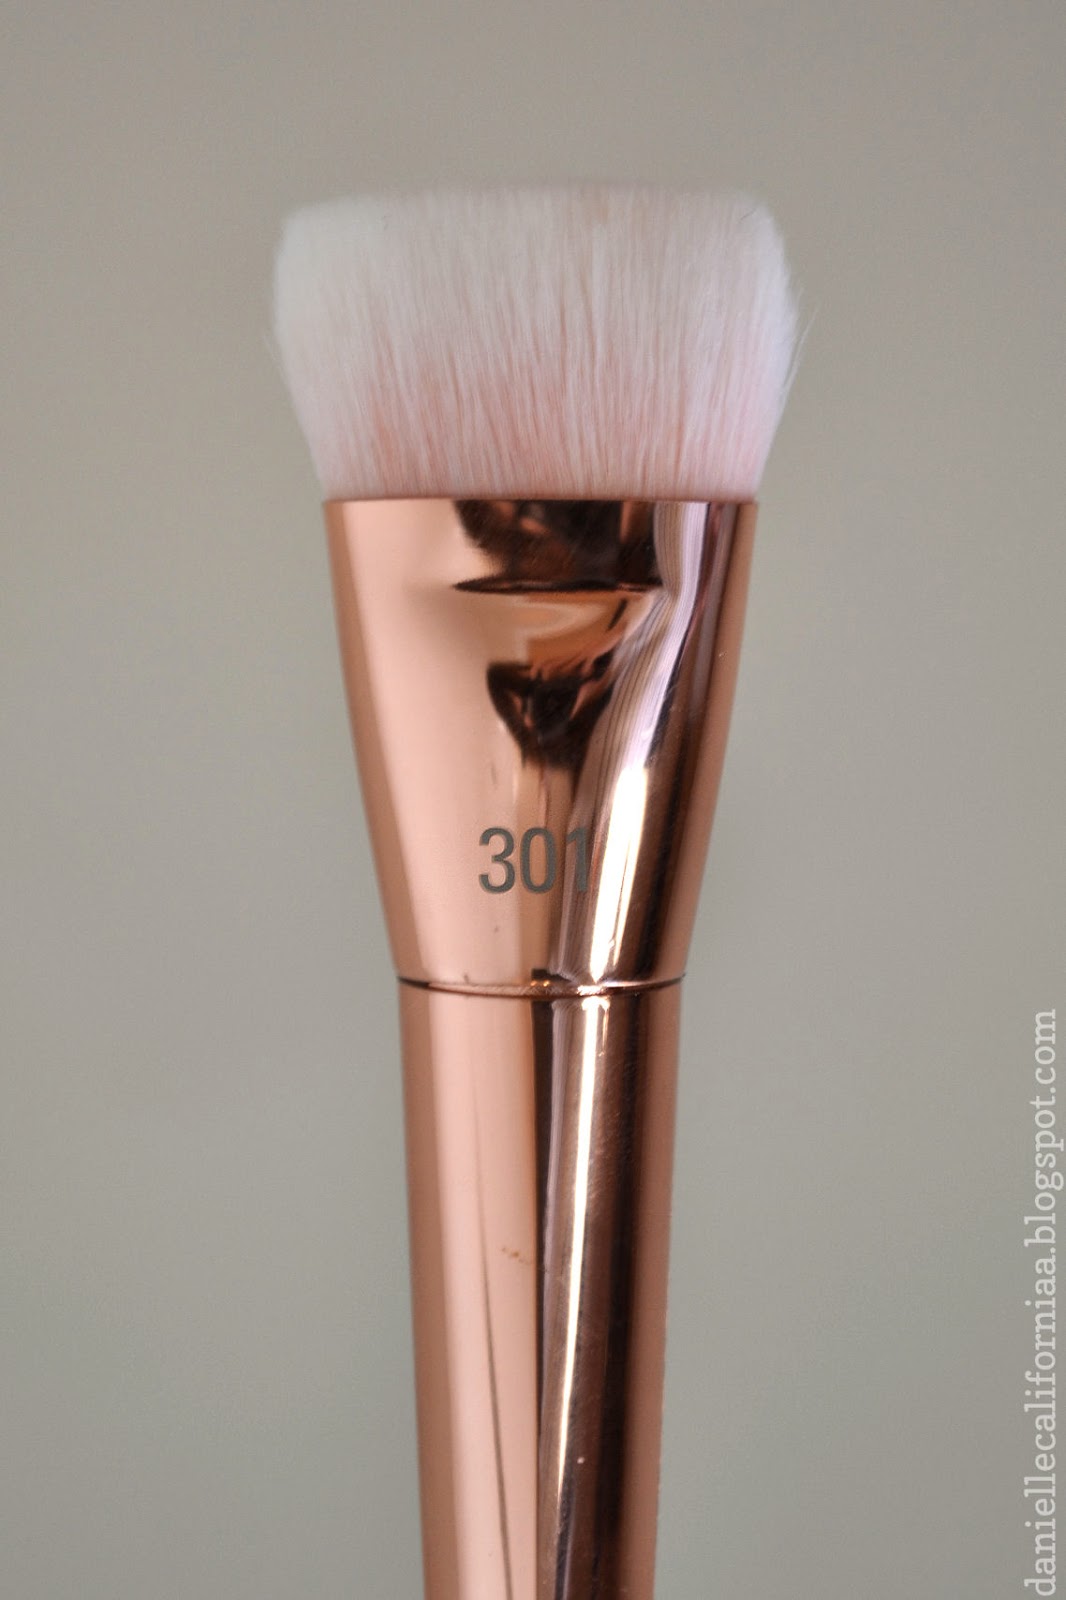
If there is one brush I'd say is a must-have in this collection, it's the 301 Flat Contour. It's $26 and worth every penny. Everything about this brush is just so right. First of all, the super short bristles ensure that your contour powder is going EXACTLY where you want it, without the bristles being flimsy and getting powder everywhere. And because the bristles are so incredibly dense, it blends product out like an absolute dream. I wish I knew how to express how much I adore this brush. Seriously. If you can get your hands on it, don't hesitate! It's a similar concept to the NARS Ita Kabuki Brush, but half the price! 


The 200 Oval Shadow is a bit of a struggle for anyone with smaller eyes. It's about twice the size as a MAC 239, and it's kind of easy to get product everywhere when using this brush. It's a little bit flimsy, making it a little bit difficult to apply product with. However, this would be a great "clean up" brush. What I mean by that is, sometimes, when I've gone a little overboard with the shadows and brought them too high up on my brow bone, I like to take either my face powder or an eyeshadow similar to my skin tone and use a brush like this to bring the colors back down to where they should be. Overall, it's an okay brush, but not a must-have by any means, especially at the $16 price point. 

Like the other brushes in this collection, these do not shed at all after being washed! In terms of drying time, it was pretty standard. I washed them in the evening, and in the morning when I was ready to do my makeup, they were all dry.

Final Thoughts: Nothing stands out to me like the 301 Flat Contour. I just can't. It's no wonder this brush was sold out for weeks after the collection was released. Overall, these four brushes are beautiful to look at, are easy to clean, and get the job done!


Collection Wrap Up: Overall, the Real Techniques Bold Metals Collection is absolutely beautiful. These are the kinds of brushes you want on display on your vanity! The quality of the bristles on every single brush is exquisite, as well as the general build of all of them. Now that I've used all of the brushes, let's go back and do a recap and final review!

The 201 Pointed Crease brush is large and dense, and costs $16. I wish it came to more of a precise tip, because it can be difficult to use on smaller eyes, but it blends out product flawlessly. The 300 Tapered Blush brush is quite small, and kind of like a fluffier version of a standard flat foundation brush. It costs $24. I've played with it quite a bit since purchasing it, and I've realized that it is actually the perfect brush for setting my under eye concealer and for highlighting the face! I much prefer using it for more precise applications than blush. The 202 Angled Liner is very small, dense, and pointed, and costs $16. It's a little bit sharp, so if you have sensitive eyes, be wary. However, if can give you a super sharp and precise line! It is also fantastic for filling in the brows. Because it is so small and precise, it successfully applies even powder products in a way that looks like small brow hairs! The 100 Arched Powder is a standard powder brush that costs $26. It's not really anything special, but it is super soft and doesn't shed at all, which makes the final steps of my foundation routine just that much more enjoyable. The 101 Triangle Foundation brush is not quite what you'd expect, and definitely an upgraded version of a standard flat foundation brush, at $24. It creates a full-coverage canvas, which is perfect for anyone who wants to achieve a flawless look. The 301 Flat Contour is the creme de la creme, and worth the $26, hands down. An absolute must-have. It both places and blends contour powders like an absolute dream! Finally, the 200 Oval Shadow brush, is a little bit difficult to use for smaller eyes, but it places products well and feels soft on the lids. It costs $16.

Of course, you can definitely do an entire look using this entire collection. It is definitely a full set of brushes, and can easily help create a professional look and feel to your makeup look! This is a preview of a look I'll be posting soon, with which I exclusively used the Bold Metals brushes to apply the product.


I hope you found this First Impressions post helpful, and I really enjoyed getting to use these brushes! Is there anything out right now that you would like me to review? Let me know in the comments below!

- D. 

Wednesday, January 29, 2014

Beauty 101: Facial Anatomy Breakdown for Beginners!

I know lots of my readers are very new to makeup. I remember when I was a sophomore and first really began to explore makeup, I would watch +Makeup Geek's videos (I can't believe I've been watching her videos for almost 5 years now!) and just be completely absorbed in her knowledge. This was the very first video of hers that I ever watched, because I had just joined colorguard earlier that year, and our school color was green. I remember watching her video and being so confused about some of the terminology she was using. What was a crease, what was an outer v, what was the waterline, and how the heck did you apply false lashes!? The only thing I knew was how to apply eyeliner (horribly, I might add), and mascara. Of course, as I explored more into the beauty world, I discovered what each part of the face was, and it helped my application immensely. So here we go!


A. Outer Corner or Outer V. Typically where a dark color is applied to add definition, the outer corner or outer v is a sideways v-shaped pocket on the outer edge of your eyelid. Applying a darker color here can give the illusion of wider set eyes. 
B. Crease. The crease is exactly what it sounds like -- it's where your eyelid creases. This is where the eyeball and the brow bone meet.You will often see that darker colors are applied here to add dimension and to create the appearance of a deeper crease. Some eye shapes (such as monolid eyes) don't have a defined crease.
C. Inner Corner. The inner corner can sometimes be incorrectly called the tear duct. The tear duct is a fleshy pink fold inside your eye, and it's best to avoid getting product there. However, your inner corner, which is the skin around your tear duct, is often highlighted to create a brighter, more youthful appearance.
D. Brow Bone. The brow bone where your eyebrow sits, also known as the superorbital ridge. It separates the frontal bone (the forehead) from the eye socket. The skin around the brow bone is often lighter than that on your lid, but it  is often highlighted to add dimension and to create the illusion of cleaner brows.
E/F. Upper and Lower Lashline. The upper and lower lashline is where your lashes grow. You could consider them the garden for your lashes. When dark eyeliner is applied to the upper or lower lashline, it can create the illusion of thicker, fuller lashes.


G. Hollow of the Cheek. The hollow of the cheek is underneath the cheekbone, and can most easily be found by sucking in the cheeks or making a fish face. By using a darker shade in the hollows of your cheeks, you can make your cheekbones look more defined, and it can also give a slimmer look to your face. 
H. Orbital Bone or Orbital Socket. The orbital bone, or, more appropriately, the orbital socket, is a collection of bones that create the eye socket. If you think of a skull, it is where the eyes of the skull would be. The orbital socket is made up of seven bones, but primarily the frontal bone (forehead),the lacrimal bone (which is separates the two orbital sockets), the zygomatic bone (cheekbone), and the ethmoid bone (which is behind the nose, and separates the nasal cavity from the brain). The only two bones that make up the orbital socket that you really need to know are the brow bone and the cheekbone. 
I. Jawline. The jawline is the line created by the lower jaw, and starts where the upper and lower jawbones meet. A "strong" jawline will be more square, while a "soft" jawline will be more rounded. You can change the shape of your jawline by highlighting and contouring. 


J. Apple of the Cheek. The apples of the cheeks are the fattiest part of the cheek, which can most easily be found when you smile. They become more rounded and noticeable when you smile, and it is the part of the face that the old lady at the supermarket used to pinch when you were little.
K. Side of the Nose. The side of the nose is the downward angle created by the bridge of the nose, as well as the nostrils. For a slimmer looking nose, you can apply a darker contour shade along the sides of the nose.
L. Bridge of the Nose. The bridge of the nose is created by two smaller bones. Think of it as the peak to the mountain. Some people have ridges or bumps in the bridge of their noses, while others have smooth bridges. It typically starts between your eyes, and ends at the tip of your nose.
M. Waterline. The waterline, or the tightline, is the fleshy section of your eye area that separates the lashline from the eyeball itself. It can be lined with a dark color for a smokier, more dramatic effect, or with a nude or white color for an awakening effect. Only use waterproof pencils or waterproof gel liner in the waterline, otherwise you will end up with a goopy, blurry mess (if you've done it, you know exactly what I'm talking about)!

The one thing I forgot to add to these photos was the Cupid's Bow. The cupid's bow is found on the upper lip, where your lips peak and fall. If turned sideways, it looks just like a hunting bow!

I hope this helps all you beginners out there!

- d.

p.s. Don't forget to enter my giveaway! It ends February 5th! 

Friday, November 22, 2013

Face and Outfit of the Day -- Job Interview Edition

So today, I had my second interview at Sephora (woo hoo!)

I thought that, because Sephora is such a fun place for makeup, I would show you the makeup I wore for the interview, as well as the outfit (which is significantly less exciting, but it may help some of you who are looking for some good professional attire!)

I'll start with my outfit.


We'll go from head to toe! My headband is from Icing. I bought it a few holiday seasons ago so I'm sure they don't have it anymore, but it's just a simple bow headband. It is pretty similar to this headband, though, which is also from Icing. Around my neck is my beloved bow necklace that I actually haven't worn in quite some time. I got it from eBay, a few years ago, and can still be found here! It is a gorgeous gunmetal color, and the photos online definitely do not do it justice. My shirt is a basic black t-shirt from H&M, which is tucked into a slitted pencil skirt from Target. This is another one of those items that I bought quite some time ago and is no longer available at Target, but black pencils skirts are a staple and can be found just about anywhere! My shoes are also from Target, and definitely aren't as cute in the picture as they are on my feet! Plus, they are SO comfy, and wear really well. I tend to walk with my toes up (from a few good years of marching I assume), so a lot of shoes wear out around my toes really quickly. My belt is the same belt I wore in my last OOTD, which actually belongs to my best friend, so I am not sure where it's from.


My nails were inspired by +leighannsays, and I used my L'Oreal Color Riche Nail Color in "Eiffel For You" with my N.Y.C. Longwearing Nail Enamel in "Plaza Plumberry" for the triangle accent. It's the first time I've ever done a manicure like this, so it's anything but perfect, but I think it turned out pretty well for a first time try! 


The look I wore today was definitely a fall-inspired look, with some oranges and wine colors. Unfortunately, my camera was going crazy today and didn't seem to want me to be able to get a very good photo of it. Also, please excuse my crazy hair. I am in desperate need of a good hair mask. 

First, I used my Too Faced Primed and Poreless face primer, and over that, my L'Oreal True Match Foundation in the shade C2. Then I went straight into the brows, with Inglot 358 Matte and my Ardell Brow Sculpting Gel (not pictured). Then, I ran my Rimmel London Scandaleyes Waterproof Kohl Kajal in "Nude" to help shape and define my brows just a bit more. Then, I applied my Urban Decay Primer Potion (not pictured) to help my shadows stay put. Then I went in with my Coastal Scents 252 Ultimate Palette


This palette comes with three tiers of shadows: one with cools tones, one with neutral tones, and one with warm tones. I used the warm tier, and applied a shimmery peach color on the inner third of my lid. I then took a matte plum color and rocked it in my socket as well as the outer corner, being careful to blend it out really well. I then used a bright matte orange to add an extra pop of color on the center of my lids, as well as a matte brown to deepen the plum in my outer corner. I also ran the shimmery peach color along the inner corner. 

After applying my eyeshadows, I went back in with my Maybelline Eye Studio Lasting Drama Gel Eyeliner in "Blackest Black" and created a defined winged liner. It's a bit difficult to see in the picture, unfortunately. I then took my nude Rimmel pencil and ran it in the lower waterline, as well as under the wing to give it some extra definition. 

After all this was applied, I went in with my new holy grail concealer, the Rimmel London Wake Me Up Concealer in Very Fair. I applied this to the undereye area, as well as down the bridge of my nose to add a bit of highlight. This concealer is amazing for my dry-combination skin. I then went in and powdered with my Revlon Photo Ready Translucent Finisher, and contoured with the same Inglot powder I used on my brows. On my cheeks, I used my favorite blush (of all time), Wet 'n Wild Color Icon Blusher in "Mellow Wine," and on my lips, my Wet 'n Wild Megalast Lip Color in "Sugar Plum Fairy." Finally, I used my Maybelline The Mega Plush Volum' Express Mascara. And of course, I spritzed some Mac Fix+ to add a lovely finish to the skin!

- d. 

p.s. in case you were wondering, I got the job!

Thursday, November 14, 2013

REVIEW: Maybelline Color Sensational Color Elixir

Time for a quick review!

I recently saw this advertisement for the Maybelline Color Sensational Color Elixir, while watching Once Upon a Time with +Andrew, and when we saw the commercial, we could not stop laughing. Cosmetic commercials will always be hilarious to me. Regardless, I was intrigued. They described it as a "creamy lip lacquer." Personally, I love lip lacquers. I love the longevity of them, in comparison to lipsticks or glosses, and I love the pigmentation in them. So this commercial instantly made me curious to try them!

image

This is the model from the Maybelline website in the color "Signature Scarlet." The website reads, "Fall under the spell of the elixir effect...Hyper-saturated color, ultra cushiony feel...The new hypnotic lip sensation." 
A few days after seeing the commercial, I ran out to my local Walmart and purchased two of them -- one in "Signature Scarlet" and one in "Mauve Mystique."


There are 20 shades in the collection, ranging from nudes, to purples, to bright reds, and even a couple of orange and coral shades. I purchased "Signature Scarlet" because I'm always on the lookout for a good red, and the color in the picture was amazing. 

Today, I wore it out for the first time!


I must say, the opacity of this is phenomenal. I was absolutely shocked. It was so smooth, vibrant, and non-sticky. Sticky lipglosses are the #1 reason I don't typically wear lipgloss. I have noticed that this product doesn't swatch very well, but for some reason, it glides so beautifully on the lips. This red is a glossy, cool-toned red, and the mauve color is defined by "my lips but better." The colors do stain, so they are somewhat longwearing. In terms of full-on vibrancy, though, they last about 2 hours (if you aren't eating or drinking) before they being to fade. This is coming from someone who has an anxious habit of lip biting. 

Something I really loved about this product, though, is that when I took it off, my lips actually felt smoother. The commercial claims that it has an "addictive cushiony feel of a balm." I totally agree with that. After putting it on for the first time, I just kept rubbing my lips together and wanted to put on more and more product because it felt so nice and smooth when applied. 

Now for the negatives. This is a messy product. If you plan to wear this, bring a mirror with you to check for feathering and smears, because it will do both of those things. I am curious to see if using a lip pencil will help the feathering, but you do need to keep an eye on it if you are wearing it. 

All-in-all, I'd say this is a great product. It feels so nice when applied, and creates a beautiful, pigment-rich lip look. 

- d.

Saturday, November 9, 2013

Makeup and Outfit of the Day!

So today was a bit of a special day for my guard. It was the first time that the marching band has ever been allowed to perform for a football game. Weird, right? Most schools have their bands play halftime shows normally, but at the school I teach at, they have never performed. Anyways, it was also senior night, and two of my girls are seniors. One of them asked me and Kiyoshi to be her escort for senior night. Basically, we came out on the field and met her and walked with her. It’s just kind of a high school tradition kind of things to honor the marching band, colorguard, cheer, and football seniors. 
I figured since I was getting dressed somewhat nicely for this, I would do an outfit of the day! Plus, I would show my makeup for the day as well.


So on the left side was my outfit for before the sun set, and the outfit on the right was for the actual football game, since I knew it would be cold.

My sweater and skirt are both from Target. The sweater was a recent purchase and it is SO soft. If you can get your hands on a couple, snag them! It comes in a ton of different colors and is totally worth the purchase. My watch is from Charming Charlie, and was featured in my October Favorites. My super cuteroll-down boots are the Dr. Marten’s “Stratford” boots. They have this adorable floral pattern on the inside, and can be rolled down for a girlier look, or laced all the way up to create a combat boot style! These boots are great for me, because my last pair of combat boots lasted about a month or two with all the wear I put into them. I expect these Nappa leather boots to last and last and last. As for my jacket, it is faux leather from Aeropostale. But it isn’t that plastic-feeling leather. It is SO soft and comfortable and one of my autumn staples. I bought it last fall, so they don’t have it anymore, but they did come out with a red version and a quilted version. My scarf is from Walmart, and I believe I bought it for about $6, which was a total steal, especially because I’ve been wearing this scarf everywhere! It has sequins weaved into the fabric, which gives any outfit just a little extra punch. Oh yeah, and my studded black belt belongs to my best friend, Christine, so I have no idea where that came from! I think it’s from Target, though.


Now for the face! On my skin, I mixed my moisturizer with my L’Oreal True Match Foundation in the shade C2. Yeah, I’m pale. I mixed it with my moisturizer because I have dry-combination skin, and with these chilly autumn nights on the football field, I need the extra hydration. Then I went on to my eyebrows, which I filled in with Inglot 358 Matte, and sealed that withArdell Brow Sculpting Gel. I also used this shade in my crease, and then Inglot 397 Pearl on my lid and in my inner corner. I did not use a base, because for me, these shadows do not crease at all. To each her own! For my liner, I usedL’Oreal Carbon Black Lineur Intense, which was also featured in my October Favorites. Then I ran Urban Decay’s 24/7 Glide-On Eye Shadow Pencil in Delinquent along my lower lashline, using an angled brush to create a double wing under the liquid liner. For my undereye concealer, I used Maybelline’s Instant Age Rewind Dark Circle Eraser in the shade Fair 110, and blended it out with my ring finger. I used my Revlon PhotoReady Translucent Finisher to set my foundation and concealer. Then I mixed the two colors in the e.l.f. Studio Contouring Blush & Bronzing Powder in St. Lucia (total dupe for Nars Orgasm/Laguna duo, by the way), to add some color to my cheeks. And finally, I used MAC Fix+ to add a lovely, dewy finish to my look! Special shoutout to my Revlon ColorBurst Lip Butter in the color Creme Brulee for adding just a little something extra to my lips! 


I’m sure some of you are wondering why I didn’t use mascara. Today, I chose not to wear mascara because I knew it was going to be a long night and that it would begin to irritate me. I wear glasses. Sometimes I don’t wear mascara simply because I can feel it against my glasses and it drives me absolutely insane.


Hope everyone had a great Friday! 

-d. 

Friday, November 1, 2013

First post and October Favorites!

Hello! Sooo, as many of you may already know, I've been really into the whole beauty industry for quite some time now, and since I was 16, I have been the go-to hair and makeup artist for many of my friends, and friends' friends. When I was 18, I started in beauty school, where I primarily learned hair styling. About 6 months later, I realized it wasn't what I wanted to do with my career, and I left beauty school (insert "beauty school dropout" lyrics here). However, that has not stopped me from being passionate about the beauty industry! That's why I have decided to start posting my favorite beauty, fashion, and lifestyle favorites from month to month, just like a lot of my favorite YouTube beauty gurus. 

Let's start with a rediscovered favorite. 


L'Oreal Carbon Black Lineur Intense. This is my all-time favorite liquid liner. While I typically tend to go for cream or gel liners, Lineur Intense is perfect for just about any eyeliner look. I forgot about this liner for a while, but when I recently saw it in Target, the fire was rekindled. The sponge tip allows it to apply with ease and precision, and is different than the typical felt tip or brush applicators sometimes seen with liquid liners. It is flexible like a brush, which allows for ease of application, but thin and precise like a felt tip, which allows you to build up your liner from super fine to thick and bold. And if you're looking for a black liner, let me tell you. This one is...well, carbon black. In terms of wear time, it lasts and lasts and lasts. I have oily lids, and once this stuff is dry, it won't budge until I'm ready to take it off. But when wet, it is easy to manipulate, and if you mess up, no worries! Just take a wet cotton bud and it cleans up easily.


Wet n Wild Mega Last Lip Color -- Sugar Plum Fairy. This is a truly versatile lipstick. Not only is it the most gorgeous berry color, perfect for the fall, but it can easily double as a cream cheek color! This lipstick has been my favorite cheek color for October. Crazy, you say? Try it yourself! It has a semi-matte finish, with a creamy consistency, so it will not dry out your skin or make it look oily. Just rub the color between your fingers and pat it on your cheeks. Use a buffing brush or sponge to blend it, if your fingers aren't doing the job. This stuff does have a tendency to stain, so it will last! 


Maybelline The Mega Plush Volum' Express Mascara. I've never been a fan of the flaky, clumpy lash look, and I'm not blessed with super long, healthy lashes. This mascara is great for me. It definitely adds volume and length, without making your lashes look clumpy, AND it stays soft while holding a curl! To me, it's almost a "no-mascara" mascara. It feels nice on the lashes and is buildable. It is a very wet mascara when you first apply it, so if that's not your thing, skip it. I hear this mascara is typically a hit or miss, but for me, it's a hit.


Soap & Glory Hand Food Hydrating Hand Cream. Some of you may already know, I am a colorguard coach. As a colorguard coach, I am very hard on my hands. And now, going into these cooler months, my hands will really begin to feel the wear and tear. However, this hand cream has been my savior! I've seen it talked about a million times and I am in love. It smells divine. The smell alone would make me want to use it. But not only does it smell good, it is so creamy and rich! And it isn't the kind of creamy and rich that lingers on your skin so you can't do anything with your hands. It soaks in quickly and leaves your skin feeling soft and smooth. I have the travel size that I keep in my bag. 


Essie Nail Lacquer -- Vested Interest. Anyone who has followed me for a long time will know I'm not a fan of Essie nail polishes. I am so picky about polishes. I like them to be thick, but not goopy. Essie has a tendency to be too thin to achieve the opacity I like without pushing into 3-4 coats. However, Vested Interest is a gorgeous, teal gray creme that is opaque in 2 coats. Honestly, I don't know why I love this polish so much. I tend to stay away from blue-ish polishes, but this one has been on my nails nonstop since I purchased it. It has great staying power. As I said before, I work with my hands a lot, and this polish typically stays on for 5 days before beginning to chip. Maybe my bad Essie luck has changed? 


Bath & Body Works 3-Wick Candle -- Leaves. This is an autumn staple for me. Leaves is such an amazing scent. I even have the Scentportable for my car, and get compliments every single time someone new sits in my passenger seat (despite how messy my car actually is)! It is described as a "rich blend of golden nectar, red apple, and spiced berries." In the last month, I have burned it practically every night, and when B&BW had their 2 for $22 candle sale, of course I had to buy another one, as well as their Cinnamon & Clove Buds candle. I love pairing this with my Candle-lite Essential Elements Vanilla & Sandalwood candle (that's a mouthful), which I found at Rite Aid. Absolutely amazing, and it's burning as I type.


Charming Charlie Right On Rhinestone Watch -- Gunmetal. There isn't much I can say about this watch. Just a standard boyfriend watch with rhinestones in a gorgeous gunmetal color! I've been wearing this pretty much every single day since purchasing it. The cool thing about it was that I received a sizing kit with my purchase (basically a blunt thumb tack with instructions), so it fits just right for me now!

- d.