menu

Showing posts with label beauty. Show all posts

Sunday, January 19, 2014

Johanna Mason's Interview Look + Giveaway!

So now we've come to the final look of the series! This makeup is from the scene when Johanna cusses out the Capitol citizens. She is so gutsy! 


This look was so much fun to do! I primarily used my Too Faced Chocolate Bar Palette for this look. 


I first started out with an eyeshadow primer. Any primer will do, just something that will really hold onto the pigment. Then, I took the gold color, Creme Brulee, and packed this all over my lid and onto the orbital bone, but not quite all the way to my brows. I wanted to leave an empty space for the highlight color. I did this in a rounded shape. I also applied this color along my lower lashline and smudged it out.

Next, I took Milk Chocolate, which is a cool-toned light brown, and placed this on the orbital bone, into the crease. I also blended this color along the sides of my nose, near the brow, to create dimension. Jena Malone's makeup artists really love to accent her gorgeous bone structure this way! I used a fluffy domed shadow brush for the Milk Chocolate color. 

I then took an angled brush and Triple Fudge, and filled in my brows. I have very sparse brows, so this was a necessary step for me, but if you have great brows like Jena Malone, feel free to skip this step! I took a spoolie and blended out the brow color. I also took this same dark brown color and angled brush and lined my upper lashline, using a pencil brush to add a smoky effect. Then, I took White Chocolate under the brow. 


From here, I moved onto the face, using the same products I have used in every look I do, which you can find in any other makeup look or face of the day post! I also took Milk Chocolate on a fluffy domed brush and contoured my cheeks, as well as my nose. Milk Chocolate is a great contour shade, especially for really precise application. I used "Strawberry Bon Bon" from the Chocolate Palette as my blush. I then applied a light coat of my Maybelline The Mega Plush Volum' Express Mascara. I ran a clean spoolie through my lashes to ensure that it was a very light coat. 


Now moving onto the most important part of this look: the lashes! I bought these lashes from Elegant Lashes, and they are the exact style used in the movie. I simply applied my Duo Eyelash Adhesive in "Clear" to the band, let it sit until it was tacky, then placed them underneath my lower lashes. Don't worry if you can see the band. This look isn't supposed to be natural, despite the fact that she's a tree. ;)


For the lips I actually used a cream shadow, which was the Rimmel Scandaleyes Eye Shadow Paint in "Golden Bronze." I used a lip brush to neatly apply it, and I was done!


Now for the big surprise I keep talking about! 

I seriously have had so much fun doing this series, and I have gotten such positive feedback from it. So I wanted to give back to all of my followers! I have decided to do a GIVEAWAY!!! 


For this giveaway, there will be two winners. Each winner will receive a fun Catching Fire prize pack! 

I will be giving away the CoverGirl Catching Fire Limited Edition Nail Polish in "Seared Bronze," as well as the Nail Stickers in "Tawny Flame." I used both of these products in my last Katniss look (but don't worry, you'll be getting these products brand new and still in the packaging). The winners will also receive a brand new pair of lashes, just like the ones I wore in this post, as well as a replica Mockingjay pin! 

So here are the rules:
  1. This giveaway is international! I will be choosing two winners at random via Rafflecopter.
  2. If you are under 18, please get your parent or guardian's permission before entering this giveaway.
  3. This giveaway will end on February 5th, 2014, at 12 AM, PST.
  4. You MUST leave a comment below explaining why you want to win this prize pack. You will only receive one entry for this. Multiple posts will not grant you multiple entries.
  5. You may tweet about the giveaway once per day. For each tweet per day, you will receive one entry.
  6. You may follow me on Instagram! You will receive one entry.
  7. You may reblog this post on Tumblr! One reblog per day will get you one entry per day. 
Use the Rafflecopter widget below to ensure that your entries count!

a Rafflecopter giveaway

Good luck! And may the odds be ever in your favor...

- d. 

Friday, January 17, 2014

Too Faced Chocolate Bar Palette Review

If I'm being honest, this post has not been planned at all. I have a list of ideas for blog posts, and I generally know what I'm going to do or say. But I have been eyeing this palette for a while now, ever since they began to advertise it on the Too Faced website, and while in Sephora yesterday, I caved. I just had to have it!


As of right now, this palette is sold out on the Too Faced website, but it can be purchased at Sephora and Ulta! It retails for $49. In this palette, you get 16 chocolate-inspired shadows. Like the other chocolate products that Too Faced is known for, the shadows in this palette are made of pure cocoa powder, which you can smell when you open it up. It isn't overpowering, but it's definitely there. It has 6 matte shades, and 10 shimmers.


First things first: the packaging. This palette is beautiful to look at! The packaging is metal, and the mirror seems sturdy. It's compact, it's sleek, and easy to fit just about anywhere. I have one major beef with it though. It has a weak magnetic closure. Usually, I don't mind magnetic closures. I mean, I love my Inglot palettes! But this magnet in this palette isn't enough to keep it closed, and it could easily open up and get ruined if not properly stored. 

Another flaw in the packaging is that the names aren't on the palette. It comes with a little plastic cover that has the names on them, but after taking and labeling the photos of the product, I don't even remember where I put it.

So how are the shadows themselves? 


Gilded Ganache: This shade is a cool brown, with gold and bronze microglitter. Not much to say about this shade. Good color payoff, and the glitter is definitely noticeable.

Salted Caramel: One of the smoother (if not the smoothest) matte colors in this palette, Salted Caramel would make a fantastic blending shade. It's a warm light brown, very comparable to Urban Decay's Naked shadow.

Hazelnut: This is a gorgeous bronze shadow, which reminds me of a less shimmery version of Urban Decay's Smog. It's very smooth, and has great color payoff.

Marzipan: Probably one of my favorite shades in this palette, and I know I'm going to use it a ton. It's a shimmery light pinky peach shadow that would be great as an all-over lid color.

White Chocolate: This is a matte, creamy off-white shade. This would be a great blending or highlight shade for anyone with fair skin. It's not chalky, but it's not incredibly smooth either. It also tends to grab when applied.

Creme Brulee: This a very true, cool-toned gold color, with lots of shimmer. It's incredibly smooth and pigmented.  

Semi-Sweet: This is the warmer-toned brown in the palette. It's like if the color "brick red" had a cousin named "brick brown." Initially, the color payoff isn't great, but it definitely builds well.

Haute Chocolate: This is a pinky brown shimmer. I'd compare it to a shiny new penny. It's smooth and pigmented, and really easy to apply.


Milk Chocolate: This is the cool-toned counterpart to Salted Caramel, and totally comparable in texture. It's a cool, matte light brown and a great blending shade. 

Strawberry Bon Bon: This cool baby pink shade is probably the most disappointing shade in the entire palette. First of all, it seems a little out of place. It's also the chalkiest shadow in the palette, and the color payoff could be described best with a "meh" and a shrug. 

Cherry Cordial: I guess this is considered a shimmer, but it's more like a matte brick red shadow with multi-colored microglitter. The color payoff is okay, but it can definitely be layered and built up to a deep brick red color.

Black Forest Truffle: This color is insanely glittery. It is a deep wine color, with TONS of silver and bronze glitter. It's also very pigmented, and you don't have to completely pack it on to get the glitter to show up.

Candied Violet: This is a really pretty cool-toned purple shimmer. Really great pigmentation, with lots of pink and green duochrome microglitter. It applies very smoothly. 

Triple Fudge: This is the cool-toned counterpart to Semi-Sweet! Definitely a great crease color, and, like Semi-Sweet, it builds well.

Amaretto: This shade sucked me in the moment I saw it. I love bronze colors like this one! It's incredibly shimmery, and applies smoothly, with great color payoff. 

Champagne Truffle: This would be a fantastic inner corner highlight shade. It is smooth and very shimmery, and would also be great to layer on top of other colors to add some extra shine. 


I think that Too Faced did a fantastic job balancing cool and warm tones in this palette. A couple of the matte shadows are hit-or-miss, but the shimmery shades are really smooth, pigmented, and all of the shadows are easy to blend. 

I love that this palette has a great variety. While it is definitely a neutrals palette, it also has some lovely shades to add a pop of color. This is a "complete" palette, meaning that you could easily create a look using just this palette. It has some great mattes for blending, and the looks you could create with this palette are endless! Many of the shades are comparable to many of the shadows found in Urban Decay's Naked palettes, and this is a great response from Too Faced to all of the Naked 3 hype.

Final Thoughts? This is definitely a palette I will find myself using often, especially for travel. Unfortunately, I think I will probably have to tie a rubber band around it to ensure it stays closed, but it is sleek and doesn't take up much room. It is a versatile palette, yet still basic enough for beginners! For all that you get, I certainly think it's worth the $49 price tag.


- d. 

Saturday, January 11, 2014

Katniss Everdeen's Tribute Parade Look

Now we're back to the Catching Fire mini-series! We're almost done, just one more look, and in the next post, I have a surprise!

This is the look Katniss wears in her second tribute parade, before entering the arena for the Quarter Quell.


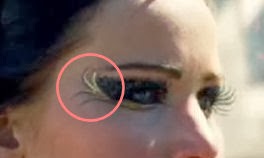
Jennifer Lawrence's makeup artists definitely didn't hold back on the glitter in this movie. It looks like it's a pretty chunky black and gunmetal glitter on her eyes, and a gorgeous gold liner, almost like feathers.


Despite being fairly simple, this look is very messy, and I made sure to keep cotton swabs and makeup remover on hand at all times. To create a solid base for the black shadow, I took a Milani Liquid Eye Eyeliner Pencil in "01 Black" and created the shape I wanted for my lid. I took it up through the crease, being very particular about where I placed the product. I used my finger to blend the cream color out, then I took a matte black shadow and a flat shader brush and pushed the color into the liner, to prevent fallout. 


After I placed the color, I took a cotton swab and some makeup remover and went along the edges to clean up any fallout, and to create a crisper edge. Next, I took a gunmetal cosmetic glitter from Claire's and, using the same flat shader brush, I pressed this into the black shadow. I held a tissue under my eyes to prevent the glitter from getting everywhere. 


Now comes the hard part. I took NYX Loose Pearl Eyeshadow in "Yellow Gold" and mixed it with a spray of my Mac Fix+ to create a paste. I used this for the feathery strokes along the outside of the eye. I took a precision liner brush and very carefully and quickly drew in the strokes. I also took this wet shadow under the lower lashline, stopping at the inner corner. Before the product completely set, I took the loose shadow, dry, and patted it over the wet shadow to brighten it up. 


I completely forgot to take a picture of this next product, but if you've been keeping up with this mini-series, you'll recognize the product from Johanna's Tribute Parade Look. I wiped off my precision liner brush and took my Maybelline Eye Studio Lasting Drama Gel Liner and carefully lined the accent points on the feathery strokes.


After I accented the feathers, I again took my Milani Liquid Eye Eyeliner Pencil and lined my upper and lower waterline, as well as my lower lash line. Finally, I applied a pair of generic eBay lashes, like I did in my last Katniss look.

I used Rimmel Professional Eyebrow Pencil to fill in and straighten out my brows, much like Jennifer Lawrence's.This brow pencil is great for on-the-go because it comes with a brow brush on the cap! I highlighted the browbone with my MAC Studio Finish Concealer in NW25 (which actually isn't even the right color for me, but it works well for this step). 

From here, I did my face, layering my foundation for a more flawless finish. On the cheeks, I used my trusty Inglot 358 Matte as a light contour, and the mauve-toned blush from my Morphe 10 Color Blush Palette. Since her lips look pretty natural, I simply applied my Jack Black Intense Therapy Lip Balm


For this look, I decided to do something a bit different, and do some Katniss inspired nails! 


For this manicure, I used a gorgeous berry color on my nails, which was Revlon Nail Enamel in "Bewitching." On the accent nail, I used a polish from CoverGirl's Limited Edition Capitol Collection, which is called "Seared Bronze." I got this polish in a pack with the nail stickers in the style "Tawny Flame," which I also used on my nails for this look. I was actually quite impressed with this bronze polish from CoverGirl. The glitter was gorgeous and it was so opaque! It looks especially amazing in natural sunlight.


- d. 

Thursday, January 2, 2014

REVIEW: Anastasia DipBrow Pomade

Recently, Anastasia Beverly Hills, known for their incredible brow products, released a new product that caught my eye: DipBrow Pomade. Their website says, "Waterproof brow color ideal for sculpting, defining, and carving perfectly precise brows that won’t fade. Smudge-free, creamy formula glides on skin and adheres to hair. Must-have for oily skin and humid climates. Tighten cap to prevent drying."

Now, I don't typically have oily skin, but I do have oily lids, and I am a sucker for anything that claims to be waterproof, long-wearing, and smudge-proof. It also claims to be non-comedogenic. So when I first heard about this product, I decided I wanted to give it a try! I purchased the shade "Dark Brown," which is a neutral-toned brown.


The package arrived in a bright metallic blue bubble wrap envelope, and inside was the product as well as a travel size of their Clear Brow Gel. While I'm typically not the type of girl to complain when given free stuff (or not given free stuff), I would have very much liked to see even just a cheap little mini angled brush or something. It would have been convenient for anyone who doesn't already have a brush. However, onto the product itself!


In the "before" photo, you can see my naked brows. In the "after" photo, you can see my brows when the product has been applied. I used a synthetic angled brush to apply the product. Now what I discovered instantly is that a little bit goes a very long way. I love thick and defined Cara Delevingne-esque brows, but you definitely don't need a lot of product to fill in your brows. Now I decided to put it to the work day test.

I had a pretty normal work day, but my skin tends to get rather oily when I'm at work because of the air conditioning. Because of that, I usually find that my makeup tends to fade a lot, and I get very shiny. At the end of my day, about 7 hours later, I came to find that I looked like this: 


Why, yes, I am totally aware that I look like a hot mess. However, despite the oily face, my brows are still defined and in tact! 

I was going to just post these findings and give my review based on a normal work day, but then I decided I should really put it to the test. Some of my best friends and I went to a place in my city called Belmont Park, which is basically just a little boardwalk amusement park at Mission Beach. We first went to Belmont Park, and rode a few rides and played some games, then we went to the beach. We were probably there for a total of about 6 hours, but then we went over to one of my friend's houses and hung out in their jacuzzi for a good hour or two. After that, we went into her house and ate and watched a movie. I was out and about for 11 hours. 

Here is what I looked like at 10 AM...


And then again at 9 PM...


I think my brows still look pretty good after 11 hours against the sun, wind, and water! When I swatched the product on my arm, I let it set for about 30 seconds, and did a rub down test.

Swatched with dry hands.

After some really vigorous rubbing with wet hands.

And more vigorous rubbing, this time with my Sephora Collection Cleansing Water on a cotton ball.

All in all, I'd say I'm pretty impressed by this stuff! It holds up really well in some crazy conditions, and I would definitely trust this product to last. I would probably suggest using an oil-based makeup remover to get it off though, because I was rubbing my arm raw when I was trying to get it off with the cleansing water. Trust me, when I say "vigorous rubbing," I really was trying my best to get it off! 

As of right now, this product is only available online, at Anastasia.net, Sephora.com, and Ulta.com. On all three websites, it runs for $18, and I think it'd definitely worth the price, especially because you get a substantial amount of product! From what I've read, it should be released in stores in January 2014, so keep an eye out for it! 

- d. 

Tuesday, December 17, 2013

How I Clean/Disinfect My Makeup Brushes & DIY Brush Drying Rack

My brush cleansing routine is far from extraordinary. However, I still know a lot of people who spend $15-$20 on brush cleansers that don't last! For just a little more money, you can cleanse your brushes for more than a year, as opposed to a few months, and this routine will clean, condition, and disinfect your brushes.


Typically, for powder brushes, I recommend deep cleansing at least once a week. For foundation and concealer brushes, or really any brush that is used to apply liquid or cream products, I recommend deep cleansing after every use. Liquid and cream products are more likely to trap bacteria than powder products. When dirty brushes are applied to the face over and over again, they will spread dirt and bacteria, and can be a major cause of breakouts! 

To begin, I always lay out paper towels, simply as a holding place for my brushes before they are hung to dry. Then, I section out my brushes based on use. There is no particular reason for this, I just find it easier to manage that way. 

Extra virgin olive oil is the key to cleaning your brushes. Many people are scared of the word "oil." However, extra virgin olive oil has so many amazing uses, including being an amazing brush cleanser! It helps to break down even the toughest product buildup, as well as condition your brushes.


I've had this bottle for at least a year now, and still have plenty left. You can buy huge bottles of this in any grocery store, ranging in price from $3 to $20, depending on the size and quality. The bottle I have is from Costco, and has also been used for cooking. It has been very well loved.

I take just a little bit in my hand, and swirl in one brush at a time. You will instantly begin to see product coming out into the oil. I like to squeeze the bristles to try to get more product out of the brushes, but keep in mind, squeeze, don't wring. Don't twist the bristles to get the excess oil out. Squeeze, almost like you would a toothpaste tube. 

I usually repeat this with five or so brushes before moving onto the next step.


Dr. Bronner's Magic Soap is a "pure-castile" soap, which means that it is a vegetable oil-based soap. Again, here's that "oil" word. However, this soap cleans so deeply yet gently, and because of the organic oils, it doesn't strip the brush hairs of the oils they need to stay soft. No one likes prickly bristles on their face, especially around the delicate eye area! The soap I use is the Baby Mild Liquid Soap, and ranges in price from $3 to $60. My 16 oz bottle cost about $10 at my local Sprouts Market! You can use this locator on their website to find a bottle near you. Their website is fascinating, and talks all about the products and why they work. The best part is, there are absolutely no harsh detergents in this soap, making it safe for use just about anywhere. You can even use it to brush your teeth!

Anyway, enough blabbing about this product. The cool thing is that you only need a couple of drops to cover quite a few brushes. This stuff is potent. Again, just swirl your brush around in the soap, and rinse in warm water until you are no longer seeing suds.

Quick Tip: Make sure to avoid getting water above the ferrule. The ferrule is the metal piece that connects the bristles to the handle. Getting water into the ferrule can cause the wood to warp, or the glue to decay, both of which will lead to broken brushes. 

From here, I lay my brushes flat on the paper towels to soak up the excess water before moving onto my next bunch of brushes. You can always stop here, but there is still a chance of water leaking into the ferrule and ruining your brushes. To prevent this, you can always purchase a brush drying rack. Or, you can make you own with some clothespins and a hanger! 


To create your own brush drying rack, you will need clothespins, a wire flexible hanger, and a safe place to hang your brushes. You can also use chip clips, but wooden clothespins are so cheap and easy to get a hold of! I got mine in a pack of 50 at Target for $1.79. 

Assembling this drying rack is so quick and easy! First, I twisted the top of the hanger, so that the hanger would be parallel to the wall my brushes will be hanging near. I chose to hang my brushes on a towel bar in my bathroom, which sits about 3 to 4 inches away from the wall. 


Next, add the clothes pins! Face the mouth of the clothespin downward, and attach it to the hanger. You can add as many as you like, but I generally like to keep at least an inch between each brush. Then, place the brush handle into the mouth of the clothespin! You should be left with a little something like this:


Keep in mind that this may not work for brushes with thicker handles. For example, the clothespins were not big enough for my Real Techniques Expert Face Brush. If you have any larger-handled brushes, I suggest using chip clips instead. This works really well for kabuki brushes! Hanging your brushes upside down will also speed up the drying process, all thanks to gravity. 

Now, before you use your brushes, you need to make sure that they are sanitized. I like to use tea tree oil to sanitize my brushes. Tea tree oil is an essential oil that is poisonous to ingest, so do NOT eat it, and do not get it in your eyes! I can tell you from personal experience that tea tree oil in your eyes is extremely painful. However, when diluted with purified water, it has been used for many different cosmetic purposes. In fact, my beloved Cosmetic Warrior mask from Lush contains tea tree oil! I purchased mine at Target, but it can also be picked up at your local drug store. 


Tea tree oil is known for its antibacterial properties, but because it is an essential oil, it will not dry out your brush hairs like an alcohol-based antiseptic would. 

To create your tea tree oil brush disinfectant, you will need a small spray bottle. You can pick one up at just about any drug store. I suggest checking the travel section. Fill your bottle with purified water. The rule of thumb for creating this disinfectant is, know how many ounces your bottle contains! For each ounce of water, add one drop of tea tree oil. Only one drop per ounce, meaning, if you have an 8 oz bottle, only use 8 drops. 

After you have properly filled your spray bottle, close it tightly and shake. Mist the mixture onto your bristles and you're ready to use your freshly cleaned brushes! 

- d. 

Tuesday, December 10, 2013

Face and Nails of the Day -- Dramatic Cut Crease, Vampy Lips, and Nails on Fire.

Happy Monday!

Today, I had the weirdest shift at work, but because of the time that I was scheduled, I had plenty of time to play around with makeup, and today, I came up with this look:


Dramatic makeup is a great way to make any Monday a little less drab. It's always important to remember that if you are going to do a bold lip, neutrals on the eye are important. Neutral eye makeup doesn't have to be synonymous with boring, simple, or "every day." In this look, I used a shimmery taupe and a matte black to create this neutral cut crease.


The key to this look is BLENDING. I wanted to have a sharp edge on the outer corner, to create a cat eye effect, but I also wanted to offset it with a beautiful smokey effect as the shadow neared the brow bone.

For this look, I used my trusty Coastal Scents 252 Ultimate Palette, the Rimmel London Scandaleyes Waterproof Kohl Kajal in "Nude", and my favorite translucent powder, Revlon Photo Ready Translucent Finisher.


Using a flat shader brush, I applied the shimmery taupe color all over the lid, careful not to go into the crease. Then, I used a MAC 217 brush to apply my translucent powder in the crease, up to the brow bone. This will help the black color blend a little easier. I then took a small pencil brush and carefully applied the matte black color to the outer corner, as well as through the crease. I created a V shape with this color, on the outer corners of my eyes. That is what creates the cat eye effect. Then, taking my MAC 217 again, I began blending away. 

Quick Tip: Use your face powder on a fluffy blending brush to help blend any harsh lines. Your face powder on a stiffer brush will also act as a bit of an eraser. 

After I finished blending my crease color, I felt that the taupe color was losing vibrancy, so I again took a flat shader brush and reapplied the color to my lid. From here, I used my Milani Liquid Eye Eye Pencil in "01 - Black" and smudged this along my upper lash line, being careful to get in between all the lashes. The great thing about this liner is that you have plenty of time to smudge it out, but once it sets, it has great staying power. I also used this to create a small wing on my outer corner, then blended it into the V shape using a pencil brush. 

If your outer corner V isn't sharp enough, take a makeup wipe and clean up the line!

After I decided I was happy with how it looked,  I used my Rimmel London Scandaleyes Waterproof Kohl Kajal in "Nude" to highlight under the brow bone and in my inner corner. I blended this pencil and then set it with my translucent powder. Then, I topped off my lashes with a few coats of my favorite Maybelline The Mega Plush Volum' Express Mascara.

After this, I moved onto the lips. 


I took an angled brush and applied the tiniest amount of the OCC Lip Tar in "NSFW" all over my lips. Then, I wiped off my brush, and took a dark, warm-toned purple and applied this to the corners of my mouth. This added an ombre effect to the lips that add an extra vampy punch. Don't be afraid to be heavy handed with the purple. After I had the corners to my liking, I applied a light coat of the Maybelline Color Sensational Color Elixir in "Signature Scarlet" to help blend together any harsh lines created between the lip tar and the purple shadow. 

When I finished with the lips, I went back in and applied my foundation and brows. The same routine as usual:  Too Faced Primed and Poreless face primer, L'Oreal True Match Foundation in the shade C2,  Inglot 358 Matteand my Ardell Brow Sculpting Gel. I also went in under the eyes with the Rimmel London Wake Me Up Concealer in Very Fair, and used a flat concealer brush to help define the cat eye shape even more. Then I topped it all off with my Revlon Photo Ready Translucent Finisher

I used my Inglot 358 Matte shadow as my contour shade, which I ran in the hollows of my cheeks, around the jawline, and on the sides of my nose. Then I used my Morphe 10 Color Blush Palette to create a subtle flush to the cheeks. 


In the pan, this color looks very brown. However, when applied, it creates a beautiful, natural glow.

And, as always, I finished everything off with my Mac Fix+!

Now, onto the nails! 


I've been super into The Hunger Games recently, hence the title "Nails on Fire." But I found this polish at Walmart last night and am completely in love. I only wish the photos could do it justice. It's the Rimmel London Lasting Finish Pro Nail Lacquer in the color "Lava Red." It's just this amazing, almost holographic oxblood shade and I am so, so in love. In certain lights, it appears almost brown, and in others, very purple. But in direct light, it is so beautiful and almost indescribable. I wish I knew how to better describe this polish, because it is to die for. And for a little over $3? A total steal. 

- d.