


Starting with the hair, victory rolls are actually a lot easier than you may think. All you really need are lots of bobby pins, some hairspray, and a comb!
First, I take the section of hair that I want to style into the victory roll. For me, I usually just take a rat tail comb and go from right about the ear and toward my part, and make the roll out of that section. Most of the time, especially if you have bangs, you can't go wrong doing that! Then, I hairspray the entire section to give it some hold, especially because my hair is pretty slippery most of the time, and separate the section into two horizontal sections (think of "horizontal" as "from one ear to the other"). I clip the front section out in order to keep it from getting mixed up with anything else, and then backcomb (or tease) the back section in order to give the bobby pins and the front section a proper base to hold onto.
I'm not very good at explaining exactly how to do this, so here's a diagram that will hopefully help.

After you've teased that section, all you have to do is take the front section and slide it over the section behind it. I usually like to wrap the hair around my finger and then loosen my grip to create the perfect rolls,
but honestly, the key to this look is practice and bobby pins. I only really place bobby pins in the roll itself, and sometimes in the back if they need a little extra security.
Another thing that might make this easier is to take a 1" curling iron and curling the hair upward and away from the face. That will give the roll a direction and a mold to go into, as opposed to just falling right back down. After I've secured all the bobby pins, I always spray in my hairspray and then smooth over it all with a comb. If the back of your roll looks a little messy, you can always add some kind of hair piece for some added flair, and no one will ever know that it is messy!

The makeup for this look is very simple but always classic! I won't be explaining how I did the winged liner, because I already did a tutorial for that here.

Starting with the face, I used my trusty L'Oreal True Match Foundation with my Beauty Blender to give my skin a flawless finish. My skin has been acting up a bit lately, so I took my Rimmel Wake Me Up Concealer over any of my blemishes as well as on my lids, and my Maybelline Dream Lumi Touch Concealer to highlight under my eyes. I then took my Anastasia DipBrow Pomade and filled in my brows, making sure to keep them super defined to really get that pin-up look. Then of course, I used my Anastasia Clear Brow Gel to set the brows into place.

For my eyes, I first took my Makeup Geek shadow in "Beaches and Cream" and put this all over the lid and up to the brow bone. I find that this shade is perfect as a starting point to make sure everything blends nicely. Then, I took "Unexpected" and ran this in the crease, making sure to keep it defined yet blended. I really wish I had this shade for when I did my Karlie Kloss look, because it would have been perfect in the crease! Then, I took "Shimma Shimma" and used that on the browbone, making sure to blend it out so it wouldn't be harsh, as well as in the inner corner.
After finishing the eyeshadow, I took the Milani Liquid Eye Twist Up Pencil in "Blue" and created a pretty substantial winged liner. It wasn't over the top, but I made sure it was thick enough to be noticeable. While this set, I ran my Rimmel Scandaleyes Kohl Kajal in "Nude" in my waterline to really open up my eyes. After that, I curled my lashes and used my Maybelline Volum' Express Mega Plush Mascara, focusing especially on the outer corner to really help give that cat eye effect. I also did a very light coat of this on my bottom lashes, just to help define them a bit more.

After setting my face with my Revlon Photo Ready Translucent Powder, I took the middle contour shade from the Anastasia Contour Kit and contoured my face. I did a whole post about how I contour here, and let me tell you, this palette makes contouring so easy! After that, I used my Morphe Blush Palette and the upper mauve shade to give my cheeks a very subtle color.
Finally, on the lips, I just took my OCC Lip Tar in "NSFW" on a lip brush and carefully filled in my lips with this perfect pin-up red.


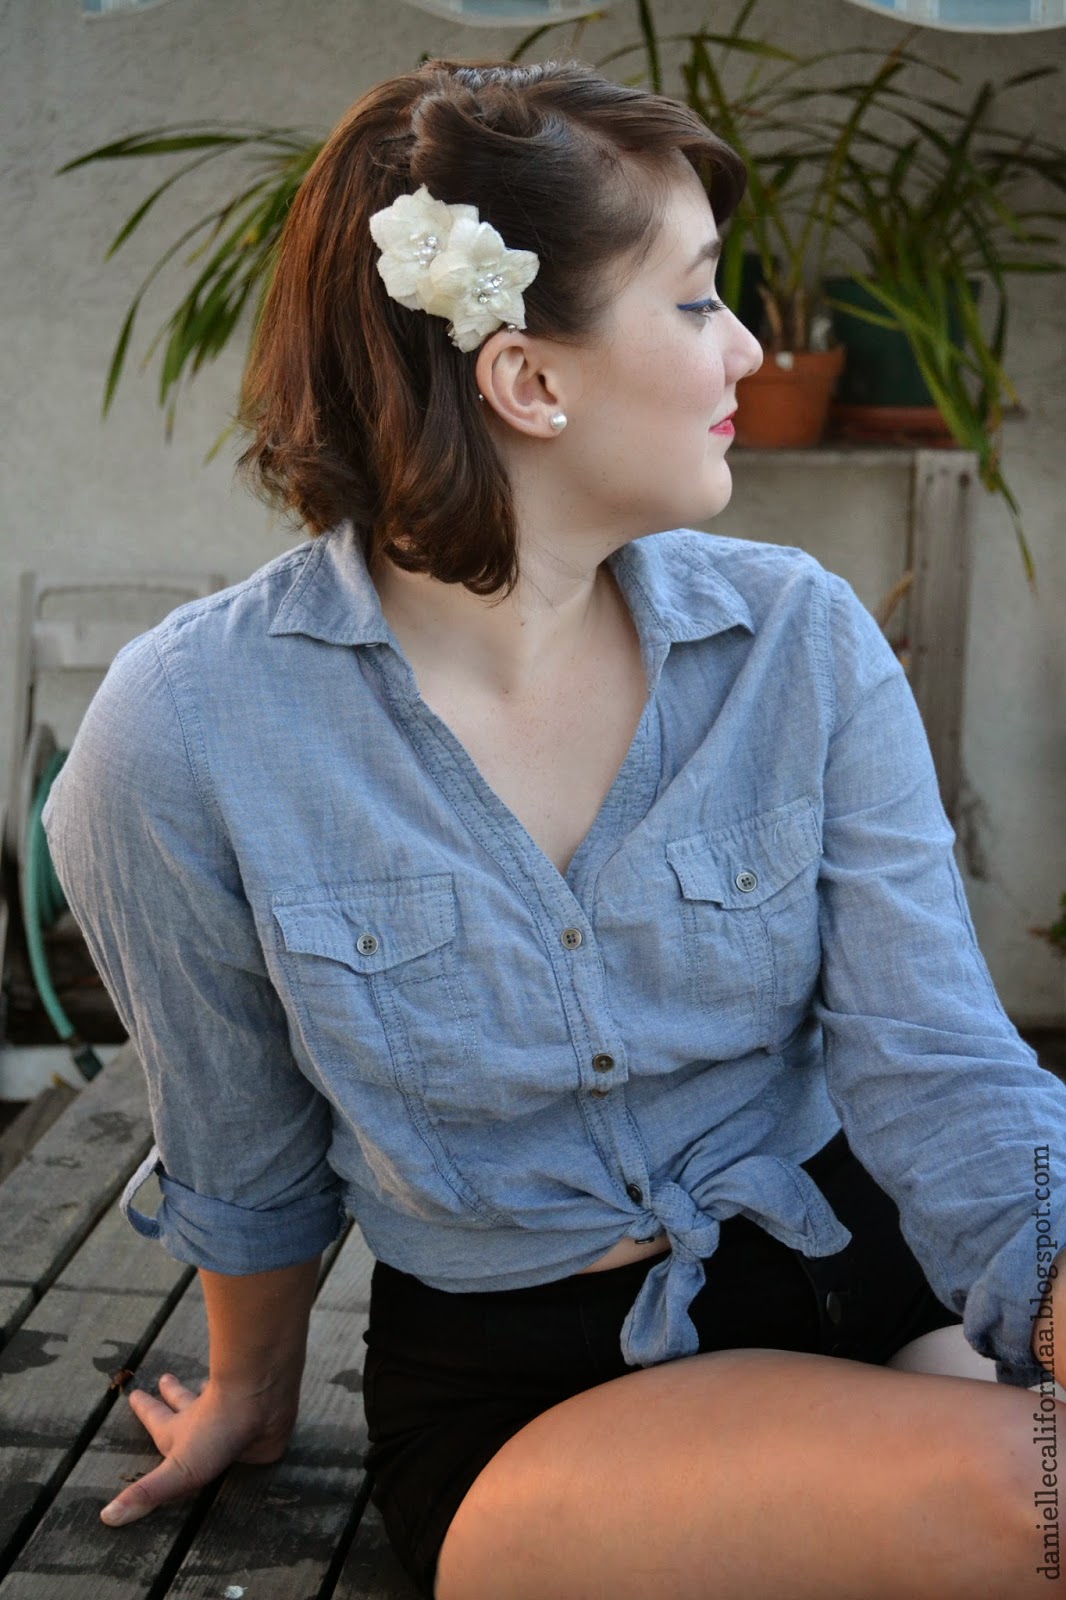
Of course, you can't have a fun summery pin-up look without cute high-waisted shorts! These shorts are very basic high-waisted black shorts that stretch to fit my every curve and I love them! They no longer sell these exact shorts, but they do have a very similar pair at Forever21. For my shirt, I bought this chambray shirt a few years back and I still absolutely love it! I tied it up around my waist and rolled up the sleeves. Chambray is super popular right now, so you can get it pretty much anywhere, but I know I got this specific one from Target. Of course, I had to throw on my classic red Keds, which when great with my red lips! For my jewelry, I just wore simple pearl stud earrings. I got my white flower hairpieces from Charming Charlie a few years ago, and they also have little pearl accents!
And that's it for this super long post! I hope that you all have a wonderful 4th of July (even if you aren't from the US)!
- D.
Wooooooow, I love this. I'm worse at hair than I am at makeup, and my hair is so long that I don't know if I'd be able to pull it off anyway, but my best friend is pretty handy with a curler, so I might see what she can make of it. You look gorgeous, this is awesome!
ReplyDelete