menu

Thursday, April 2, 2015

Life Update: Where Have I Been?

So it's been two weeks since I've last posted, and I can't apologize enough. It feels like I've been away for so much longer than that!

Anyway, as you guys probably already know, I've been going to art school for theatrical costume design & technology since August, and recently, everything has just begun snowballing and getting super crazy! I have about one month of my first year left to go, and suddenly, everything has gone into overdrive. I've had a million and one projects due all at the same time (many of which you can see if you follow me on Instagram), and I was selected to be on the wardrobe team for the biggest production of the year -- our featured production of Guys and Dolls!


The cast for this production is between 40 and 50 people, and I wish I could post a video or something, because our cast is absolutely phenomenal. Seriously, we have some Broadway level talent here at my school. And while we only have 40 to 50 cast members to juggle, each cast member has an average of 3 different costume looks that they wear. Meaning we have approximately 150 costume looks in the entire show. You can only imagine just how crazy that is.


These are JUST the men's hats and shoes! Not to mention all the shoes that didn't fit on the table and had to be stored underneath!

Because of all the craziness of this show, on top of all the projects I've had due, I haven't had much time to blog. Heck, I barely have enough time to eat, sleep, or shower these days! I have a few posts planned though, and as soon as life calms down a bit, I'll be back up to posting weekly as usual. I really appreciate you guys for being so understanding!

- D. 

Wednesday, March 18, 2015

Winter Favorites

Happy spring! After doing monthly favorites for the last year, I decided that seasonal favorites would be a lot easier for me and a lot more interesting for you guys, especially since I'm in school and don't find myself wearing makeup all that often! This winter has been kind of hectic for me, because it's the first time I've ever had to deal with such cold weather and snow for an extended period of time. Last year, I went to Chicago, but that was only for a few days. I've been here in North Carolina all winter! My skin has been parched, my hair has been frizzy, and I can never seem to put enough layers on. Most of my favorites this month have been focused on combating all that!


Nivea Vanilla & Macadamia Kiss Lip Butter. After picking up the Kiss of Milk & Honey lip balm for Andrew back while I was on winter break, I decided to give this stuff a chance. Now, I apply it ever single morning and night, and I absolutely love it! In fact, since it's a few dollars cheaper than my all-time favorite Jack Black Lip Balm, I might find myself purchasing this more often. It has kept my lips super hydrated this winter -- well, as hydrated as they can be when I have to walk to school in below freezing weather. I never expected such amazing results from such an inexpensive lip balm, but now I'm hooked! Oh yeah, and it smells amazing.


Macadamia Deep Repair Masque. I talked about this mask back in my Winter Pamper Essentials post, but it's seriously become such a staple in my weekly hair care routine. I use this mask once a week, and that's all I need for some intense hydration! This mask makes my hair feel like I had never colored it in the first place, and that says a LOT, considering how many times I've bleached and dyed and bleached and dyed it. It's also been such a huge help with my current journey of attempting to grow my hair out back to my natural color, since I have a lot less breakage now!


Wet n Wild Color Icon "Comfort Zone" Collection Palette. As you may be able to tell with my use of this palette in two recent tutorials, I really enjoy this palette. My good friend Ciarlene gave it to me back when I was home as a Christmas present, and I can't stop using it! I used it when I went to a post-Christmas Christmas party (for which I took pictures for but never typed up a post about) and I got so many compliments on my eye makeup. For those of you looking for an amazing drugstore neutrals palette -- this is totally the one for you!


Real Techniques Bold Metals 301 Flat Contour Brush. If you read my review on this brush, you'll already know I'm obsessed with it. It feels so luxurious and soft and makes contouring a breeze! If you have the chance and the money, go out to Ulta and buy this brush, I promise you won't regret it. The short, dense bristles make applying and blending out contour shades super easy and quick, and since getting it, I have pretty much looked for every possible excuse to use this brush!


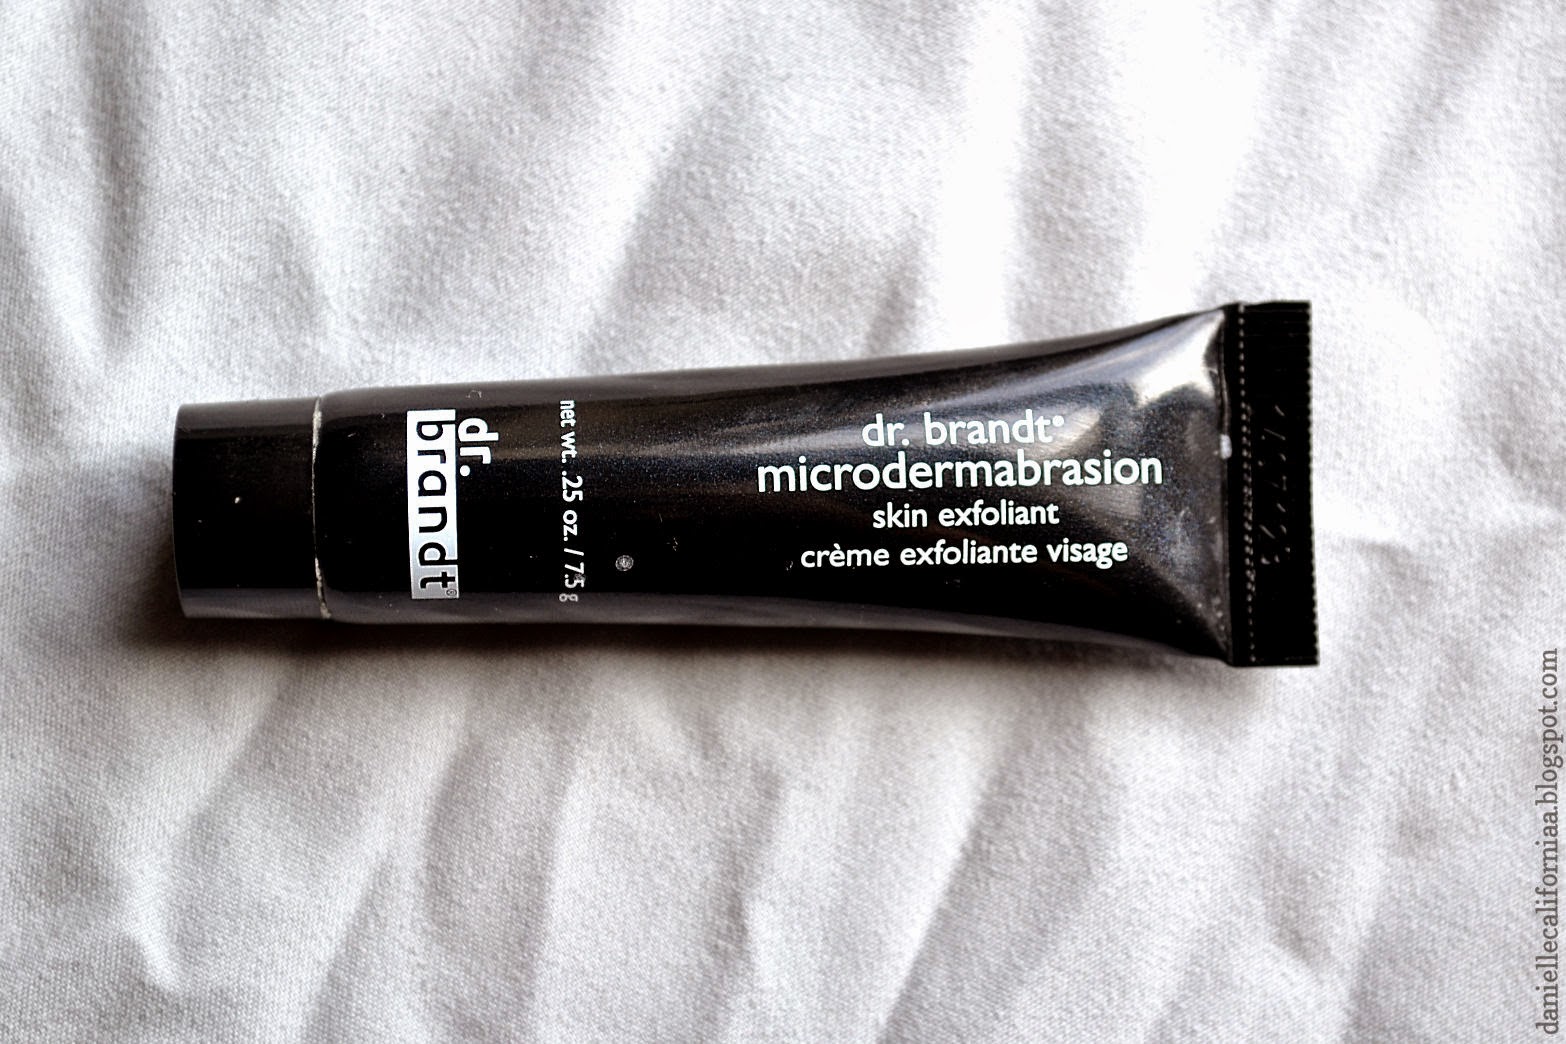
Dr. Brandt Microdermabrasion Skin Exfoliant. I REALLY hesitated about putting this in my winter favorites because it is SO expensive. $78 for the full size of thing. I personally did not buy it, it came in a huge deluxe sample bag that my best friend gave me for Christmas, and the sample I have is about an eighth of what you get if you purchase the full size. However, this microdermabrasion exfoliant is really, really good. It is so finely textured, but it really gets the top layer of your skin off without being overly aggressive, and my skin always feels so incredibly soft after using it! You really don't need very much, so this tiny bottle seems to be lasting me quite well! Do I have $78 to be spending on a full bottle of this exfoliant? Heck no. Would I spend the $78 if my budget allowed me to? Yeah, probably. It's that good.


Milani Bella Eyes Gel Powder Eyeshadow -- Bella White. For a pale girl like me, I can never quite find the right matte highlight for right under the brows. Turns out, I need a white eyeshadow to do the trick! I've been using this in quite a few of my recent tutorials, and I have been absolutely loving using this shadow as a highlight! When applied with a fluffy brush, it gives just a subtle highlight to the brow bone without being so obvious that I used just a straight up matte white. Then again, I'm crazy pale, and definitely need such a light color to really get the job done.


Maybelline Fit Me Concealer. I know this concealer has gotten a lot of hype in the makeup community recently, being noted as a pretty dead on dupe for the NARS Radiant Creamy Concealer. I bought it while on the hunt for a replacement for my Rimmel Wake Me Up Concealer (which I no longer need, thanks to Andrew). It's a total gem. It's just the right amount of coverage for the majority of my spots, especially considering I don't wear much makeup on a day-to-day basis, and because it's definitely a creamier concealer, it isn't super drying. My blemishes tend to get kind of dry and flaky, and this concealer does a great job of hiding them without making the texture even worse!


Yes To Cucumbers Soothing Daily Calming Moisturizer. After running out of my long time favorite moisturizer by First Aid Beauty, I finally decided to go back on the hunt for a new moisturizer. I wanted something more affordable, since the one by FAB was $24, so I hit up my local drugstore and found this! It comes in very similar packaging to the moisturizer I loved before, but it is a bit thicker and really hydrates my dry skin! The best part is, it's totally comparable to the FAB moisturizer, for about $10 less!

That's it for this season's favorites! I'm so excited for spring, I'm absolutely dying for it to warm up. Hurry up, spring, I'm waiting for you!

- D.

Wednesday, March 11, 2015

Bohemian Queen Using Only Drugstore Products!

A few weeks back, my friend Alana (who did a guest blogger post about a year ago) requested I do a look inspired by the lovely Stevie Nicks. It's so funny to me when I do looks like this, because I feel like other people look absolutely lovely with this kind of makeup, but it's not something I normally gravitate towards! However, I think the soft and smokey style of Stevie Nicks is timeless, and can easily be worn during the day, or smoked up even more for a fun night look! For this tutorial, I chose to stick with only drugstore products, aside from my brows, so everything I used is super affordable and easy to get a hold of!

My look was inspired by this video, but I also screencapped a couple shots for reference!


Oh the 80s...How I could never pull of that hair.


To start out this look, I used my Rimmel Scandaleyes Shadow Stick in "Bulletproof Beige" as a base all over my lid, stopping at the crease, and using my fingers to blend the product out. Then, I took my Wet n Wild Color Icon Eyeshadow Collection in "Comfort Zone" and used the left browbone shade all over my lid, covering up the "Bulletproof Beige" pencil. Then, I took the left eyelid color and patted this on the outer third of my lid, as well as taking it through the crease to warm up the eyes a bit more. Then, I took the left crease shade, and buffed that into the outer V, to really help smoke out the look a bit more. To help define the crease a little more, I used the Milani Eyeshadow in "Bella Caffe" and really blended this through the crease on top of that bronzey pink shade. For my brow bone highlight, I decided to stay matte, since all of the lid shades are generally shimmery, and i used the Milani Eyeshadow in "Bella White," as well as using that in my inner corner for a pop of white.

For the smokey liner, I used the left definer shade on an angled brush and smudged that along the outer parts of the upper and lower lash line, stopping about halfway in. Then, I took a small pencil brush and smudged out that definer shade, to really help smoke the look out. If you wanted to wear this on a night out, I would definitely recommend using this shade in the outer corner to help deepen it up, but for the sake of this tutorial, I only used it as a smudgy liner. On my waterline, I used my Rimmel Scandaleyes Kohl Kajal in "Nude," and then finished off the eyes with a few soft layers of the Maybelline The Mega Plush Mascara.


Since I didn't want to contour for this look, I used a concealer to highlight the high points of my face -- almost like a backwards contour. The concealer I used was the Maybelline Fit Me Concealer, and I used this under my eyes, on the high points of my cheekbones, down the bridge of my nose, and on my cupid's bow. For blush, I used the Milani Baked Blush in "Luminoso," and, in a very 80s fashion, used this almost like a contour, and placed it in the hollows of my cheeks, blending upward. It helps to add just a subtle warmth to the cheeks without becoming overpowering!


For my lips, I used my Maybelline Color Senstational Lip Liner in "Rose," lining my lips and filling them in. To imitate Stevie's naturally pouty lower lip, I very slightly over lined my lower lip, drawing just outside of my natural lip line. To add a gentle shine, I used my Burt's Bees Lip Shine in "Blush."


I hope you enjoyed this look! I'm sure it's definitely a bit different than what you normally see on my blog, but I think it's definitely fun to try to branch out and play a bit more with makeup!

- D.